|
|
|
This page is designed to help a homeowner with some simple issues that can arise in his/her DIY ductwork installation project.
Here is a list of the paid pages, which you can buy for the very low and I hope affordable price of only $1.00:
- How to Measure, Cut and Put Together Rectangular Duct
- How to Measure and Cut Pipe
- How to Put Pipe Together
- How to Crimp Pipe
- How to Repair Hole in Ductwork
- How to Install Galvanized Sheeting (Panning)
- How to Make Ductwork End Cap
- How to do Duct Elbow Adjustment?
- How to Make a Pittsburgh Lock Seam with Hand Tools
- Cross Break Ductwork and Blockers with Hand Tools
- How to Make Transition from Your New Furnace to Old Plenum with Hand Tools
- How to Make from Round to Square and Rectangular Transitions
- How to Layout and Make a Sheet Metal Cone
Instant Access: After you have purchased a paid page; PayPal is going to bring you back to my website. In order to see the paid page you have to click on the “Register” button, fill out the form, choose your own Username and Password and click on the “Register” button at the bottom of the form – congratulation, you are now on the page you have paid for!
Important: After you have purchased any Paid page or Download page and PayPal brought you back to my website, the first thing that you should do is to save that page to your Favorites. Then if something goes wrong you always can come back to re-register yourself on my website again.
If you have another $1.00 question type it on this page and if you qualify, you can get an answer free of charge!
Write and Earn - If you are the owner of an HVAC company this new offer is for you!
How to Measure, Cut and Put Together Rectangular Duct
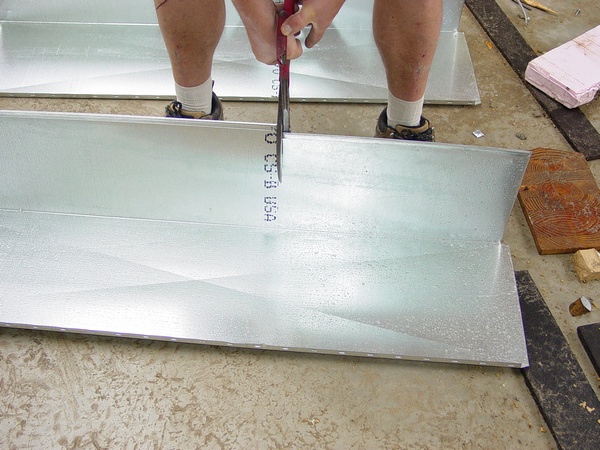 On the page you can find a step-by-step guide to how to measure, cut and put together a rectangular duct if you are doing it on the floor or using sawhorses that is supported by nine pictures for only $1.00. On the page you can find a step-by-step guide to how to measure, cut and put together a rectangular duct if you are doing it on the floor or using sawhorses that is supported by nine pictures for only $1.00.
|
|
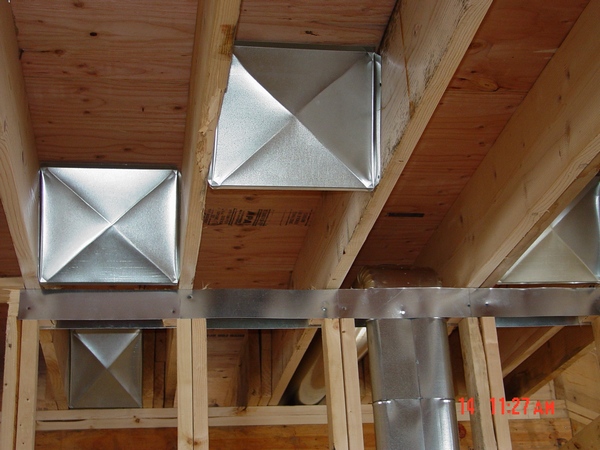
How to Install Galvanized Sheeting (Panning)
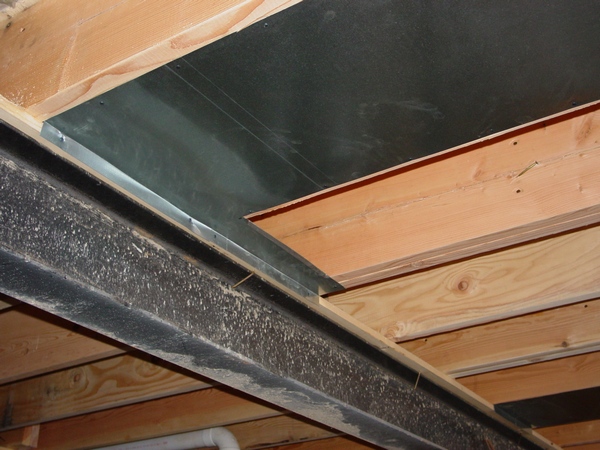
On the page you can find a step-by-step guide for only $1.00.
|
|
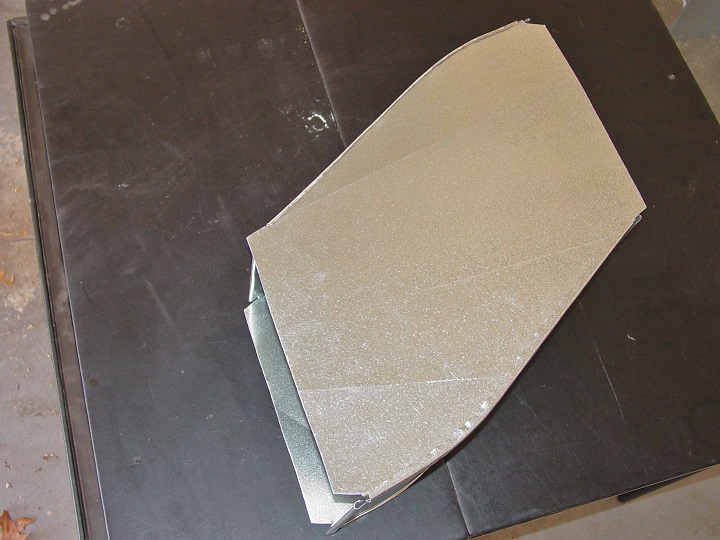
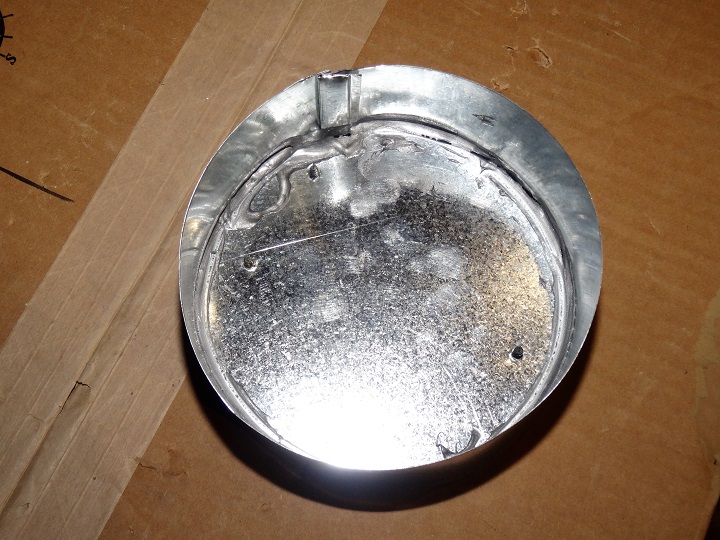
How to Make Ductwork End Cap
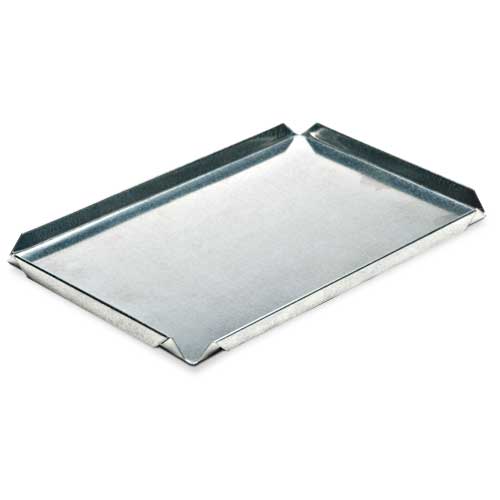
On the page you can find a step-by-step guide for only $1.00
|
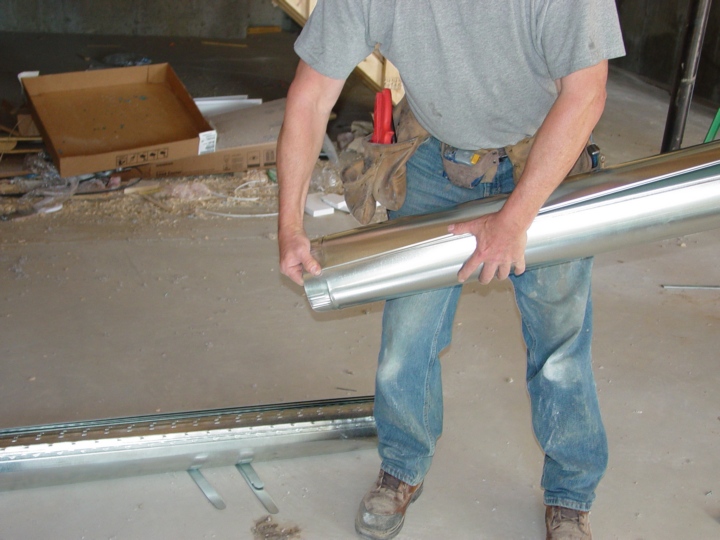
How to Measure and Cut Pipe
 On the page you can find step-by-step explanations on how to measure, cut and how to cut a pipe straight with six pictures for only $1.00. On the page you can find step-by-step explanations on how to measure, cut and how to cut a pipe straight with six pictures for only $1.00. |
|
How to Put Pipe Together
 On the page you can find a step-by-step guide that is supported by 14 pictures for only $1.00. On the page you can find a step-by-step guide that is supported by 14 pictures for only $1.00.
On 06/01/2013– Two more ways of putting a pipe together were added; explanations updated.
|
|
How to Crimp Pipe
 On the page you can find step-by-step explanations on how to use a crimper and long nose pliers to crimp a pipe with 4 pictures for only $1.00. On the page you can find step-by-step explanations on how to use a crimper and long nose pliers to crimp a pipe with 4 pictures for only $1.00.
|
|
How to Repair Hole in Ductwork
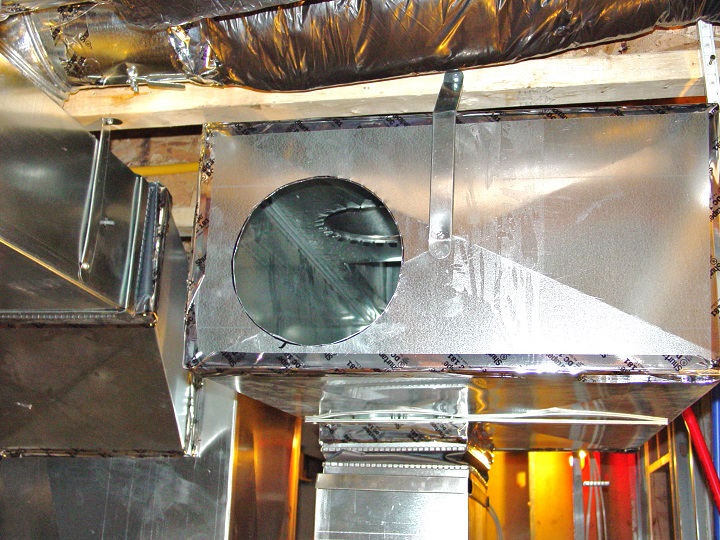 There are many occasions when it is necessary to repair a hole in the sheet metal ductwork or plenum. If you decided to move a register, get rid of old leaking humidifier or relocate a heat run then the hole in the ductwork must be patched... There are many occasions when it is necessary to repair a hole in the sheet metal ductwork or plenum. If you decided to move a register, get rid of old leaking humidifier or relocate a heat run then the hole in the ductwork must be patched...
Price is only $1.00
|
|
How to do Duct Elbow Adjustment
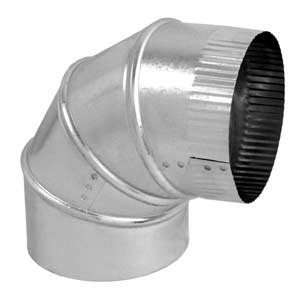 On the page you can learn how to adjust an elbow the right way for only $1.00. On the page you can learn how to adjust an elbow the right way for only $1.00.
|
|
Dollar Guide Bundle
In order to improve accessibility and reduce the price I've decided to combine all the eight paid pages above in one "Dollar Guide Bundle"! That means that from now on you are able to pay a new low price of only $3.50 (reg. $8.00) and get an instant access to all these pages one by one!
|
|
How to Make a Pittsburgh Lock Seam with Hand Tools
 If you are making a transition for a new furnace, or adding just a couple of feet of rectangular duct you may need to learn this simple technique for only $1.00! If you are making a transition for a new furnace, or adding just a couple of feet of rectangular duct you may need to learn this simple technique for only $1.00!
|
|
Cross Break Ductwork and Blockers
If you are making a transition for a new furnace or any other short piece of duct you may need to learn this simple technique! Price is only $1.00.
|
|
How to Make Transition from Your New Furnace to Old Plenum with Hand Tools
 If you are making a transition for a new furnace you may need to learn this simple technique! If you are making a transition for a new furnace you may need to learn this simple technique!
There are 20 pictures on the page. Price $1.00
|
|
How to Make Transitions from Your New Furnace to Old Plenum and from Cold Air Boot with Hand Tools
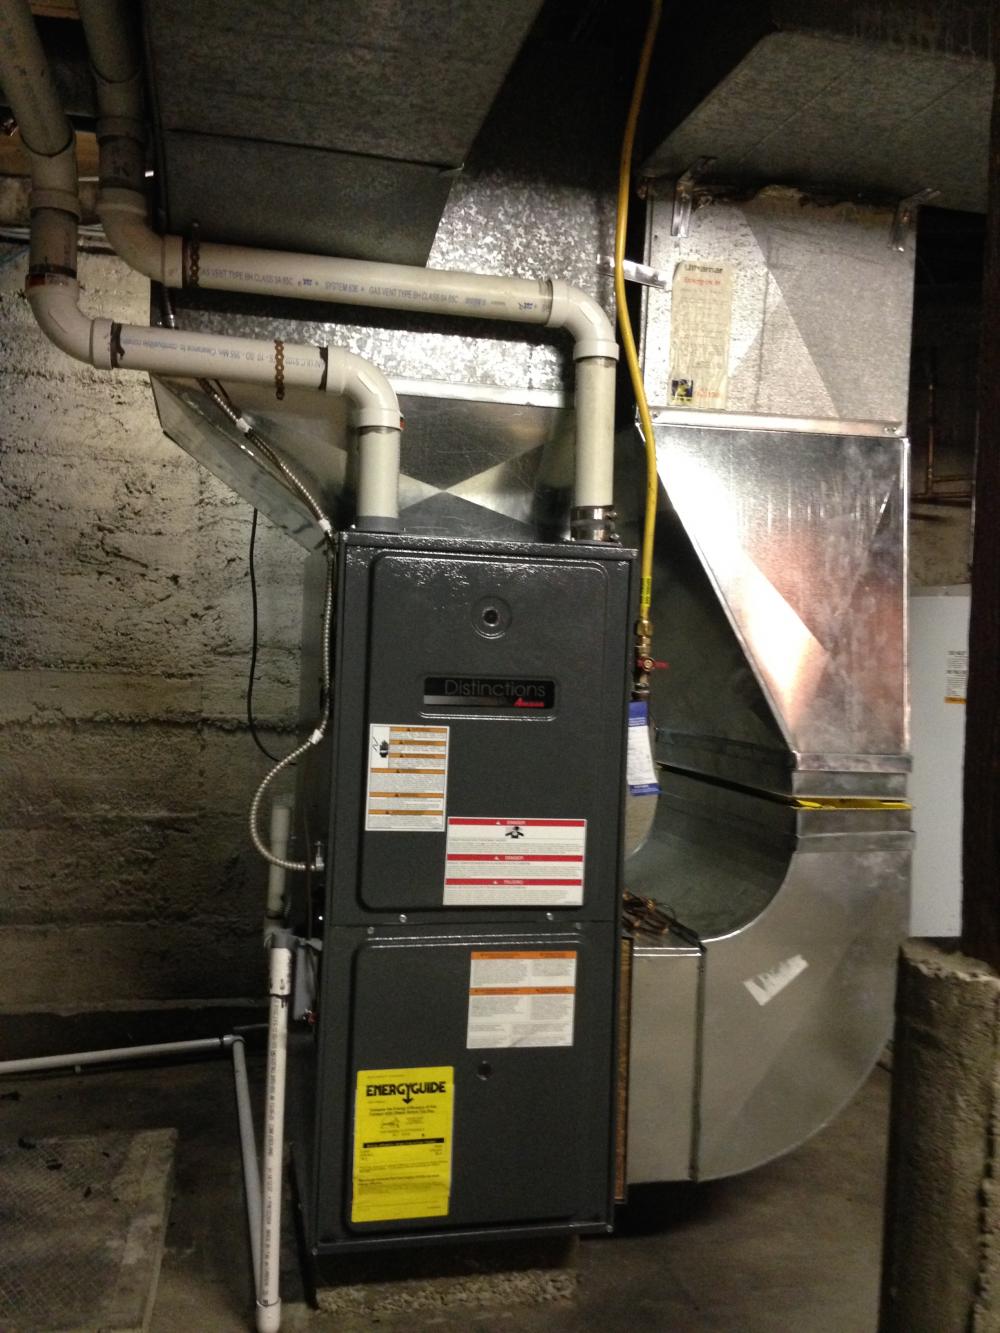
In the example above I took a hypothetical furnace and plenum and made a transition.
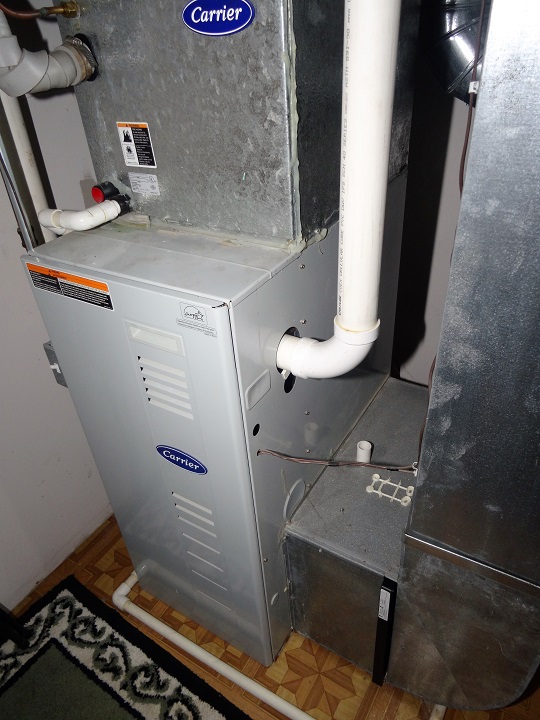
In the picture on the left you can see a real furnace, plenum and cold air drop. A transition between a furnace and plenum you can purchase below. However you can orderany other transition that represents your installation and I’ll make outlines for all its parts for you. How would you do that?
Let’s say your old furnace is 46” tall and the plenum is 30” x 25”. Your new furnace most likely will be 34” tall and its flange would be good for a 16” x 20” or 20” x 20” plenum. So, in order to make a transition for you I need to know all these numbers plus if you’re able to line up your new furnace with the plenum’s side on the right. If not, I need to know how much you’re planning to move your furnace one way of the other.
Also I need to know how you are planning to set your furnace in another dimension. In the example above you can set it in the middle (25”) or line up with one side.
The price for making your transition will be only $10.00 and after you pay, I'll make a tutorial for you and you’ll be able to gain an access to the paid page where I’ll set the pictures in step-by-step sequence with brief explanations or I may email them to you.
How to Make 20 x 20 to 30 x 25, One Inch Offset Transition with Hand Tools
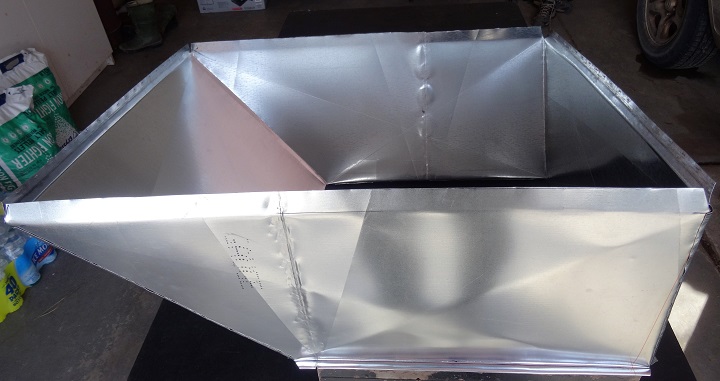
You can buy a tutorial for the transition presented on the picture above. For the price of only $3.00 you can gain an instant access to it.
|
|
How to Make 24 x 10 to 10 x 24 Duct Transition with Hand Tools
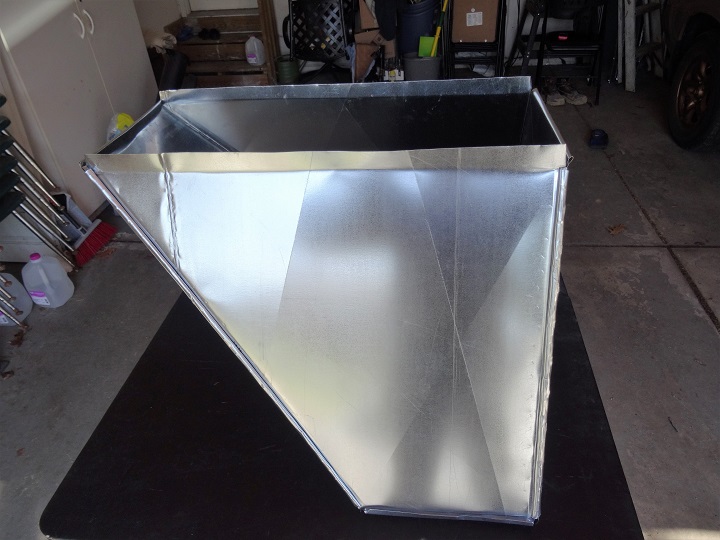
You can buy a tutorial for the transition presented on the picture above. For the price of only $3.00 you can gain an instant access to it.
|
|
How to Make Plenum Extension between Furnace & A/C Coil
My furnace is almost 20 years old. I don’t know how much time it will last longer, but I already bought a new one. Once the old one dies I’m going to install a new one. For the last 5 years I never replaced an old furnace, but I think that some newer models came to its limit and sooner or later they should be replaced. The difference between these two furnaces is only in it height. The new one is 7” shorter. This is why I don’t need any transition between a new furnace and A/C coil, but only 7” extension.
On this page for the price of only $1.00 you can find three types of such extensions.
|
|
How to Make from Round to Square Transition
 Learn how to make round to square and to rectangular transition by using hand tools only. 27 pictures. Price $1.00 Learn how to make round to square and to rectangular transition by using hand tools only. 27 pictures. Price $1.00 |
|
How to Make a Cone Reducer
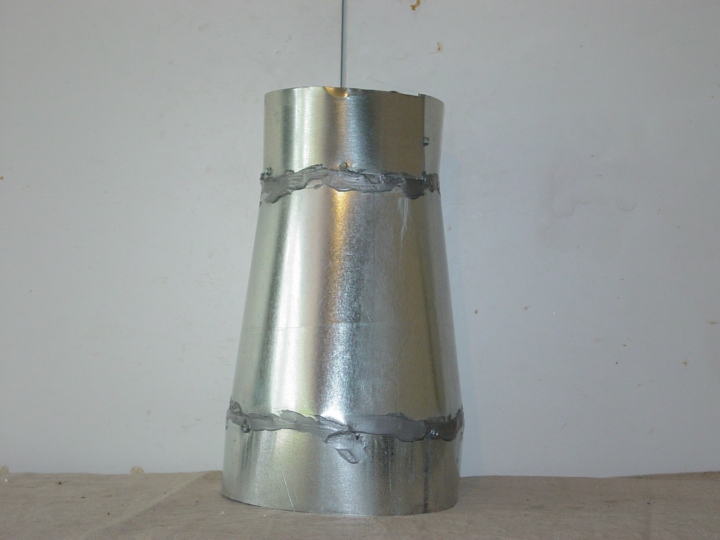 For $1.00 only learn how to make any cone (round to round) reducer the way a sheet metal guy would do it. For $1.00 only learn how to make any cone (round to round) reducer the way a sheet metal guy would do it.
|
|
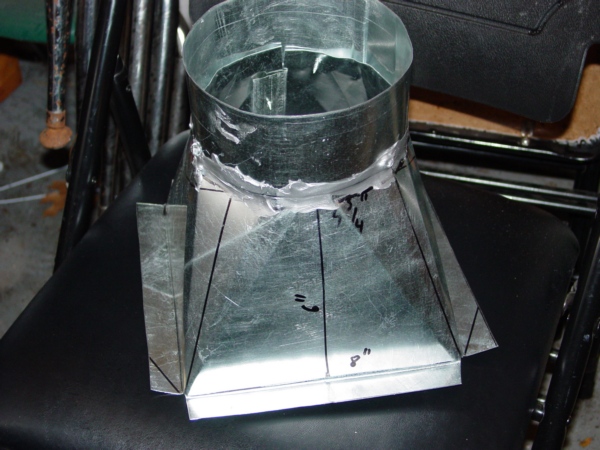
How to Make Square to Round Offset Transition
Do you want to know how to make a square to round offset transition just like a sheet metal guy
would do? 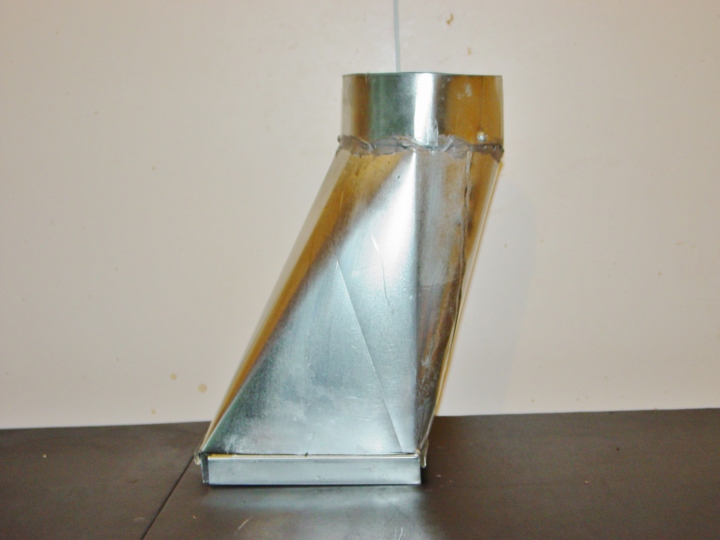
Do you want to know how to make it in a matter of minutes?
Do you like this 8”x 8” square to 6” round 4” offset transition that you can see on the left and would like to know how to make any other one?
If your answers to all these questions are "yes", then please click on the Buy Now button below and for the low price of $1.00 only purchase an instant access to the page where you can find 16 high quality photos with step-by-step instructions!
|
|
How to Make Crawl Space Toolbox on Wheels
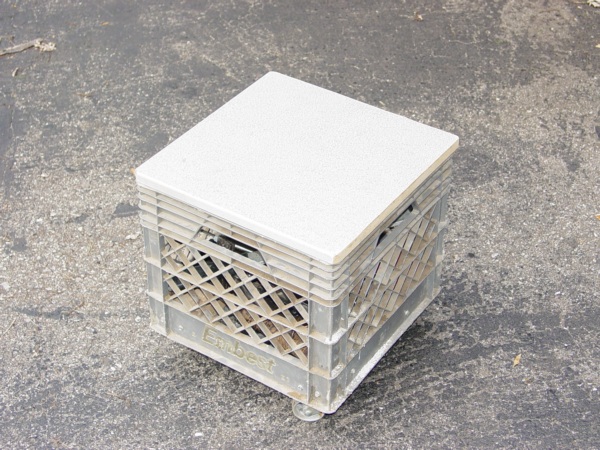
Learn how to make a toolbox on wheels in no time and surprise your entire crew of the ductwork installers just like I did it recently! Price is only $1.00.
|
|
45* Roof Penetration
 Recently, and I'm not kidding, I've received this question below: Recently, and I'm not kidding, I've received this question below:
"how big of whole needed fo 10 inch pipe through 45 degree angle" - well of course it wasn't a direct question, but it was a "keyword" someone was using to find my site on the web.
In my more than 30 years in the ductwork installation business I've never tried to find an answer to this question, so I looked on the web...
And guess what it is there!
On the forum website - http://forums.jlconline.com this type of the question was asked long time ego:
"Math gurus.... not a framing question
I am about to install a woodstove. The flue goes straight up thru a cathedral ceiling that is 12:12. The pipe that penetrates the ceiling is approx. 8" diameter. Selkirk (Metalbestos) sells a woefully inadequate one-size-fits-all two-piece trim kit that does not provide a tight fit... how could it, when it supposedly "fits" anywhere from 6:12 to 12:12?
Anyway, my question is about laying out the correct cutout given the OD of the pipe and the 45 degree angle of the lid. If I can make the layout on paper I can get my friendly local tin man to make a decent looking piece of out heavy galvanized sheet.
An alternative is to send it to the friendly non-local tin men who have a CNC cutout machine, it would take them just a few seconds.
But I'd rather do it. How do-able is this?"
So, if you'd find this thread on that website you'd actually learn how this question was answered, but here is another question - would you understand the answers? I'm sorry but even with my master degree in the mechanical engineering I didn't. Furthermore, would an ordinary tin knocker with pretty much forgotten high school diploma ever understand it - sorry guys, but I do not think so!
So I decided to think about it for a moment and find a solution any ordinary tin knocker would understand - no math, no bull... and here we go:...
If you would like to read more please click on the Buy Now button below.
|
|
How to Make Radius Elbow with Hand Tools
 If you would search the web for the tutorial in the title above you may find this video file: If you would search the web for the tutorial in the title above you may find this video file:
https://www.youtube.com/watch?v=kzLQotVEsKQ
This is a relatively good video, with only a couple of flows: the second part of this video doesn't exist and it's not clear what type of audience the author is targeting.
If you are working as a sheet metal worker at any shop in the USA the experienced guys would teach you how to make all the parts, run the Pittsburg seam through the machine and put all the parts together in a heart beat! But if you are somebody else this video is pretty much useless because you most likely don't have a Lock Former Machine...
So, in my tutorial for the price of only $1.00 you will learn how to make all four parts of the radius elbow; how to make the Pittsburg seam and how to put this elbow together. This guide also includes the video that is mentioned above that you can visualize at least part of the process and 37 high quality pictures.
|
|
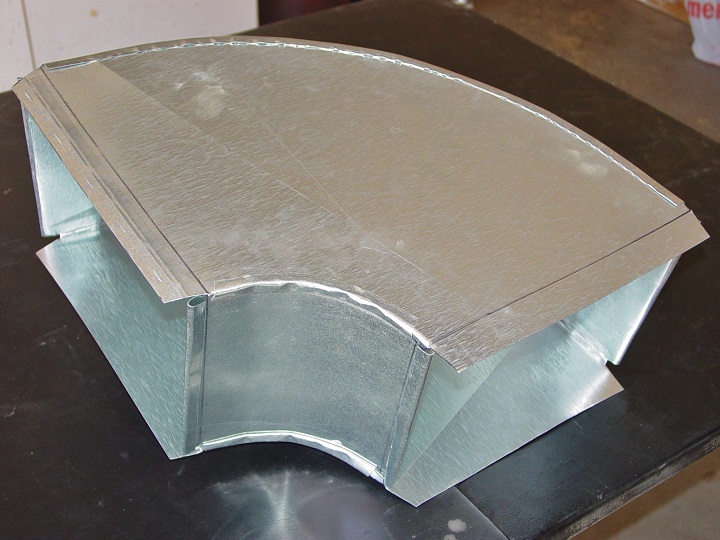
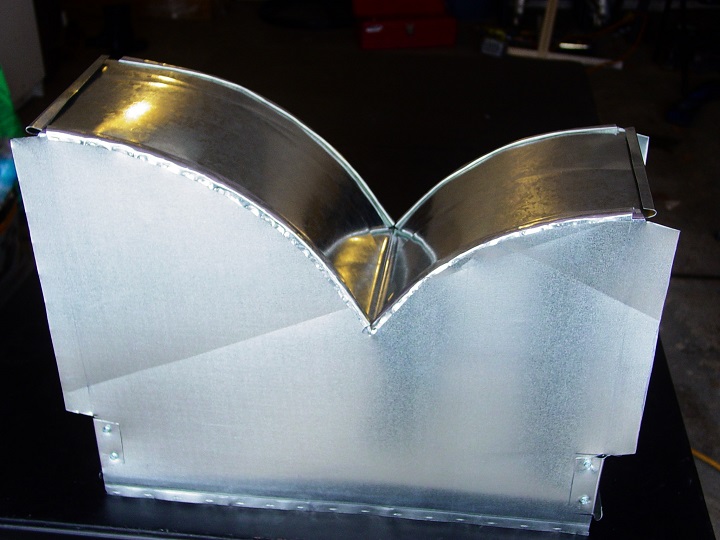
How to Make Radius Offset with Hand Tools
 If you compare this radius offset (on the left) to square throat offset above there is not much difference. However it looks better and it has lower resistance to the airflow. Of course it's a bit more complicated to make - it might take extra 10 minutes or so to draw an outline, make and put all parts together, but it worth the effort. If you compare this radius offset (on the left) to square throat offset above there is not much difference. However it looks better and it has lower resistance to the airflow. Of course it's a bit more complicated to make - it might take extra 10 minutes or so to draw an outline, make and put all parts together, but it worth the effort.
So, if you would like to learn how to make this kind of an offset with hand-tools only, please hit the Buy Now button below. Then, for the price of only $1.00 you will gain an instant access to the unique page with 39 high quality photos on it set in the step-by-step sequence with brief explanations.
|
|
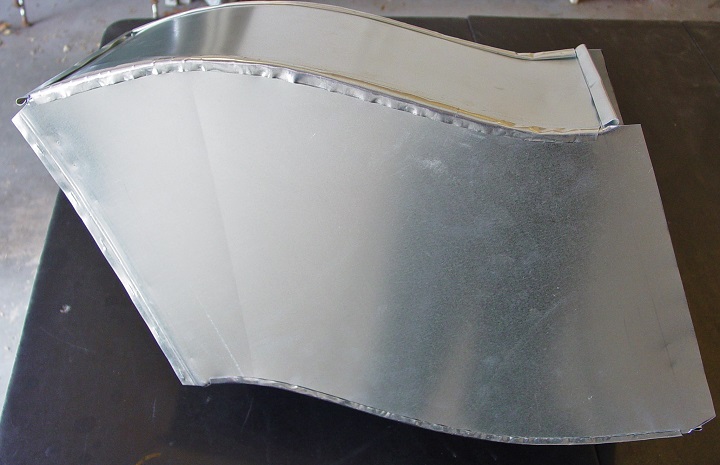
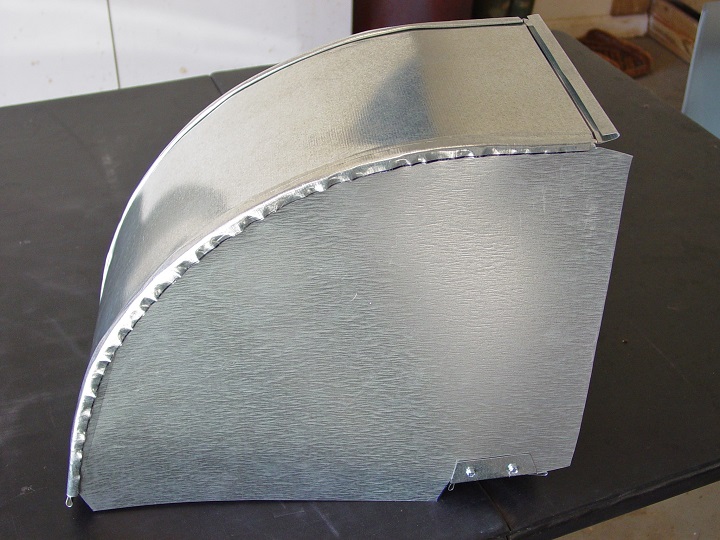
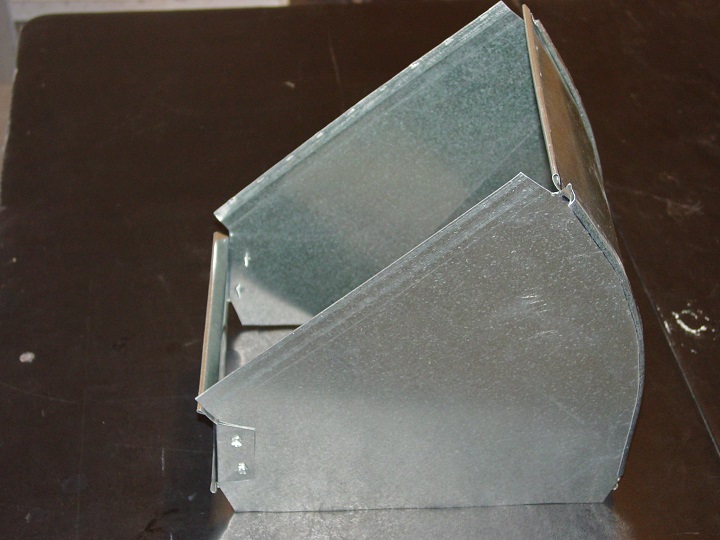
How to Make 45* Radius Elbow with Hand Tools
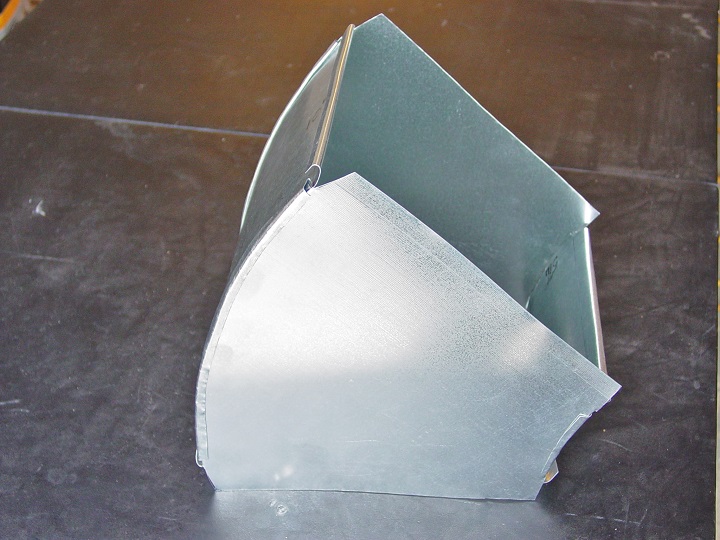 On this page for the price of only $1.00 you can learn how to make a 10" x 8" radius elbow by using just hand tools. This tutorial has 30 high quality pictures with brief explanations. On this page for the price of only $1.00 you can learn how to make a 10" x 8" radius elbow by using just hand tools. This tutorial has 30 high quality pictures with brief explanations.
|
|
How to Make Square Throat 90* Elbow with Hand Tools
 Nobody in the big operations companies making any radius fittings anymore! All the fittings such as elbows, offsets, risers, cold air boots and so on made with the square throats. This way it's a bit easier and faster to produce and assemble and in this tutorial for the price of only $1.00 you will learn how to do it. On the page you'll see 35 high quality pictures set in the step-by-step sequence with explanations. Nobody in the big operations companies making any radius fittings anymore! All the fittings such as elbows, offsets, risers, cold air boots and so on made with the square throats. This way it's a bit easier and faster to produce and assemble and in this tutorial for the price of only $1.00 you will learn how to do it. On the page you'll see 35 high quality pictures set in the step-by-step sequence with explanations.
|
|
How to Make Square Throat 45* Elbow with Hand Tools
 Nobody in the big operations companies making any radius fittings anymore! All the fittings such as elbows, offsets, risers, cold air boots and so on made with the square throats. This way it's a bit easier and faster to produce and assemble and in this tutorial for the price of only $1.00 you will learn how to do it. So from now on you are able not only learn how to figure out the length of the duct between to 45 degree elbows but make those elbows yourself on the job-site or at home! Nobody in the big operations companies making any radius fittings anymore! All the fittings such as elbows, offsets, risers, cold air boots and so on made with the square throats. This way it's a bit easier and faster to produce and assemble and in this tutorial for the price of only $1.00 you will learn how to do it. So from now on you are able not only learn how to figure out the length of the duct between to 45 degree elbows but make those elbows yourself on the job-site or at home!
On the page you'll see 37 high quality pictures set in the step-by-step sequence with explanations.
|
|
How to Make Square Throat Offset with Hand Tools
 OK, it's not too difficult to figure out how to make this kind of offset! But how would you make the Pittsburgh seam, both parts of it - the female and male parts without machine??? Well, if you are looking for the answer to this question, for the price of only $1.00 you can find it by purchasing an instant access to the page that has it all! OK, it's not too difficult to figure out how to make this kind of offset! But how would you make the Pittsburgh seam, both parts of it - the female and male parts without machine??? Well, if you are looking for the answer to this question, for the price of only $1.00 you can find it by purchasing an instant access to the page that has it all! |
|
How to Make Riser Starting Transition with Hand Tools
 Usually HVAC Companies making starting transitions that have the top parts straight and even one of the sides also straight. This kinds of transitions easy to make because they are made from three parts. But they are one-sided and if you made one wrong it won't be fit right on the plenum. Usually HVAC Companies making starting transitions that have the top parts straight and even one of the sides also straight. This kinds of transitions easy to make because they are made from three parts. But they are one-sided and if you made one wrong it won't be fit right on the plenum.
The riser starting transition a bit more difficult to make because its all parts set at a certain angle to each-other, but they are universal at installation, less resistant to airflow and if necessary can add to the plenum height 3”.
So, if you would like to learn how to make a riser starting transition that one of the Michigan largest HVAC Company using for decades. Then for the price of only $1.00 you can purchase an instant access and see 31 high quality photos set in the step-by-step sequence with brief explanations.
|
|
How to Make Square Throat Tee with Hand Tools
 The tee (pair of pants) that you can see on the left is 20" x 8" to 12" x 8" and 10" x 8" and this is made a bit wrong because a combine area of 12" x 8" and 10" x 8" is larger than 20" x 8". So if you use a duct 20" wide then better to make it 10" tall an then reduce it to 8". For this purpose you may use two transitions or make a tee that would looks like a Hess fitting. The tee (pair of pants) that you can see on the left is 20" x 8" to 12" x 8" and 10" x 8" and this is made a bit wrong because a combine area of 12" x 8" and 10" x 8" is larger than 20" x 8". So if you use a duct 20" wide then better to make it 10" tall an then reduce it to 8". For this purpose you may use two transitions or make a tee that would looks like a Hess fitting.
So, if you would like to learn how to make this kind of tee by using hand-tools only, please hit the Buy Now button below. Then, for the price of only $1.00 you will gain an instant access to the unique page with 35 high quality photos on it set in the step-by-step sequence with brief explanations.
|
|
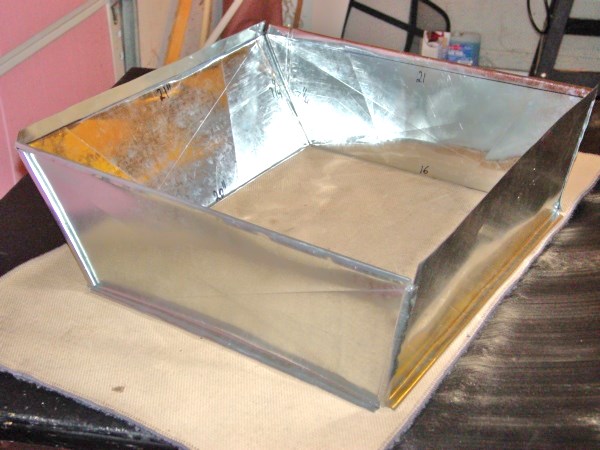
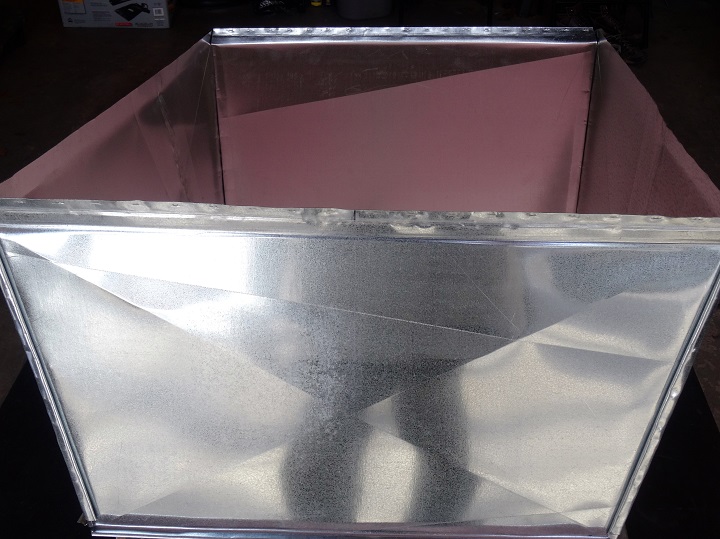
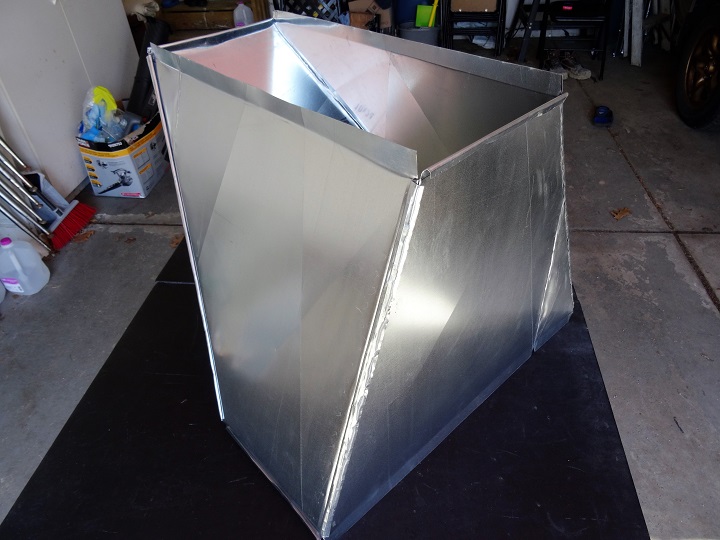
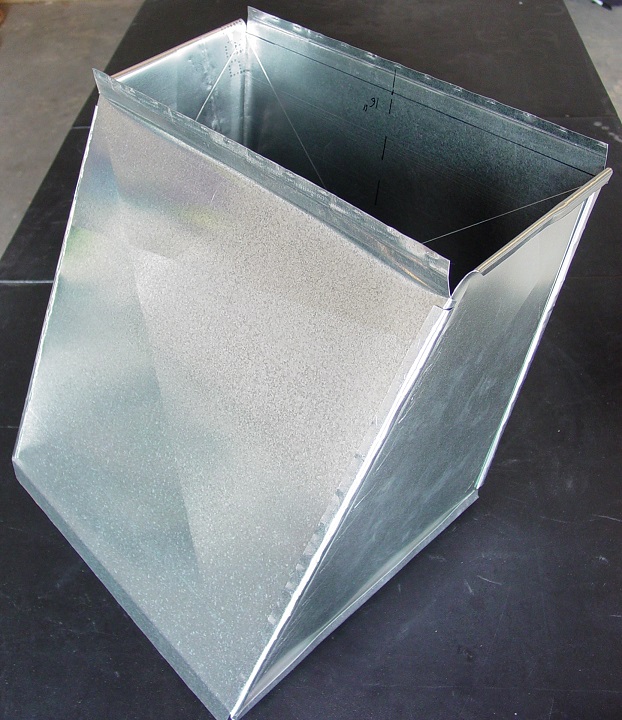
How to Make Cold Air Return Box for New Furnace
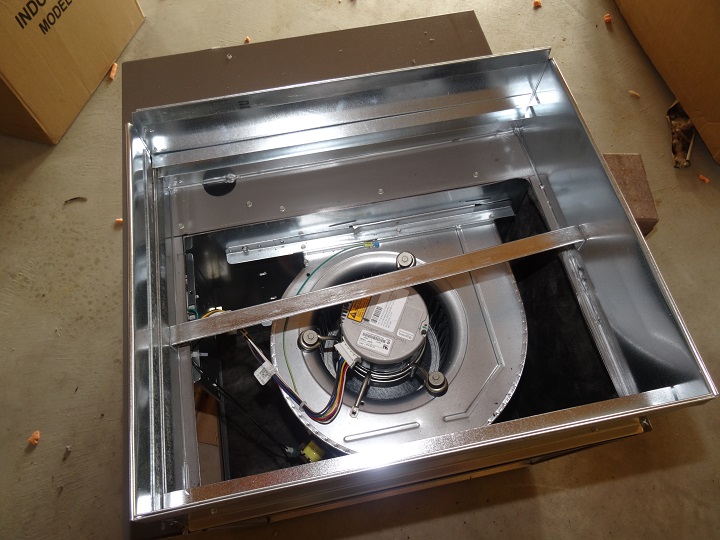
My furnace is almost 20 years old. I don’t know how much time it will last longer, but I already bought a new one. Once the old one dies I’m going to install a new one. For the last 5 years I never replaced an old furnace, but I think that some newer models came to its limit and sooner or later they should be replaced. The difference between these two furnaces is only in height. The new one is 7” shorter. This is why I don’t need any transition between a new furnace and A/C coil, but only 7” extension. However if your cold air return boot instead of 24” x 16” is 24” x 20” you can put your new furnace on a cold air return box. It will increase the air flow, reduce noise and prolong furnace lifespan!
On this page for the price of only $1.00 you can learn how to make a cold air return box.
|
|
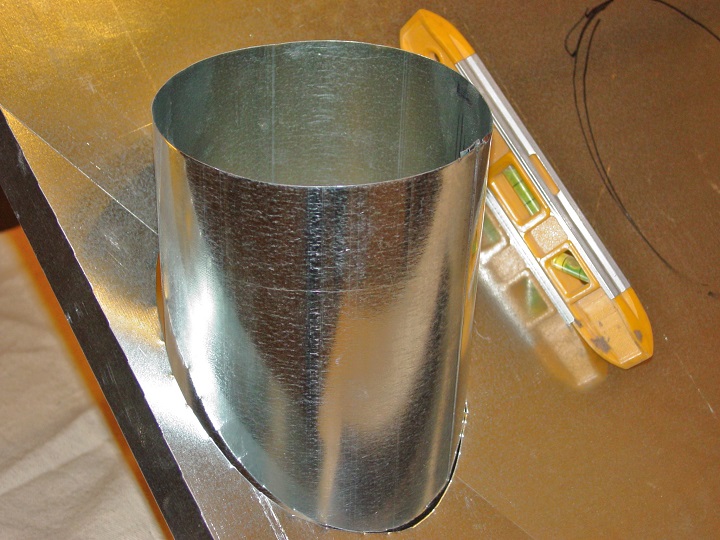
How to Make Round End Cap with Hand Tools
 Sometimes, especially when you’re finishing your basement off or working on a finished basement project, you need to relocate a heat run. In some cases you can’t reach to the takeoff to pull it out and block the hole off. Then the best option is to cap a pipe or takeoff off. The tutorial has 8 pictures with explanations. The price is $1.00. Sometimes, especially when you’re finishing your basement off or working on a finished basement project, you need to relocate a heat run. In some cases you can’t reach to the takeoff to pull it out and block the hole off. Then the best option is to cap a pipe or takeoff off. The tutorial has 8 pictures with explanations. The price is $1.00.
|
New!
If you don't need all these chapters that I picked up in the bundles above that's fine! Pick the chapters you need, add more paid pages from the other parts of this website at discount price, create your own e-book on this page and save! |
|
|
A website "ductworkinstallation. com" focus on providing information and services related to the installation of ductwork systems , which are the tubes used to distribute heated or cooled air throughout a building as part of an HVAC system; essentially, it would be a platform for individuals or companies specializing in designing and installing ductwork for homes and commercial properties, offering details on the process, and potential contractors to contact for such services.
Key points about ductwork installation websites:
Services offered:
New ductwork installation, ductwork repair, duct cleaning, duct sealing, airflow balancing.
Target audience:
Homeowners looking to install a new HVAC system, individuals experiencing issues with their existing ductwork, commercial property owners needing ductwork for large buildings.
Information provided:
Explanations on different types of duct materials, design considerations for optimal airflow, potential benefits of proper ductwork installation.
|
Million Dollar Speaking : The Professional's Guide to Building Your Platform
Book Description
Publication Date: September 28, 2010
Make your move into, or improve your position in, the powerful world of professional speaking. If you think you have what it takes to speak professionally, or you've already been doing so with insufficient reward, now is the time to make your move. Bestselling business author and Professional Speaking Hall of Fame member Alan Weiss offers the inside advice you need to turn your talent into a high-paying career—from honing your delivery skills to building a business. In Million Dollar Speaking, you‘ll learn the critical skills of Dealing with difficult crowds Creating powerful speeches Targeting high-potential markets Creating a "star" reputation Setting fees that reflect your outstanding value Perfecting platform skills making them the best in the business Expanding your business through diversification Weiss has packed the guide with tips, resources, helpful examples, and checklists that make it easy for you to keep a record of your progress. Whether you're a trainer, workshop leader, or consultant, Million Dollar Speaking has what you need to get on the paid public-speaking circuit in no time. |
A Guide Book of Morgan Silver Dollars
Book Description
Publication Date: March 1, 2007 Americans love to collect the big Morgan silver dollar! No other coin conjures up so much of the romance and history of the United States. In this third edition of his bestselling book, noted numismatic historian Q. David Bowers offers an engaging portrait of the country’s most popular classic coin. You’ll learn what to look for when you buy, how to grade your coins, how to cherry pick varieties, and ways to become a smarter collector. A Guide Book of Morgan Silver Dollars, 3rd edition, also includes a thorough market analysis for each date and mintmark, a detailed look at the minting process, and a study of Treasury releases and other hoards, plus a section on never-circulated pattern coins. Full color throughout; illustrated; indexed.
Customer Review
Excellent resource. Author even has suggestions about how to "get started" collecting Morgan Silver Dollars. Clearly explained "grading methods." I bring this book with me everywhere. It is so interestingly organized. It is more than a research book, it is an accurate historical, yet practical resource of these coins. |
|
Klein Tools 86553 Straight Hand Seamer
Customer Review
Quality tool. Much better than the Malco and others I've had. The handle grips stay on and the bolts don't work loose.
|
|