| Related Pages: |
 |
|
Installation in Pictures
Some of the visitors of my website are very sophisticated DIY-rs. They don’t need long and detailed explanations; they just want to see how it supposed to be done so they can do it!...
|
|
Kitchen Remodeling Edition
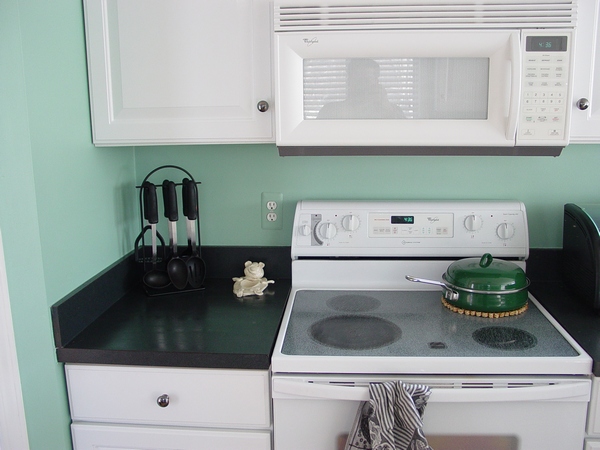
When it comes to the ductwork, kitchen remodeling requires resolving some of the most important issues, which could... |
|
Dollar Guide
This page is designed to help a homeowner with some simple issues that can arise in his/her DIY ductwork installation project.
|
|
Extending HVAC ductwork
When people are planning to change their layout of ductwork, finish a basement off, kitchen remodeling or other renovations they are usually buying my books or paid pages, because there is no other place to go. However, not all of them! Some of them are looking for help on Forum websites. Below you can see one more example of it...
|
|
Have you ever wondered what kinds of tool an ordinary residential ductwork installer carrying in his pouch?
On this and on the following pages you can see a complete set of all necessary tools that I’m usually carrying in my pouch, keeping in my toolbox or having in my van.
|
|
Ductwork Installation Tips and Tricks
Every profession has its own tips and tricks and the profession of the ductwork installer has them as well, a lot of them! On this and on the next pages I would like to introduce seventeen topics dedicated to this issue.
|
|
One Zone per Bedroom
I'd really, really like to use eight zones in the house - one zone per bedroom on the second floor, two zones on the first floor, two zones in the basement. My reasons for wanting this are:
|
|
Supply Duct Installation
The supply duct of a forced air heating/cooling system through which heated or cooled air is supplied to rooms by the action of the fan of the central heating or cooling unit...
|
|
Furnace Replacement
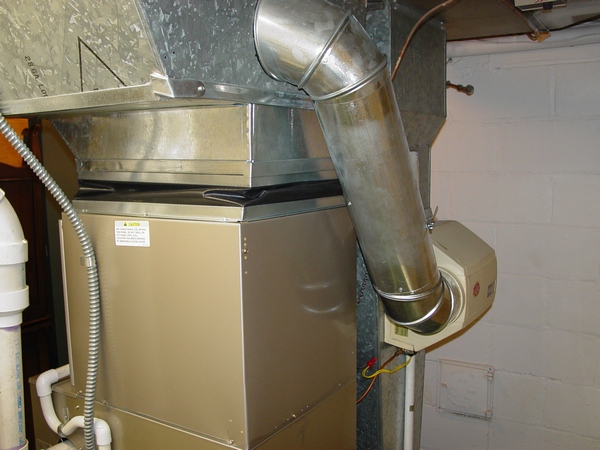
HVAC companies that are specializing on the new construction usually do not too much involved in furnace replacement business or, if it is a big company, it may have a special department dedicated just to it...
|
|
Top of the Line House Ductwork Installation

Maybe you are not planning to build a 10,000 square feet house and spend something around $85,000.00 for the HVAC installation in the foreseeable future, but you're definitely may find some interesting ideas which even I wasn't familiar with...
|
|
|
While your builder may enlist the services of a heating contractor for necessary sheet metal work in your remodeling project, it's crucial not to solely rely on their expertise. Unfortunately, a significant percentage of heating contractors lack the proficiency required for new construction, particularly in remodeling projects. Why? Many are primarily focused on replacements and servicing, while others may employ subpar installers prone to sloppy workmanship. Consider this: the absence of a comprehensive and standardized manual for ductwork installation in the country means each company operates based on its own experience and expertise.
Additionally, placing excessive faith in mechanical inspectors can lead to disappointment. Inspectors typically fall into one of three categories:
-
The Strict Enforcer: These inspectors adhere rigidly to the code, often enforcing every letter without exception. Their stringent approach may result in unnecessary re-inspections and delays, as they prioritize their authority over practical solutions.
-
The Pragmatist: These inspectors understand that the code isn't infallible and may exercise flexibility when necessary. They prioritize practicality over strict adherence to the letter of the law.
-
The Negligent: These inspectors may lack diligence and expertise, often issuing "green tags" without thoroughly evaluating the installation.
It's essential to recognize that during inspections, the focus is primarily on code violations rather than the efficacy of the ductwork system itself. As a homeowner, it's imperative to remain vigilant throughout the installation process.
This page serves as a parent page, hosting secondary pages dedicated to addressing home remodeling issues.
Furthermore, if you have any questions regarding ductwork in your remodeling project, don't hesitate to ask. Provide pictures and details of any contentious areas, and I'll assist you. If your question warrants, I'll create a secondary page at no additional cost; otherwise, my assistance is priced at $1.34.
How to Run Bath Fan Exhaust through Roof – is a page which I made in order to help people better understand how this kind of job must be done. If you will have any questions or comments, please email them after reading this page.
Instant Access:
After you have purchased a paid page; PayPal is going to bring you back to my website. In order to see the paid page you have to click on the “Register” button, fill out the form, choose your own Username and Password and click on the “Register” button at the bottom of the form – congratulation, you are now on the page you have paid for!
Important: After you have purchased any Paid page or Download page and PayPal brought you back to my website, the first thing that you should do is to save that page to your Favorites. Then if something went goes you always can come back to reregister yourself on my website again.
|
|
Split Level Ranch Remodeling
 Are you planning a remodeling of your house? This is great! From now on, you can get huge amount of information that will help you to find the right way of dealing with the ductwork installation issues. Are you planning a remodeling of your house? This is great! From now on, you can get huge amount of information that will help you to find the right way of dealing with the ductwork installation issues.
What if you only had baseboard heating in your house and decided to install a central air?
Now you can do it by yourself or just get an idea on how it should be done and now you can help your heating contractor to implement this idea into a real life!
On this page, you can see 85 photos with brief explanations to them. Also, you can ask your questions or visit some paid pages, which are related to the photos on this page. Price for the instant access to the page is only $2.00.
Instant Access:
After you have purchased a paid page; PayPal is going to bring you back to my website. In order to see the paid page you have to click on the “Register” button, fill out the form, choose your own Username and Password and click on the “Register” button at the bottom of the form – congratulation, you are now on the page you have paid for!
Important: After you have purchased any Paid page or Download page and PayPal brought you back to my website, the first thing that you should do is to save that page to your Favorites. Then if something goes wrong you always can come back to reregister yourself on my website again.
|
|
Toe Kick Heat Installation – the chapter covers several topics and gives explanations:
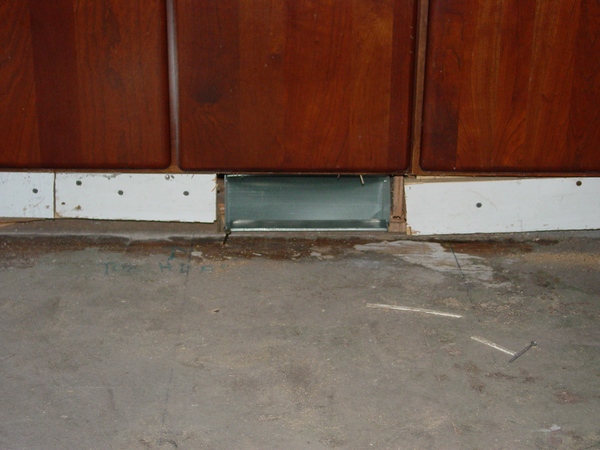
- How to make openings in the floor and in the cabinet
- What kind of fitting should be used
- How to cut a take-off in
- How to run a pipe
- How to terminate a heat run
The chapter could be useful for the kitchen or bathroom remodeling projects or to any projects alike. The chapter has five pages, 10 pictures. $2.50
Instant Access:
After you have purchased a paid page; PayPal is going to bring you back to my website. In order to see the paid page you have to click on the “Register” button, fill out the form, choose your own Username and Password and click on the “Register” button at the bottom of the form – congratulation, you are now on the page you have paid for!
Important: After you have purchased any Paid page or Download page and PayPal brought you back to my website, the first thing that you should do is to save that page to your Favorites. Then if something goes wrong you always can come back to reregister yourself on my website again.
|
|
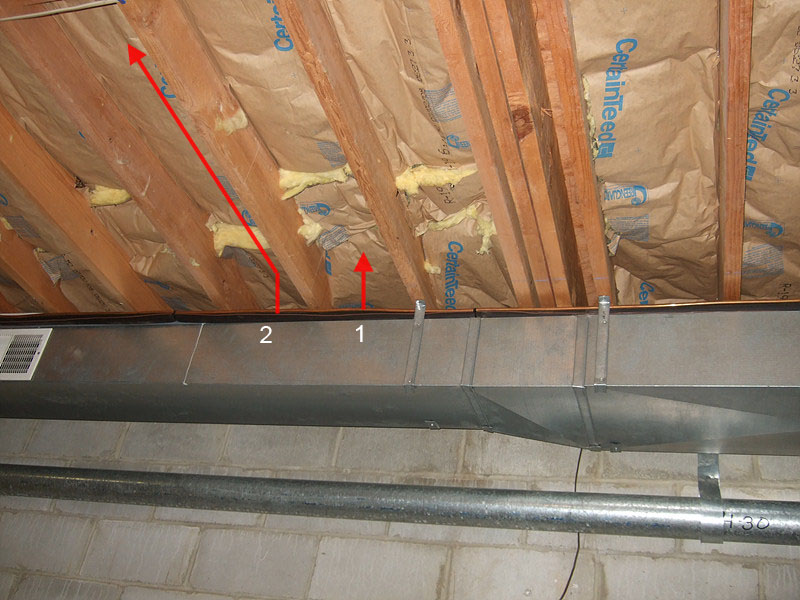
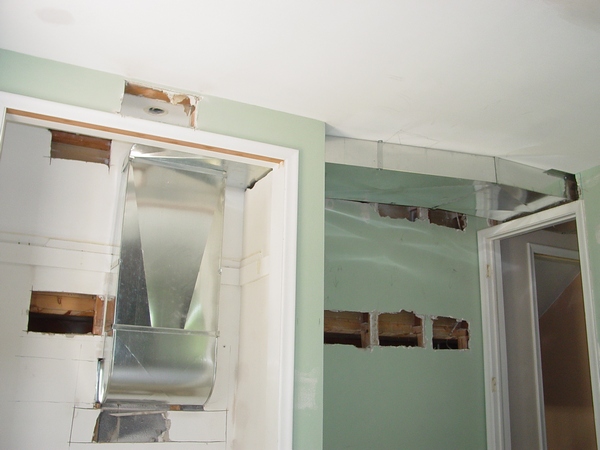
How to Move Duct Away from Wall
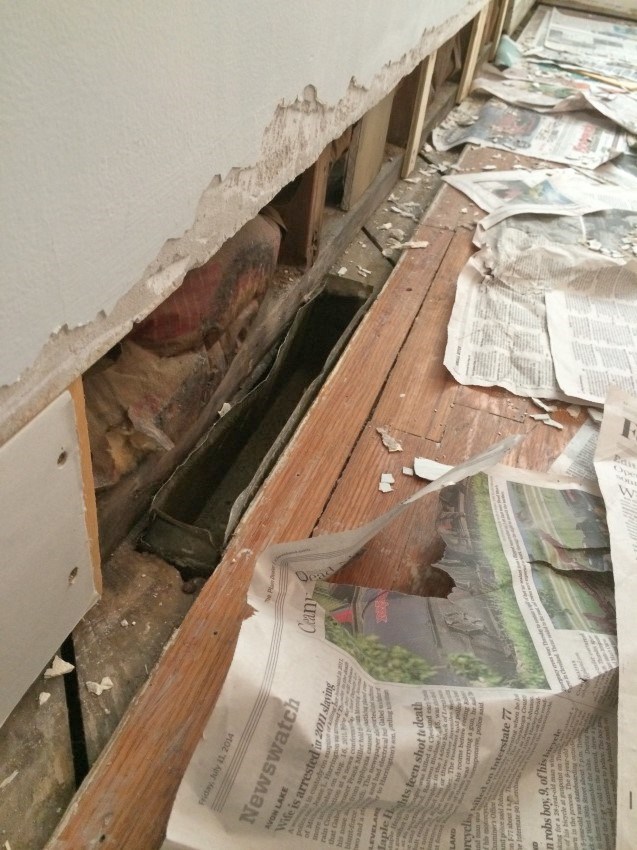 I'm remodeling my house and in the bedroom I'm working on now there were recessed wall registers. They didn't sit flush with the drywall they sat back into the drywall. I removed the registers and I'm patching the hole with drywall, when I noticed that the air duct needs to be moved away from the wall in about an inch or two. In the basement the ceiling covers the duct work going into that bedroom. I'm remodeling my house and in the bedroom I'm working on now there were recessed wall registers. They didn't sit flush with the drywall they sat back into the drywall. I removed the registers and I'm patching the hole with drywall, when I noticed that the air duct needs to be moved away from the wall in about an inch or two. In the basement the ceiling covers the duct work going into that bedroom.
|
|
DUCTWORK INSTALLATION GUIDE
Description:
Introducing a completely current and innovative way to learn the basics of Ductwork and Furnace Installation! Featuring hundreds practical competencies, this “how to” guide has been carefully designed and thoroughly modernized to provide a complete learning system for the fundamentals and applications of core ductwork installation concepts. It combines straightforward theory lessons with useful “hands-on” opportunities for learning about the industries hottest topics, including installation in small and big houses and apartments, installation in basements and attics, rough-ins and finals, safety issues, and more. Enhancements to this edition include an updated tools and materials identification chart, new and improved pictures, revised installation techniques.
Benefits:
- The flexible format affords users the unique opportunity to learn ductwork installation fundamentals and applications either on an individual basis or in an instructional setting
- Practical competencies take readers step-by-step through specific installations, repair, and maintenance procedures and provide the hands-on training needed to work in ductwork installation field
- Theory lessons and practical competencies can be fine-tuned to meet specific training needs of local contractors, associations, or individual installers
This e-textbook was written and published in 2008 and significantly modified and improved in 2011.
In 2012 links to the International Code were added.
Currently I'm working for an HVAC Company that, among others, is a contractor for Pulte Homes Company. I'm working for this company since May 2013 and generated the best practices of their unique way of ductwork installation. Hundreds of new photos were taken and inserted in many chapters of my Ductwork Installation Guide book and if you are serious to become the best in your company I highly recommend you to take a look at these chapters (chapters updated since May 2013; see below).
All possible ductwork installation tips and tricks were added to the full version of the book.
However, if you are already purchased this book in the past, in the process of purchasing it now or planning to purchase this book in the future at least once in three month please come back to the Chapter-by-Chapter Description of the Contents pages (2) to check out for updates.
"Ductwork Installation Guide" is written in the Microsoft Word and it works in both: PC and Mac. The book has 63 chapters and all chapters are available separately.
If you will purchase the “Rough-in” part of the book for $44.99, you are going to have 826photos, including tools, materials and installation on 346 pages.
If you will purchase the “Basement” part of the book for $54.99, you are going to have 1571 photos, representing all stages of installation on 801 pages.
If you will purchase the “Ductwork Installation Guide” as a whole for $98.99, you are going to have 2397 photos, including tools, equipment, materials and installation on 1147 pages, plus Ductwork Installation Tips and Tricks – 45 of them, $9.99 value absolutely free!
- If you are a homeowner who is doing remodeling of his/her house, you will have more than enough information to get the gob done right!
- If you are an apprentice or an experienced HVAC installer you are also going to get everything what you need to become the best in your company.
- If you are an HVAC contractor and you will train your employees in these skills, you will provide them with the tools they need to perform to the best of their ability.
Instant Access:
After you have purchased a paid access page; PayPal is going to bring you back to my website. In order to see the paid page you have to click on the “Register” button, fill out the form, choose your own Username and Password and click on the “Register” button at the bottom of the form – congratulation, you are now on the page you have paid for!
Important: After you have purchased any Paid page or Download page and PayPal brought you back to my website, the first thing that you should do is to save that page to your Favorites. Then if something goes wrong you always can come back to re-register yourself on my website again.
This is an on-line version of the book. No CD version is available at this time.
Chapters available online:
ROUGH-IN (Chapter-by-Chapter Description of the Contents 1)
1. Introduction, Tools and Equipment
Materials
2. Architectonic Features of House
3. House Mark Out
4. Rough-In
5. Heat Runs, Bath Box Installation in Interior Wall
6. Bath Box Installation in Exterior Wall
7. High Wall Heat
8. Bath Box Working for Tow Rooms
9. Oval Stack Installation, Oval Stack in Exterior Wall
10. Bath Box Situated in Parallel to Oval Stack
11. Bath Box Disposed Perpendicular to Oval Stack
12. Bath Box Situated Right above Oval Stack
13. Hooking up to Floor Box
14. Oval Stack Situated in Interior Wall
15. Oval Stack in Wall between Two Joists
16. Oval Stack in Wall Perpendicular to Joists
17. Hooking up Oval Stack to Toe Kick 90*
18. Uncommon Cases of Oval Stack Installation
19. Cold Air Return Installation
20. Cold Air Frames Installation
21. Blockers Installation
22. Uncommon Cases in Installation of Air Return
23. Bath Fan Exhausts
24. Bath Fans Installation
25. Uncommon Cases of Bath Fan Exhausts
26. Dryer Vent
27. Kitchen Exhaust
28. Fresh Air Cap Installation
29. Venting of Furnace
30. Thermostat Wiring
31. Firestop Insulation
32. Temporary Furnace Suspension |
BASEMENT (Chapter-by-Chapter Description of the Contents 2)
33. Basement
Preparation of Workplace
34. Sheeting (Panning)
35. Variants Sheeting Installation from Cold Air Return Duct
36. Double Sheeting
37. Furnace Installation
38. Plenum Installation
39. Ductwork Installation
40. Cold Air Return Duct Installation
41. Suplly Duct Installation
42. Calculation and Manufacturing Off-set and Riser
43. Heat Runs Installation
44. Jumper Installation
45. Application of 8” Pipes and Fittings
46. Basement Heats
47. Fresh Air, Combustion Air
48. Microwave Hood, Jenn-air, Kitchen Hood
49. Venting
50. Condencate Line, Venting and Condensate
Line for Comfortmaker and Aire-Flo furnaces
51. Humidifier Installation
52. Registers and Grills Installation
53. Thermostat Installation
54. Finishing Basement
55. Installation of Heating System in Big Houses
56. Air Handler Installation
57. Underground Ductwork
58. Garage Heaters
59. Furnace Change-out
60. Correcting Mistakes
61. Safety Techniques
62. Uncommon Cases
Conclusion
|
Ductwork Installation Tips and Tricks (45) - added to the full version of the Ductwork Installation Guide book.
The latest update: 04/20/2019
HVAC Quality Installation Specification
This is the place where the people who have purchased one of my books can say "Thank You", join others and show their accomplishments in the field of ductwork installation!
ROUGH-IN $44.99
|
|
DUCTWORK INSTALLATION GUIDE $98.99
|
|
|
A website "ductworkinstallation. com" focus on providing information and services related to the installation of ductwork systems , which are the tubes used to distribute heated or cooled air throughout a building as part of an HVAC system; essentially, it would be a platform for individuals or companies specializing in designing and installing ductwork for homes and commercial properties, offering details on the process, and potential contractors to contact for such services.
Key points about ductwork installation websites:
Services offered:
New ductwork installation, ductwork repair, duct cleaning, duct sealing, airflow balancing.
Target audience:
Homeowners looking to install a new HVAC system, individuals experiencing issues with their existing ductwork, commercial property owners needing ductwork for large buildings.
Information provided:
Explanations on different types of duct materials, design considerations for optimal airflow, potential benefits of proper ductwork installation.
|
|