|
Furnace Replacement in Pictures
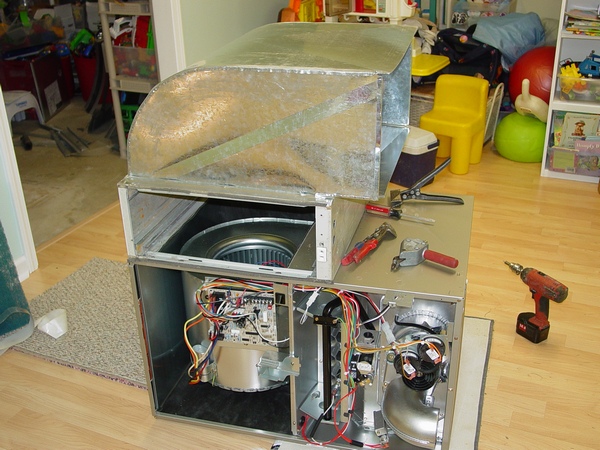
As you have seen above I’m selling Paul E. King's book – “The Furnace Book”!
In order to help you all to come up with a decision to buy it, I've made the “Furnace Replacement in Pictures” page!
So, here is how I can help you out:
If you come to my website with the questions: Can I install my own furnace? What is a furnace installation? How do I install a furnace vent? Can I see pictures of furnace installation? How do I install 80% furnace? – now you have a clear opportunity, for the very low price of only $2.50, to buy an instant access to this page and see all 137 pictures, which include pictures of the tools you may need for the replacement project and pictures of the 80% and 90+% efficiency furnaces replacement with the filter box installation and bypass humidifier replacement!
Furthermore, if you decide to buy “Furnace Change-out” chapter from my "Ductwork Installation Guide" without purchasing the “Furnace Replacement in Pictures” page it is already included in the package anyway!
If you are planning to replace your furnace, you may need to see 137 high quality pictures on this page! And learn about all nesessary for the furnace replacement parts. It doesn't matter if you are going to hire an HVAC company to do the job or not, but you should know how the installation must be done the right way!
|
|
A Furnace Plenum Installation
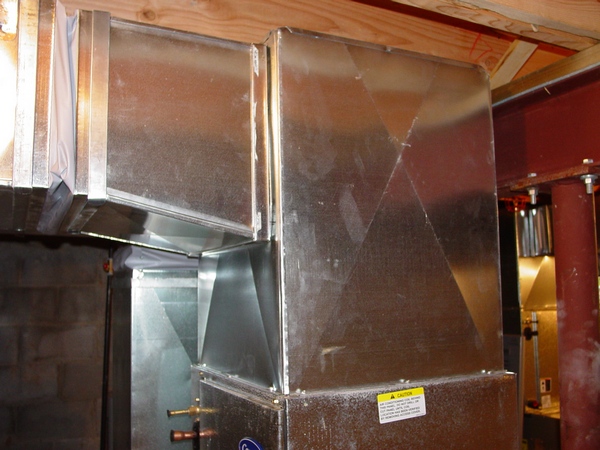
A plenum in a central heating and cooling system acts as a central distribution point, allowing conditioned air to be evenly distributed throughout the building through the ductwork, ensuring each room receives the proper amount of air at the right temperature, improving overall comfort and system efficiency; essentially, it's a chamber that collects air from the furnace/AC unit and then pushes it into the ductwork to reach different rooms in a controlled manner.
Key points about plenums:
Air distribution:
The primary function of a plenum is to evenly distribute conditioned air throughout the building by connecting to the ductwork that leads to different rooms.
Supply and return plenums:
Most HVAC systems have two plenums: a supply plenum for distributing heated/cooled air and a return plenum for collecting used air to be recirculated.
Improved air quality:
By properly distributing air, a plenum can help maintain consistent air quality throughout the building.
Energy efficiency:
A well-designed plenum can optimize airflow, reducing the need for the HVAC system to work harder to cool or heat a space
A supply air plenum is a sheet metal box that attaches to the outlet of a furnace, air handler, or AC coil and is used as a central manifold for other ductwork or take-offs to connect to...
|
|
Cold Air Return Duct Installation
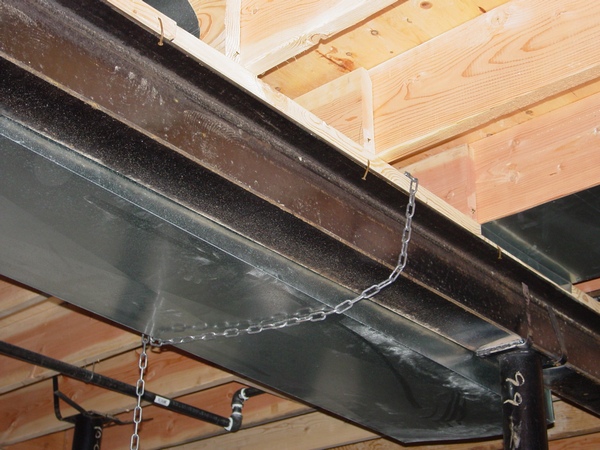
A central heating and cooling system has a "cold air duct," also called a "return air duct," because it is designed to draw in the existing air from your home (which is likely cooler than the newly heated or cooled air) back to the furnace or air conditioner so it can be filtered, heated or cooled, and then recirculated throughout the house, maintaining a balanced airflow and even temperature throughout the space.
Key points about cold air ducts:
Airflow balance:
They ensure that the system constantly pulls in air from the rooms to replace the air being pushed out, preventing uneven temperatures and pressure imbalances. =
Air filtration:
As the air returns to the system through the cold air ducts, it passes through a filter, removing dust and other particles before being recirculated.
Efficient heating/cooling:
By bringing the existing room air back to the system, the furnace or air conditioner doesn't have to work as hard to achieve the desired temperature.
How to install air ducts
Installation of a cold air return duct usually starts from that first piece which should be attached through a Canvas, Cold Air Drop and Cold Air Boot to a furnace...
|
|
Residential Supply Duct Installation
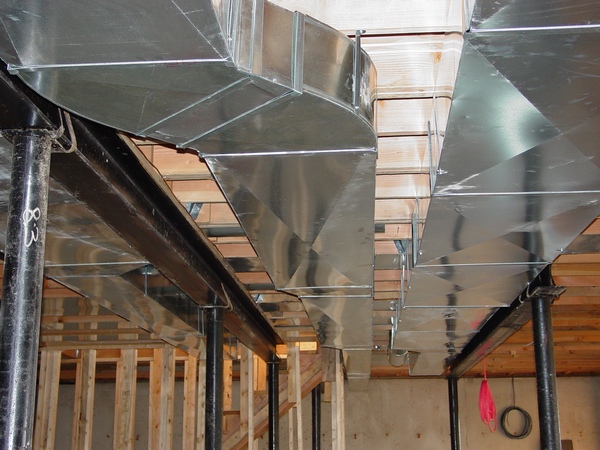
Supply ducts are essential in heating and cooling systems because they act as the "arteries" that distribute conditioned air (warm or cool) from the HVAC unit to different rooms in your home, ensuring even temperature distribution throughout the living space, making it comfortable year-round; without them, your home would experience uneven heating and cooling due to lack of proper air circulation.
Key points about supply ducts:
Air distribution:
They carry conditioned air from the furnace or air conditioner to the vents in each room.
Comfort control:
Proper installation of supply ducts helps maintain consistent temperatures throughout your home, preventing hot or cold spots.
Energy efficiency:
Well-designed and sealed supply ducts minimize air leaks, which can lead to higher energy bills if not properly maintained.
System function:
Supply ducts work in conjunction with return ducts, which draw unconditioned air back to the HVAC unit to be treated
The supply duct of a forced air heating/cooling system through which heated or cooled air is supplied to rooms by the action of the fan of the central heating or cooling unit...
|
|
Furnace Installation
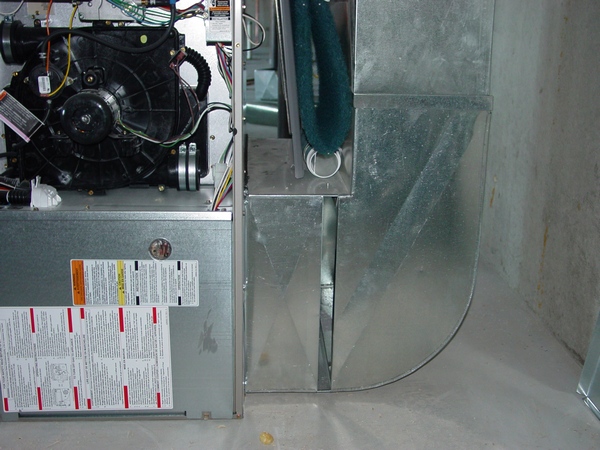
Installing a new furnace in a new house is beneficial because newer furnaces are significantly more energy efficient, leading to lower utility bills, improved comfort levels, and a reduced environmental impact compared to older models; additionally, a new furnace will likely come with a warranty, minimizing potential repair costs in the near future.
Key reasons to install a new furnace in a new house:
Energy efficiency:
Modern furnaces utilize advanced technology to produce more heat with less energy consumption, resulting in lower heating costs.
Improved comfort:
Newer furnaces often have features like variable-speed blower motors that provide more even heating throughout the house.
Reduced environmental impact:
Higher efficiency translates to less fuel usage and lower carbon emissions.
Warranty coverage:
A new furnace typically comes with a manufacturer's warranty, protecting against potential repair costs early in its lifespan.
Potential resale value:
Installing a high-efficiency furnace can increase the perceived value of your home when selling.
When it comes to furnaces, there are a wide variety of different makes and models. All of them in many ways are similar though there may be characteristic differences between brands...
|
|
Furnace Replacement
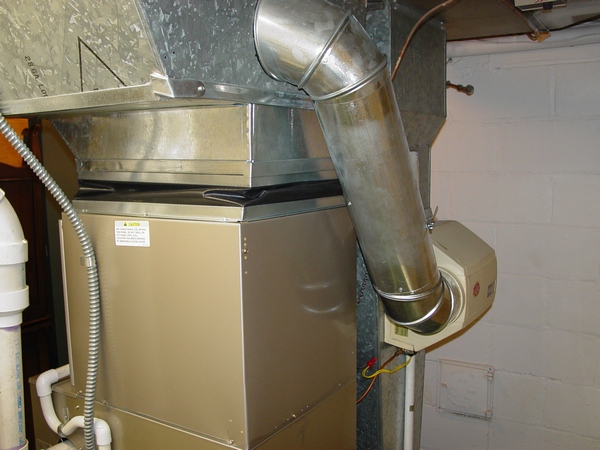
You should change your old furnace to a new one primarily because newer furnaces are significantly more energy efficient, meaning they will lower your heating bills by consuming less energy to produce the same amount of heat; this translates to significant cost savings over time, while also potentially improving your home's comfort level with features like better temperature control and humidity management.
Key reasons to replace an old furnace:
High energy bills:
Older furnaces tend to be less efficient, leading to higher utility costs.
Frequent repairs:
As furnaces age, they are more prone to breakdowns and require frequent repairs, which can become costly.
Inconsistent heating:
An old furnace may not evenly heat your home, causing some rooms to be too hot or too cold.
Safety concerns:
Older furnaces can pose safety risks like carbon monoxide leaks if not properly maintained.
Improved air quality:
Newer furnaces often have better filtration systems, which can improve indoor air quality by reducing dust and allergens.
Environmental impact:
Switching to a high-efficiency furnace reduces your carbon footprint by using less energy.
And replacing furnace by yourself would significantly reduce furnace installation cost.
HVAC companies that are specializing on the new construction usually do not too much involved in furnace replacement business or, if it is a big company, it may have a special department dedicated just to it...
|
|
Ductwork Insulation
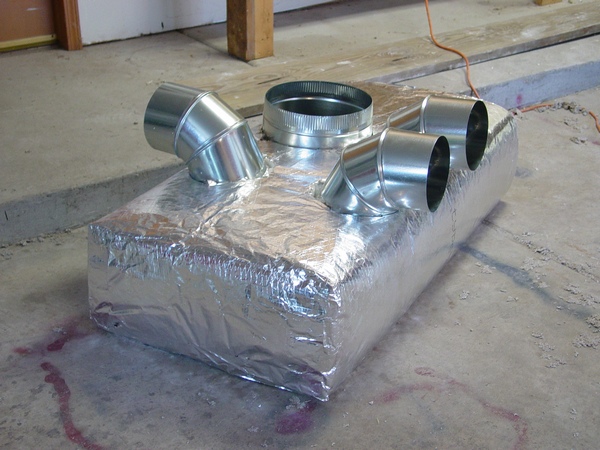
Insulating your ductwork is important because it prevents significant heat loss through the ducts, which means your HVAC system doesn't have to work as hard to maintain desired temperatures, ultimately saving you energy on your heating and cooling bills; it also helps maintain consistent air temperatures throughout your home by minimizing heat transfer from the ducts to surrounding areas, especially in unconditioned spaces like attics or basements.
Key benefits of insulating ductwork:
Energy efficiency:
Reduces heat loss through the ducts, lowering your energy consumption and saving money on utility bills.
Improved indoor comfort:
Helps maintain consistent temperatures throughout your home by preventing temperature fluctuations caused by heat loss from uninsulated ducts.
Reduced strain on HVAC system:
By minimizing heat loss, your furnace and air conditioner won't need to run as frequently or as long to reach desired temperatures.
Condensation prevention:
Insulation can help prevent condensation buildup on ducts, particularly in humid environments, which can lead to mold growth.
Better indoor air quality:
Insulated ducts can help minimize dust and allergen circulation by reducing air leaks.
When is duct insulation most important?
Unconditioned spaces:
If your ductwork runs through unconditioned areas like attics, crawl spaces, or basements, insulation is particularly important.
Climate extremes:
In climates with very hot or cold temperatures, insulating ducts can significantly impact energy efficiency
Before insulating, seal all the gaps around drive, pipe connections and take-offs. The best stuff for duct seal are special mastics or duct sealants...
|
|
Ticking Noise Elimination
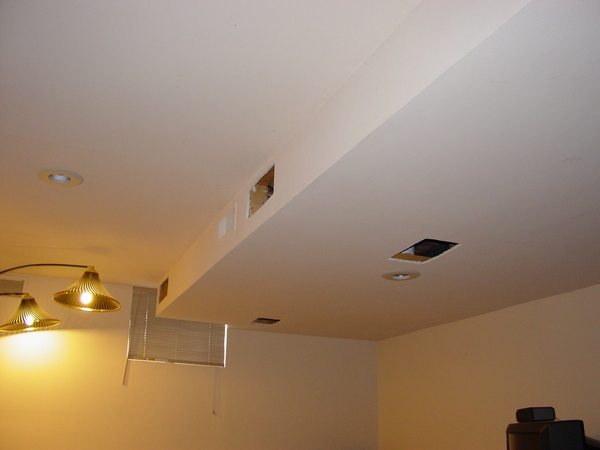
A ticking noise coming from your ductwork is usually caused by the metal ducts expanding and contracting due to temperature changes from your heating and cooling system, essentially the metal "clicking" as it shifts slightly with each temperature fluctuation; this is a common occurrence, especially with older or poorly insulated ductwork.
Key reasons for a ticking noise in your ductwork:
Thermal expansion and contraction:
As the air inside the ducts heats up or cools down, the metal expands and contracts, creating ticking or popping sounds.
Loose connections:
If duct sections are not properly secured, they can vibrate and make ticking noises when air flows through them.
Poorly insulated ducts:
Lack of insulation can amplify the temperature changes within the ductwork, leading to more noticeable ticking sounds.
Debris buildup:
Dust and debris trapped inside the ducts can rattle around and cause ticking or rattling noises.
Damaged ductwork:
Cracks or dents in the ductwork can also cause ticking noises as air pressure fluctuates through them.
If you did not finish your basement off yet it would be relatively simple to fix. Also, if in your basement you have a drop ceiling - consider yourself as a lucky one, the most difficult task would be if your ductwork is covered with the drywall!..
|
|
Banging, Oil Canning Noise Elimination
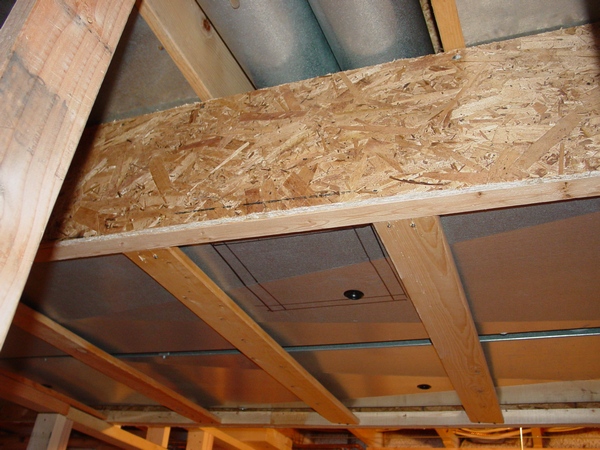
Ductwork can make noises in a house due to a variety of reasons including: expansion and contraction of the metal ducts caused by temperature changes, loose connections, damaged or dented ducts, air pressure fluctuations, poorly sealed joints, lack of insulation, and even debris buildup inside the ducts; all of which can create rattling, banging, whistling, or rumbling sounds when air flows through them.
Key points about noisy ductwork:
Temperature fluctuations:
When your HVAC system switches between heating and cooling, the metal ducts can expand and contract, causing rattling or popping noises.
Loose connections:
If duct sections aren't properly secured, they can vibrate and make banging noises when air flows through them.
Dents and damage:
Physical damage to the ducts, like dents or creases, can disrupt airflow and cause whistling or rattling sounds.
Air pressure issues:
Improperly sized ducts or unbalanced airflow can lead to high air pressure build-up, resulting in rumbling or booming noises.
Dirty ducts:
Accumulated dust and debris can also contribute to noise by creating obstructions and causing air to flow unevenly.
Lack of insulation:
Uninsulated ducts can amplify noise as the air inside them rapidly changes temperature
The banging noise that you hear is the expanding and contracting of the ductwork when the system turns on and off. This could be caused by a few different reasons. It could be:...
|
|
Making a Drive Trick
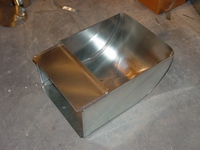
What you can see in the picture is a 14” x 8” stack 90* with a transition to 14” x14”. Manufacturer made drives and S-sides on the wrong sides: where you see drives suppose to be S-sides and vice-versa...
|
|
Top of the Line House Ductwork Installation

Maybe you are not planning to build a 10,000 square feet house and spend something around $85,000.00 on the HVAC installation in the foreseeable future, but you're definitely may find some interesting ideas which even I wasn't familiar with...
|
|
Sheet Metal Tools
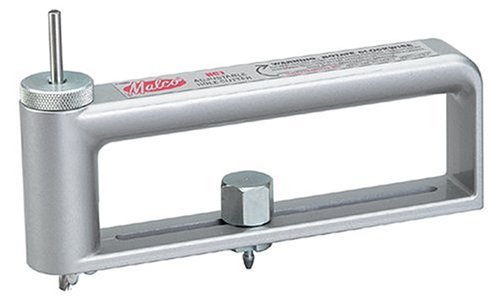
Buy HVAC tool from Amazon on my site and save! |
|
Repair or Replace Card
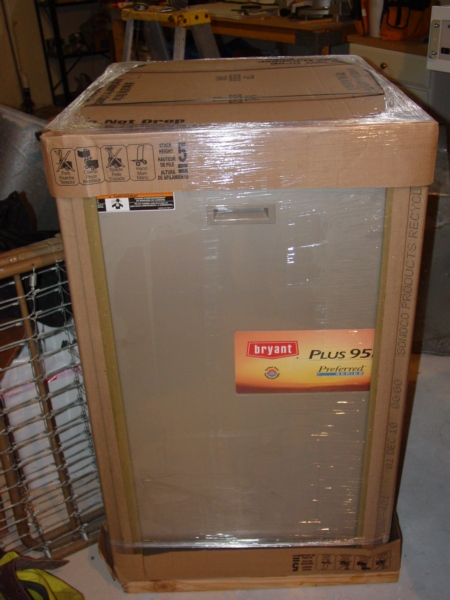
Furnace and Air Handler...
|
|
Attic Ductwork Installation
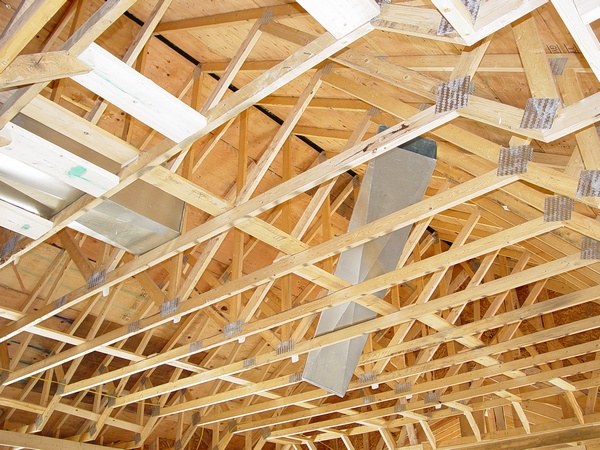
Recently I’ve installed ductwork in the attic space. Personally I don’t like this kind of installation, but a homeowner decided to build a master bedroom, master bathroom, two laundry rooms and two additional rooms above two and three car garages with a bridge...
|
|
My DIY Projects
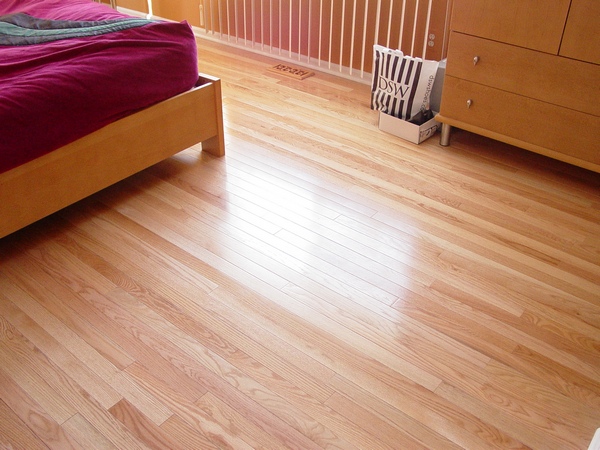
In fifteen years of living in my house, I was involved in the numerous DIY projects. For example – I painted the garage, insulated the attic, planted the sod, and did a landscaping.
Below you can see pictures...
|
|
Offset and Riser Formula
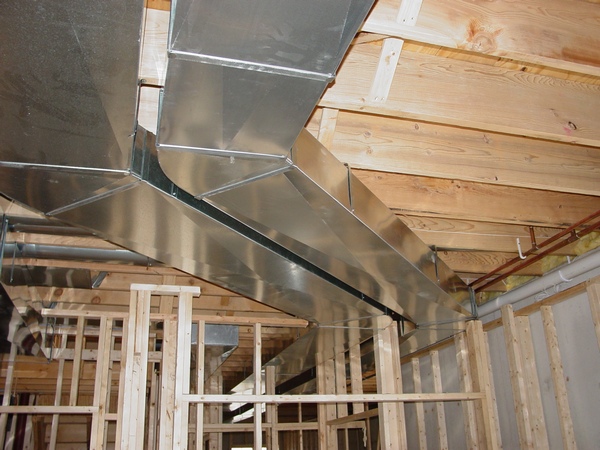
On this page you can find out how to calculate an Offset and a Riser, and formulas on how to find a distance between two flat and stack forty-fives and more!...
|
|
Closing Cold Air Grills
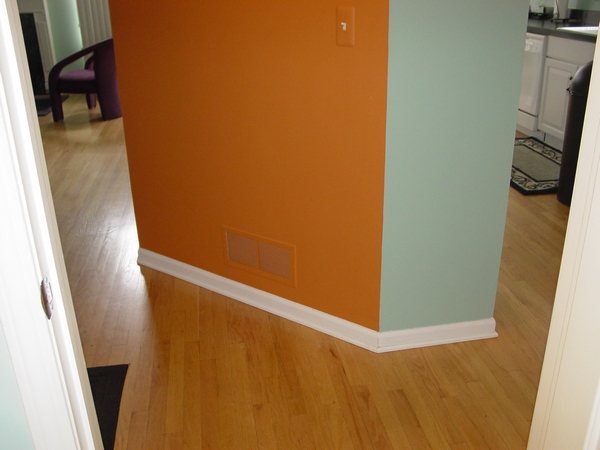
As everybody knows the cold air sinks down, but the warm air rises up. For example in the summertime, when warm air fills your house you have to run it through A/C coil to cool it down. As your A/C unit picks up warm air from the ceiling, it will be replaced by cool air coming from the supply vents...
|
|
Existing Plenum Transformation
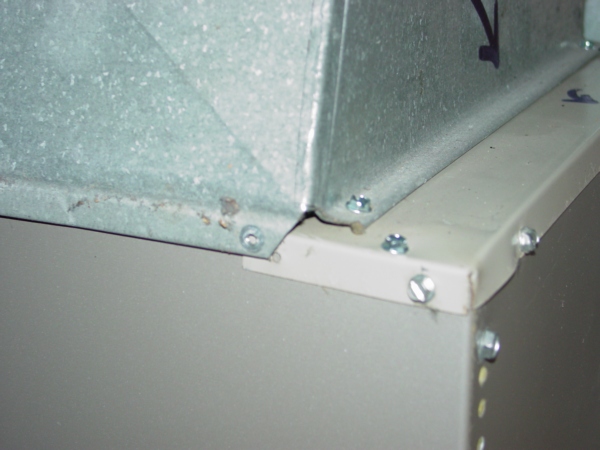
Sometimes, when you’re replacing an old furnace, the existing plenum is larger than a new furnace just for 1”...
|
| How to Use Drive-cleat Tips
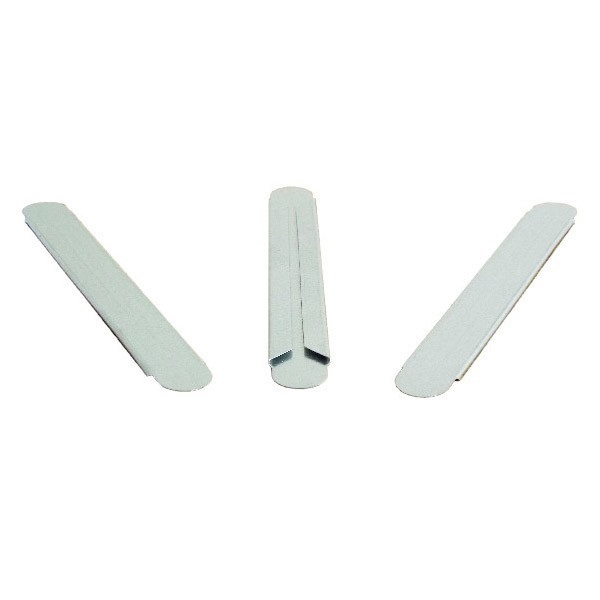
Every ducter knows how to use drive-cleats. Is this statement true or false? Well, according to my experience it's definitely false!
Why? I do not know why... However, I'm sorry but I know it for sure. During my 30 years in this business I realized that because there is no comprehensive Ductwork Installation book on the market (but only mine) every 3-month experienced guy training a newbie and as a result nobody knows anything...
|
|
|
Duct Work Installation . com
|
|
Welcome to Ductwork Installation . com, your ultimate destination for all things related to professional ductwork installation and HVAC expertise. Whether you're a seasoned HVAC installer, a budding mechanical engineer, or a homeowner embarking on a renovation project, our website is tailored to meet your needs.
Our platform caters to individuals:
- Interested in mastering the art of professional ductwork installation.
- Seeking guidance on ductwork installation techniques for basement finishing or remodeling projects.
- Troubleshooting various furnace and ductwork-related noises.
- Eager to learn practical energy-saving tips to optimize their HVAC systems.
With over 40 years of hands-on experience in the HVAC industry, our founder recognized the lack of comprehensive manuals and books addressing this specialized field. That's why we've meticulously crafted seven invaluable resources, designed to empower anyone looking to delve into HVAC installation.
Since its inception in August 2006, DuctworkInstallation.com has emerged as the premier authority in the realm of HVAC knowledge. Our extensive repository boasts:
- One hundred and two main menu and parent pages, covering a myriad of topics.
- One hundred and fifty paid and downloadable pages, many of which offer supplementary information.
- Seven meticulously curated books, brimming with insights and practical advice.
At DuctworkInstallation.com, we're dedicated to providing solutions to your most pressing ductwork, furnace, and air handler queries. From noise reduction strategies to energy conservation techniques and furnace replacement guidance, our platform serves as your one-stop resource for all HVAC-related needs.
Explore the wealth of information available on DuctworkInstallation.com and elevate your understanding of HVAC installation today!
|
|
Ductwork Installation Guide
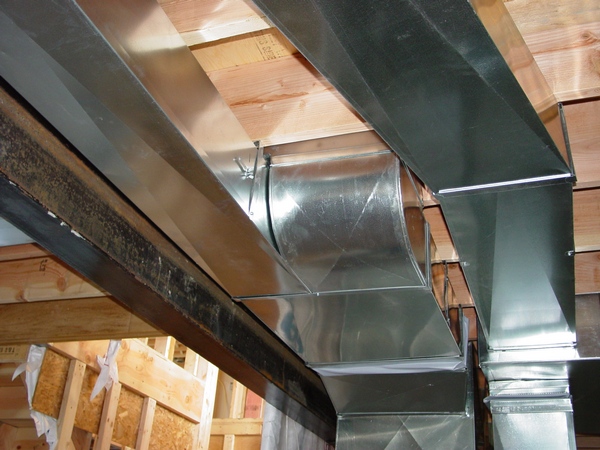
Introducing a cutting-edge approach to mastering the essentials of Ductwork and Furnace Installation! This comprehensive "how-to" guide is packed with hundreds of practical competencies, meticulously designed and modernized to serve as a complete learning system for both novice and seasoned professionals. Dive into the core concepts of ductwork installation with a blend of theory and hands-on applications, covering everything from small residential setups to large-scale installations in houses, apartments, basements, and attics. With enhanced features including an updated tools and materials identification chart, enriched visuals, and revised installation techniques, this edition sets a new standard in HVAC education. Key Benefits:
Flexible format allows users to learn at their own pace, either individually or in group settings.
Step-by-step practical competencies provide hands-on training essential for success in the ductwork installation field.
Theory lessons can be customized to meet the specific training requirements of local contractors, associations, or individual installers.
Originally authored and published on this site in 2008, this e-textbook underwent significant enhancements in 2015, with added links to the International Code in 2012. Drawing from years of experience as an HVAC contractor for Pulte Homes Company since May 2013, this edition incorporates the best practices gleaned from this collaboration. Hundreds of new photos, showcasing unique installation methods tailored for optimal performance, have been seamlessly integrated into numerous chapters.
"Ductwork Installation Guide" is compatible with both PC and Mac platforms, authored in Microsoft Word, and comprises 63 chapters available for separate purchase. Opt for the Rough-in part for $44.99, featuring 826 photos across 346 pages, or delve into the Basement part for $55.99, offering 1585 photos and 807 pages capturing all installation stages. For the ultimate package, acquire the entire guide for $89.99, encompassing 2411 photos and 1153 pages, along with 46 complimentary Ductwork Installation Tips and Tricks valued at $9.99.
|
Finished Basement Edition
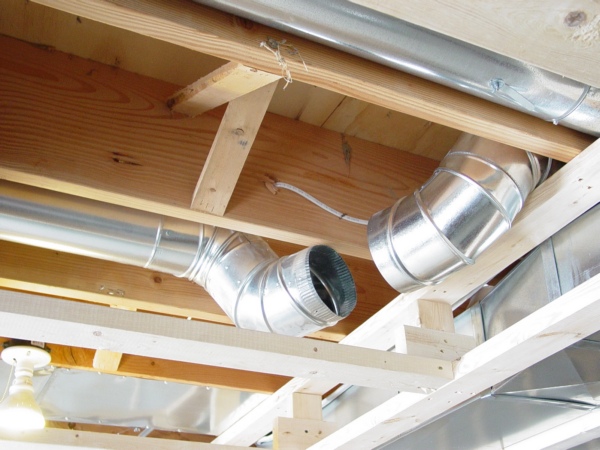
Doing ductwork installation sounds like a job that must be done by a professional. You may be surprised to know that by following my simple instructions, you can install your own ductwork in no time.
Installing ductwork in older home. This e-book is about doing your own ductwork and ideas for ductwork installation. Doing your own ductwork has significant financial advantages. You may be surprised to learn that installing your own ductwork in your finished basement project may save you a lot of money.
Usually, this task seems very complicated without some prior knowledge of the subject. But this handy e-book was designed for your first time through a ductwork installation. It will guide you through each step of the installation process. During the process of installing your new ductwork, I will be there with you offering step-by-step “how to” instructions.
Also, this e-book is useful if you are a professional ductwork installer! Depending on what you are doing every day at work it will bring you knowledge and understanding equal from 5 up to 10 years of experience!
And you are not alone. To meet growing demand for the most popular pages on my website I’ve combined all the pages from my website dedicated to the finished basement issues and sell it as a “Ductwork Installation Guide, Finished Basement Edition” e-book.
Nine pages for the Finished Basement Edition Guide have been taken from the “Professionally Answered Questions” page, nine from the “Installation in Pictures” page, two from the “ Ductwork Installation Guide” e-book, two from the “Energy Saving Tips" e-book and one from the “Ductwork Installation Tips and Tricks”.
So if you decide to finish the basement on your own you are going to have a complete guidance which includes everything that you need to know to finish the project! Furthermore, all pages from “Installation in Pictures” page are including step-by-step explanations to them too!
As I’ve mentioned above all chapters of the “Finished Basement Edition Guide” e-book are presented on my website and designed to help anyone who is finishing his/her basement off
|
Kitchen Remodeling Edition
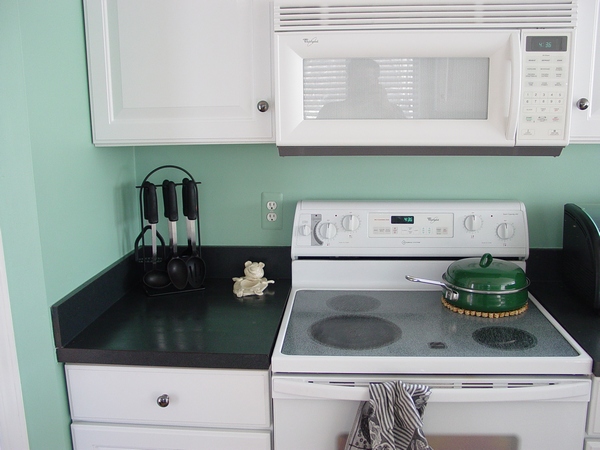
When it comes to the ductwork, kitchen remodeling requires resolving some of the most important issues, which could arise during the remodeling process.
For example:
Bathbox installation/relocation
High wall heat installation
Toe kick heat installation
If in your kitchen you are doing a remodeling project on moving a wall, you may find out that existing heat no longer can serve your kitchen area and should be moved to another location. It is why I give you three options of resolving this issue:
If you have an unoccupied span of wall you can install a bath box in, if not, you can install a bath box high above your wall cabinets, or you can set it low and bring such necessary heat to your kitchen area as the Toe Kick heat.
Next and the most important part of your kitchen-remodeling project is a kitchen exhaust. Here you can also have three options:
Microwave Hood exhaust
Kitchen Hood exhaust
Downdraft Range exhaust
All three of them require resolving of some ductwork installation issues and you are able to find the solutions in my book.
The “Jumper Installation” chapter of my book gives you insight on how to run heat or exhaust if you unable to run it as a “straight shot”.
All the chapters are very cheap and the book price is even cheaper than combine the price of all chapters. However, you may be worried that there is no answer to your particular question or issue, and then you have two options:
You can buy the book and if you are unable to find an answer to your particular question I will answer it free of charge
You can ask your question before the book purchasing and I will tell you if there is an answer in the book. You can type your question here.
Chapters of the book:
- Bath Box Installation
- High Wall Heat Installation
- Toe Kick Heat Installation
- "Jumper" Installation
- Kitchen Exhaust
- Tools and Materials
|
Energy Saving Edition
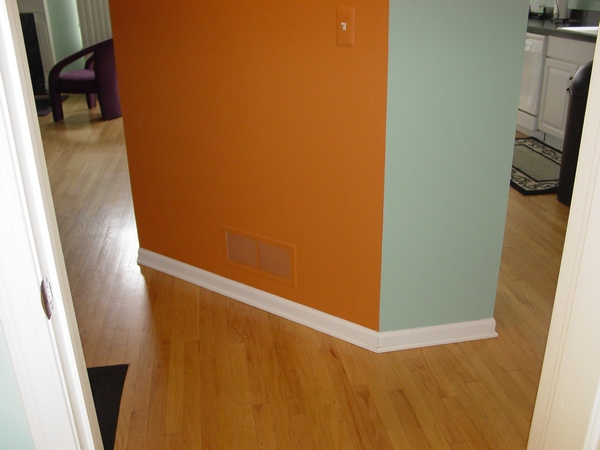
On the web, you'll stumble upon countless websites advocating the importance of energy conservation. They often furnish a generic list of measures you can adopt in your home to align with their recommendations.
What sets my website apart? Unlike others that regurgitate the same old energy-saving tips sourced from government websites, I bring something fresh to the table. In addition to the well-known strategies, I've uncovered and tested my own methods over the years, yielding remarkable results in my own household.
Does this warrant a purchase of my book from this website? Not necessarily. Why? It's simple: owning the book won't guarantee implementation.
Why the reluctance to implement? Because people typically favor tangible items over abstract concepts like energy conservation. This is why most energy-saving tips on other websites are freely available – attaching a price tag would likely deter interest.
Now, the crucial question: why do people invest in my energy-saving tips? It boils down to the details. On my website and in my book, I don't just offer energy-saving advice; I provide comprehensive, step-by-step guidance on implementation. What's more, I delve into detailed explanations of various ductwork installation issues pertinent to each energy-saving tip.
What's more important I give a step-by-step explanations to many ductwork installation issues related to this or to that energy saving tip!
Let’s take a look what kind of information you can get if you will purchase any of my energy saving tips:
If you implement Closing Supply Registers and Closing Cold Air Return Grills energy saving tips you will reduce your furnace cycle time! However, do not try it at home on your own! Because if you close all supply registers and all cold air return grills which you may think are unnecessary at the time, you will end up destroying your furnace or AC!
Another benefit of these chapters is that you are going to get a step-by-step guidance on how to add a floor heat and cold air return.
Programmable Thermostat: this item will increase your furnace idle time, save some gas in unexpected way and, also,
|
|
Double Cold Air Return Installation
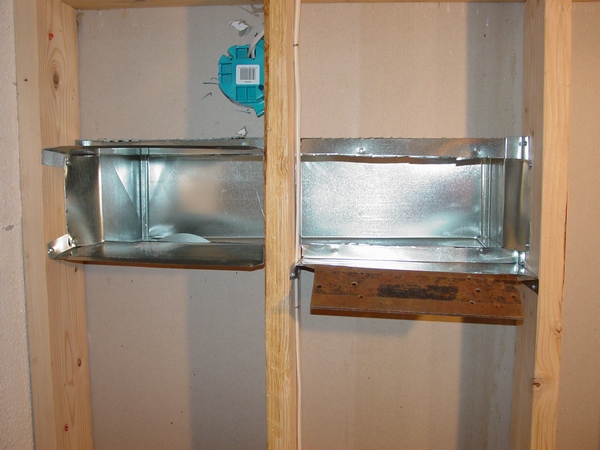
Cold air return is one of the most important parts of the finished basement project. The main goal of the cold air return installation is to make air circulation. In the winter time it will remove cool air off the floor and help replace it with warm air from the supply registers, in the summer time it will remove moisture and create a healthy environment.
Double cold air returns are necessary to use in large basements or in basements with a big open space. If basement has bedrooms it would be a good idea to have a cold air return for each room, otherwise one double cold air return would be more than enough.
Of course, if you have a zoning system where one zone works only for the basement you might need more returns, but in the basement it’s always a good idea to have less cold air returns than supplies!
If you found your way to this page I can assume that most likely you are interested in the double cold air return installation. Some of the visitors of my website already purchased an access to the paid page and I’m not surprised why. Recently I've spent more than an hour looking for DIY information on how to install a cold air return in general and a double return in particular, but didn’t find anything! I dug through hundreds of websites and found out that only my website can give you a comprehensive step-by-step explanation with pictures of installation, tools and materials!
|
Basement Cold Air Return in Pictures
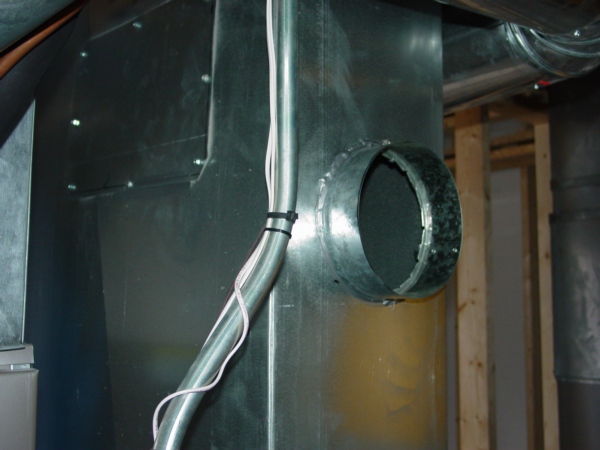
On this page, you can see pictures of all materials and tools necessary for installation. Pictures, which represent installation, are set in a sequence in which the installation was executed. There are 15 pictures of tools and materials and 13 pictures of actual installation.
As you can see in the picture on the left the original builder put a window too close to the furnaces! He probably thought that all this aria - from the furnaces, down to the window's end will be just enough for an entire storage-mechanical room, but a homeowner had a different opinion. However, because of that I didn't have enough room for a cold air return to the left, so I ran it to the right.
In addition I've included some brief explanations, which made this page twice as valuable!
Installation on the paid pages might not exactly describe your upcoming project. However, it will give you an important example of how this type of installation should be done. In addition, it will open the gates for as many questions as necessary to make sure that the job is done right.
In order to gain an access to the Basement Cold Air Return Installation in Pictures page you have to pay an access fee of $1.86. Just click on the “Buy Now” button below. Once you pay, you will gain an instant access to the page! This page is the part of the Finished Basement Edition e-book. Click here and save.
|
Cold Air Return in Basement
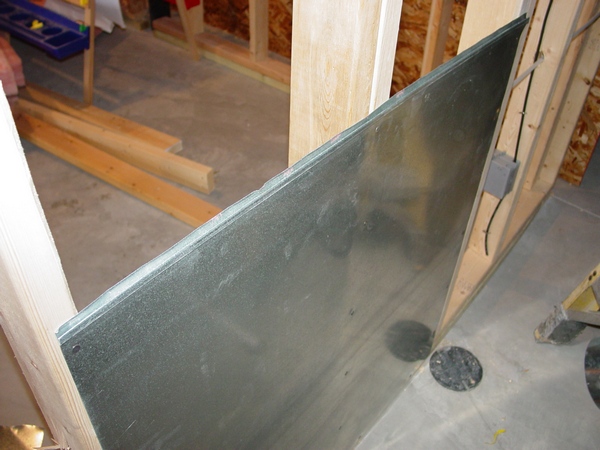
Return air ducts in wall cavity
A cold air return vent can help keep a finished basement warm by removing cold air and recirculating it through the HVAC system. Here are some tips for installing a cold air return vent in a basement:
Placement: Place the vent lower on the wall or floor where cold air sinks.
Space: Leave 6–12 inches of space in front of the vent.
Number of vents: Ideally, have one vent in every room, but at least two or three.
Avoid obstructions: Make sure nothing is blocking the vent, like furniture or clothes.
Run the furnace fan: Running the fan constantly mixes cold air from the return vents with warm air in the house.
Other ways to heat a finished basement include:Adding registers to the HVAC system
Installing a wood pellet stoveUsing electric space heatersInstalling electric baseboard heatersInstalling basement radiant floor heating
When people are finishing their basements off, they are usually creating a mechanical room. This room is serving not only the purpose of separating noisy heating equipment such as furnace and water heater, but also serves as a storage room. From
|
Cold Air Return from Interior Wall
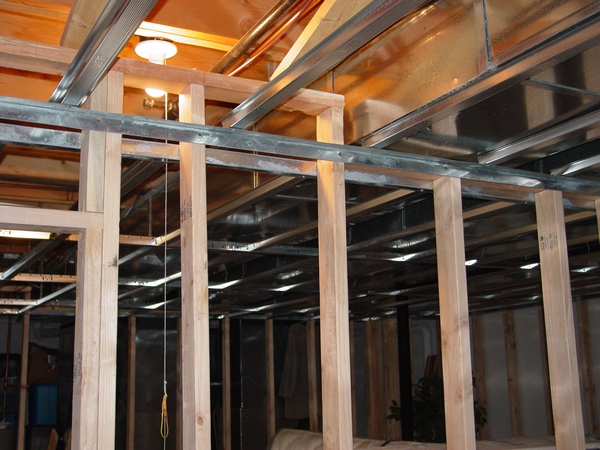
A "cold air return from an interior wall" refers to a vent located on an interior wall within a home that draws in cool air from a room, allowing it to be recirculated through the heating and cooling system, typically positioned low on the wall to effectively capture cooler air that sinks to the floor.
Key points about cold air returns on interior walls:
Function: They pull in cool air from a room, enabling the HVAC system to maintain a consistent temperature throughout the house by recycling that air.
Placement: Usually situated near the floor on interior walls, as cold air tends to settle downwards. Importance: Proper placement of cold air returns is crucial for efficient air circulation and comfortable indoor temperatures.
This chapter in three instances gives a description of the cold air return installation from the inner wall, which separates two rooms in the finished basement. In this chapter you can see pictures of all necessary tools and materials and pictures of the system elements installed. All installation is divided into three steps. All installation is divided into six steps. Also you can learn how to measure, cut, put together and crimp a round pipe. The chapter has 34 pictures; 12 pages..
|
|
Ducted Cold Air Return Installation
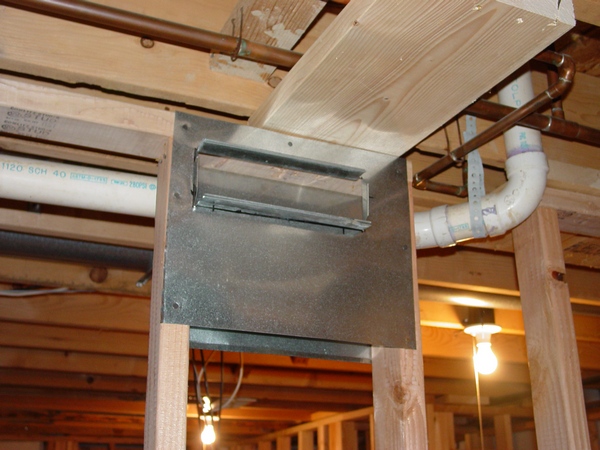
On this page you can see pictures of all cold air duct materials and tools necessary for installation.
The pictures, which represent installation are set in the sequence in which the installation should be executed. There are 20 pictures on the page. Price for the instant access to the page is $2.00.
Detailed explanation for this topic is also available. Price for the page with explanations is $2.50.
Installation on the paid page might not exactly describe your upcoming project. However, it will give you an important example of how this type of installation should be done. In addition, it will open the gates for as many questions as necessary to make sure that the job is done right.
In order to gain accesses to these pages you have to pay access fees: $2.00 or $2.50. Just click on one of the “BuyNow” button below. Once you pay, you will gain an instant access to the page!
|
Return from Exterior Wall in Pictures
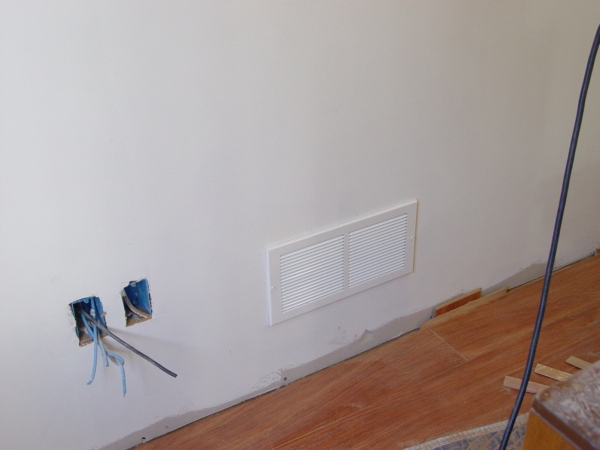
A "return from an exterior wall in a basement" refers to a vent in your HVAC system that draws air back to the furnace from a basement wall that faces the outside of your house, essentially acting as a return air vent, but located on an external wall of the basement; generally, this is not recommended due to potential issues with moisture and temperature fluctuations, making it best to place return vents on interior walls whenever possible.
Sometimes you do not have a choice, but must use an exterior wall for a cold air return in your finished basement. This type of installation requires a different approach, which I have employed for this project.
On the page, you can see 11 pictures of the tools and materials and 16 pictures of installation that represent it in the step-by-step manner.
In addition I've included some brief explanations, which made this page twice as valuable!
In order to gain an access to the Return from Exterior Wall in Basement (Installation in Pictures)
|
Two Cold Air Returns from Interior Wall
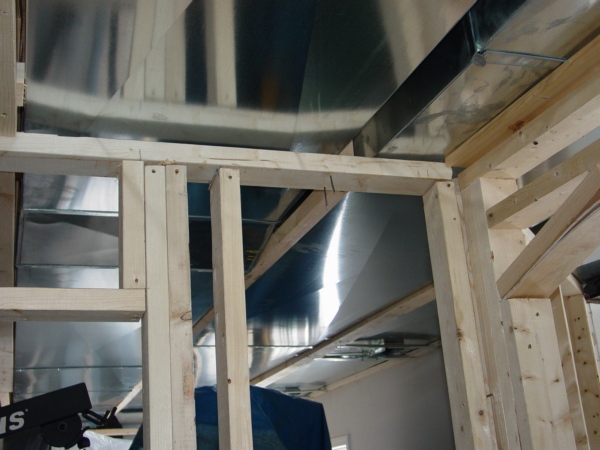
On this page, you can learn how to connect a cold air return to the wall that sits directly under the cold air duct and to the wall located under the panning.
On the page, you can see 17 pictures of the tools and materials and 16 pictures of installation that represent it in the step-by-step manner, in addition I've included some brief explanations, which made this page twice as valuable!
In order to gain an access to the Two Cold Air Returns from Interior Wall (Installation in Pictures) page you have to pay an access fee of $2.50. Just click on the “Buy Now” button below. Once you pay, you will gain an instant access to the page!
On 04/10/2016 one more instance of the cold air return was added. Now it’s become Three Cold Air Returns from Interior Wall and this one is a double return! This new addition includes 9 high quality pictures with brief explanations to them.++
|
Supply Register Soffit installation
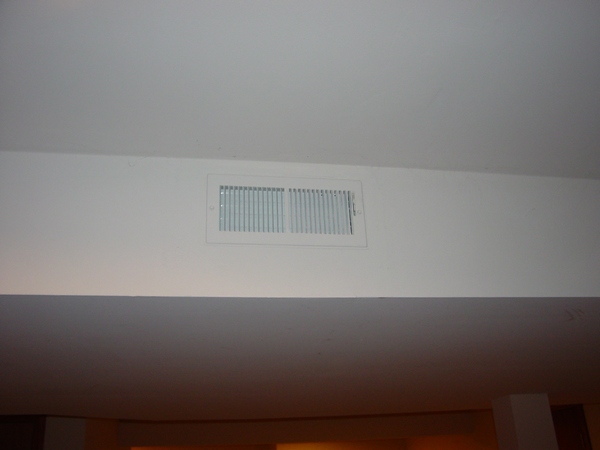
On this page you can find information how to install a supply register directly on the supply duct for your finishing basement project...
A "supply register" in a basement refers to a vent located in the basement ceiling that delivers conditioned air (heated or cooled) from your HVAC system into the space, essentially acting as the point where the treated air enters the basement from the ductwork; it's considered a "supply" register because it supplies air to the room, unlike a "return" register which draws air back into the system.
Function:
This chapter gives a description of a sheet metal sleeve installation that is a necessary element for a supply register that connects it to the duct. In this page, you can see pictures of all necessary tools and materials and pictures of the system elements installed. All installation is divided into five steps. This chapter has 20 pictures; 7 pages.
|
|
Register Installation on Ceiling Tile
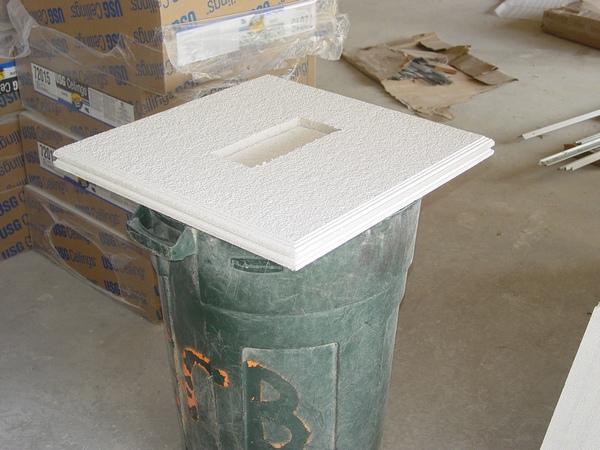
This chapter gives a description of the register installation on the ceiling tile. In this chapter you can see pictures of all necessary tools and materials and pictures of the system elements installed. All installation is divided into four steps.The chapter has 18 pictures; 5 pages
|
How to Drop Register to Shallow Ceiling
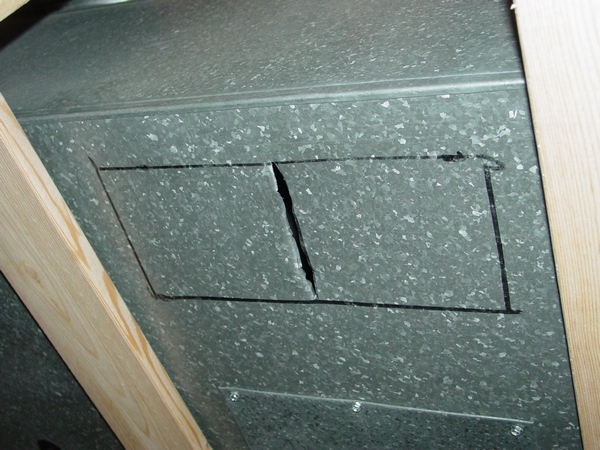
In this chapter you can find another way of how to drop a register to the soffit right below the duct. There are 19 pictures of all necessary tools, materials and installation. All installation is divided into four steps.
The chapter has 9 pages.
|
How to Extend Duct to Floor in M. Room
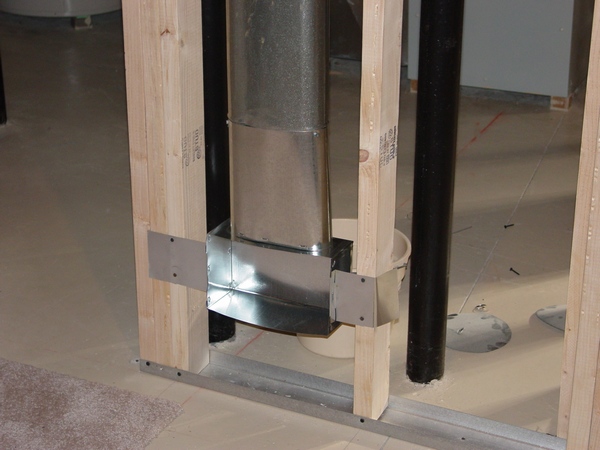
This chapter gives a description of three heat duct installations two in interior and one in exterior wall. In one instance it separates mechanical room from the rest of the finished basement. In another, a storage room from the bathroom. In this chapter you can see pictures of all necessary tools
|
Tapping Two Heats for Finished Basement
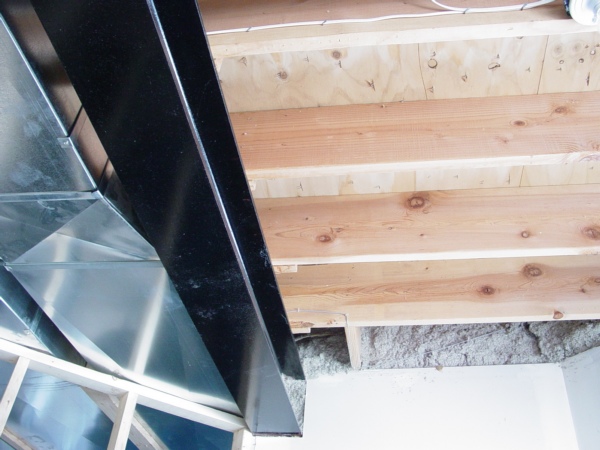
On this page, you can learn how to tap into an existing supply duct to add registers in two rooms for your finished basement project. One of the heats was tapped into the duct's top, another into its side. In addition, one of the heats can be considered as a "straight shot", while another has two "jumpers".
|
|
Bath Fan Exhaust through Brick Wall
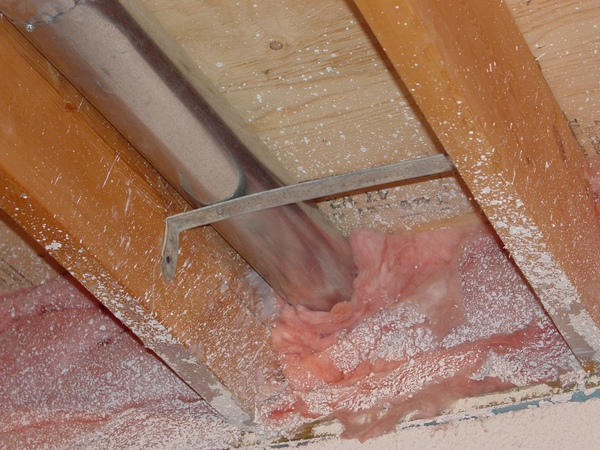
If you are making a bathroom in your finished basement you can’t avoid venting out a bath fan. Running the bath fan exhaust through brick wall gets more questions then any other type of installation.
On this page you can find out how to run a bath fan exhaust through the brick wall. If you want to know the easiest and fastest professional way of doing that, do yourself a favor and get the information for a discount price.
On this page you can see pictures of all necessary tools and materials and pictures of the system elements installed. There are 21 picture on that page. All installation is divided into four steps that represent the entire project in the making.
|
How to Run Bath Fan Exhaust through Roof
|
Venting of Two Bathroom Fans
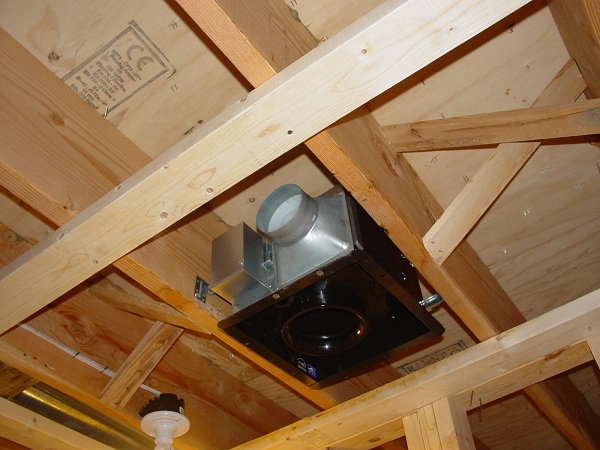
Usually when people finish their basements off they make a bathroom or two, but sometimes in addition to the bathroom, they build a steam room and sauna.In this case, one fan isn't enough and another fan should be mounted in a dress room in front of the steam room.
On this page, you will learn how to exhaust both fans in a single pipe and how to vent it through the brick wall.
On the page, you can see 12 pictures of the tools and materials and 13 pictures of installation that represent it in the step-by-step manner.In addition I've included some brief explanations, which made this page twice as valuable!
In order to gain an access to
|
Duct Span Removal and Reinstallation
Hello, Ed! I am doing some structural work in my basement and the only way to get in the steel is to take down a span of ductwork, or to cut it. It looks like I can take out the piece I need to, it's about 3 feet long, on one end is an elbow that turns it upstairs through the floor, and the other end joins a larger network that comes from the furnace.
I'm not afraid of home repairs, but I am a novice when it comes to HVAC. Is this something I should be able to swing on my own? If so, how do I go about removing the bands that connect the pieces, removing the piece I need to get out of the way and later reconnecting it? Installation on the paid page might not exactly describe your upcoming project. However, it
|
|
Tap Takeoff into Duct
I am installing a partition wall between the mechanical room and the semi-finished part of the basement. The semi-finished part has carpet, painted walls. But, I do not intend to install ceiling.
I want to tap into the existing duct work for air-conditioning / heating.
Since there will not be any ceiling, I could just use a round pipe and elbow to blow the incoming air from the top. For the return I need to install something in the wall yet to be built. I am not familiar with all of different types of ducting parts and tools. Therefore, I was hoping that your website could be useful.
Any help will be appreciated, even if it costs.In this chapter, I will explain how to tap a Take-off into existing duct and how to do a basement heat run. In order to cut a take-off in you have to:
|
Ductwork Relocation
People who want to finish their very low ceiling basements must fight for every single inch of it space! Unfortunately, most of the heating...contractors, while they are installing ductwork, do not consider it.
On the pages dedicated to this issue, on one page you can look at the 15 pictures without any explanations and see entire project in the making. In addition, you can purchase another page with a full-scale step-by-step explanations to it.
What you can see in the picture above is the installation before I made some changes. Of course your case could be different, so after you read on the page Pay Pal will provide you with my e-mail address and then you can send me some pictures and ask all your questions about installation in your particular case!
|
Re-run of Heat Runs
On this page, you can find a description of how to re-run a heat run, which is set in the middle of the basement's ceiling and by exterior wall in a more suitable area for your finished basement project place. Here you can see pictures of all materials and tools necessary for installation.
Pictures and explanations that represent installation are set in the sequence in which the installation should be executed.
If you are doing a finished basement project, most likely, that you are going to deal with this problem on your hands. So, stop inventing a bicycle! If you are finishing your basement off yourself you are already saving a lot. Just give yourself a bit of respect – save some time and some money on the unnecessary mistakes!
Installation on the paid page might
|
Bathroom Heat
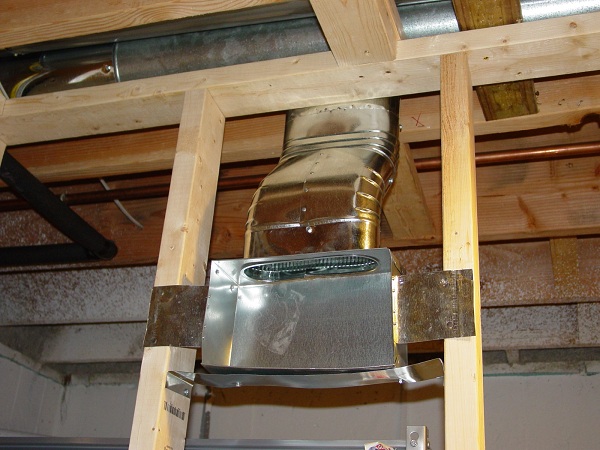
If your bathroom is located somewhere in the middle of your finished basement, you do not need to supply too much air into it. You just need a vent to compensate air losses to the bath fan and not much else.
On this page, you will learn how to tee-off an existing duct, which is working for the adjacent storage room in order to rout some air to the bathroom.On the page, you can see 12 pictures of the tools and materials and 7 pictures of installation that represent it in the step-by-step manner.
In addition I've included some brief explanations, which made this page twice as valuable!
In order to gain an access to the Bathroom Heat for Finished Basement (Installation in Pictures) page you have to pay an access fee of $1.86. Just click on the “Buy Now” button below. Once you pay, you will
|
|
Installation of Combust. Air Intake
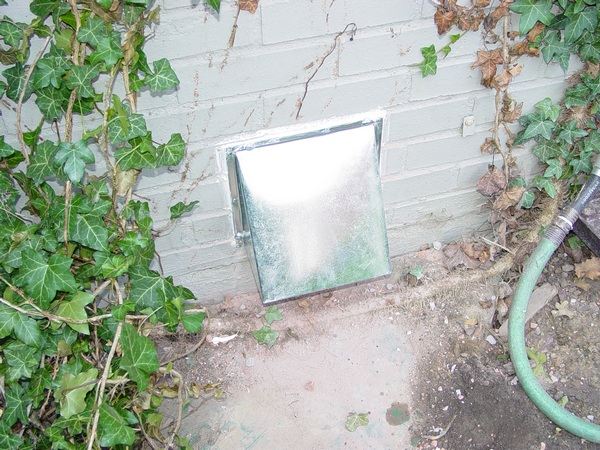
Combustion air is crucial because it provides the necessary oxygen for fuel to burn completely, ensuring safe and efficient operation of appliances like furnaces and water heaters; without adequate combustion air, incomplete burning can occur, leading to the production of harmful byproducts like carbon monoxide, which can be extremely dangerous to human health due to its odorless and colorless nature.
This chapter from the Energy Saving Edition book gives a detailed description of the Combustion Air Intake installation, which according to code must be an important element of your HVAC...
|
Combustion Air Intake in Pictures
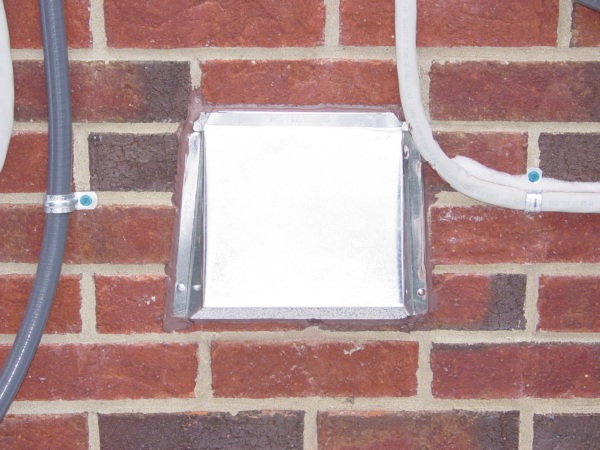
For years, I was preaching about high necessity of the combustion air intake, but did not have one installed in my own house. I have both - high efficiency furnace and a water heater and a water heater. Key points about combustion air: Safety: Insufficient combustion air can lead to carbon monoxide buildup, posing a serious health risk. Efficiency: Proper combustion air allows for complete fuel burning, maximizing heat production and minimizing energy waste. Appliance function: All fuel-burning appliances require a continuous supply of fresh air to operate correctly. Ventilation: Proper ventilation systems are
|
Installation of Fresh Air Intake

If you already have a fresh air intake it’s important to determine how much fresh air you really need. In order to do that you have to insert a volume damper in the fresh air intake and repeat the above test. As you probably understand fresh air intake brings unconditioned air from the outside and furnace or A/C must increase their cycles to heat or to cool this air. By dampering the fresh air duct, you will reduce the cycles and save some energy and money!This chapter from the "Energy Saving Edition" book gives a detailed description of the Fresh Air Intake installation, which according to code must be an important element of your HVAC ductwork system...
|
Stop Cold Air from Combust. Air Intake
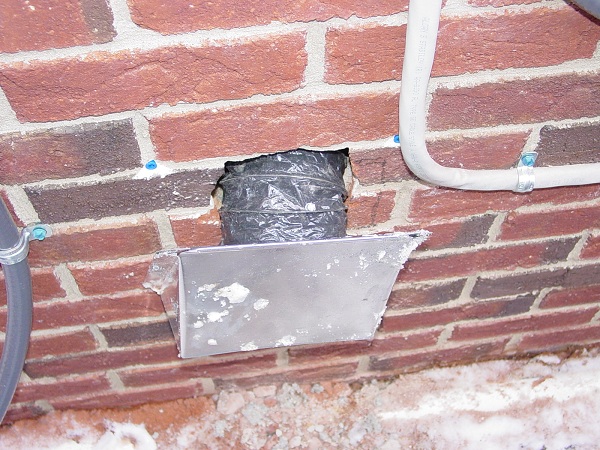
For years, I've heard about these issues related to the combustion air intakes, but never faced it myself before. However, recently I install one in my house and now I joined a legion of people who are trying to resolve this inconvenience once and for all!
At first as many of you, I've searched the web and all the solutions that I found there were just laughable:
1. Drop the pipe down into an empty 5-gallon bucket.
It doesn't work. You can try it at home just as I did - the result is obvious!
2. Forming very large P-trap with the flexible duct, I am
|
|
Closing Supply Registers
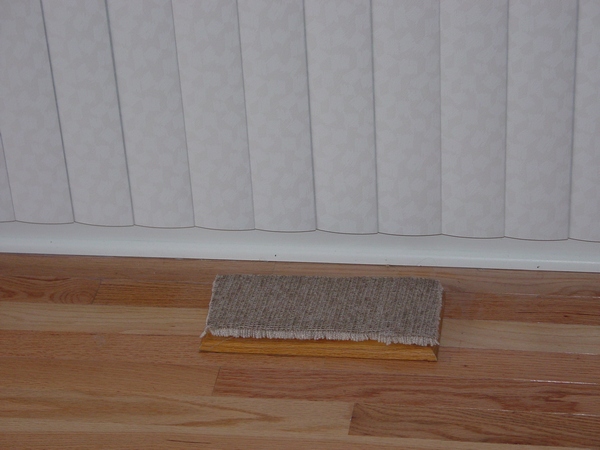
The basic idea behind this – you have to close supply vents in the rooms, which you do not use and it will conserve energy, and save money. I tried to do it in my house and I have discovered the fact that if I’m closing all vents which I’m thinking are unnecessary at the time I would spend even more energy than before. So, what do you have to do and how? My idea, and after you read this chapter you can try it in your house, is.....My house is a colonial with a furnace in the basement and the thermostat is located on the first floor. The furnace is 80000 BTU-s 90+ Carrier with 1200 cfm output. That means that the warmed-up air should be distributed by twelve 6” heat runs. However, in my house I have 19 heat runs on the first and second floors plus 4 in the finished basement, which ........ My house has:
Three bedrooms with two bathrooms upstairs and there are two heat runs in each bedroom and one heat run in every bathroomOn the first floor there is 11 heat runs
In the basement – 4
In order to save energy I am closing down .......
In addition, I keep all doors on the second floor ...... As a result.....
As you probably already figured it out it is kind of a big job: every day walk around your house and fool with the floor vents! No, not at all, I made covers from .......
However, here is one thing you have to take into consideration. I have built the HVAC system for my house by myself and I put some extra heats on the first and on the second floors. So, if you will try this energy saving tip in your house and it not gives you a reduction in the furnace’s cycle time or it will rise output temperature in your furnace you have to add one or two heat runs to the first floor.
|
Closing Cold Air Return Grill
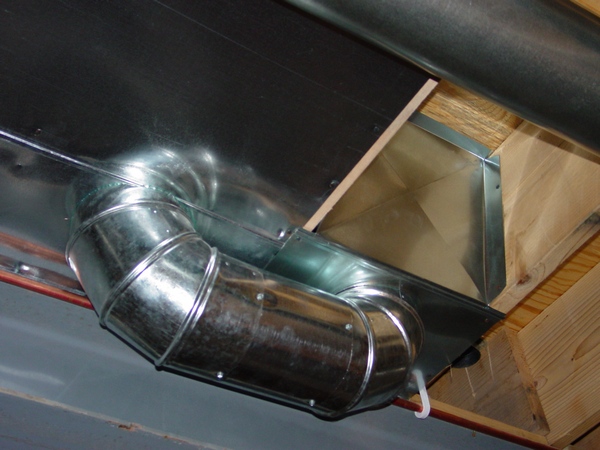
As everybody knows the cold air sinks down, but the warm air rises up. For example in the summertime, when warm air fills your house you have to run it through A/C coil to cool it down. As your A/C unit picks upwarm air from the ceiling, it will be replaced by cool air coming from the supply vents. This set up also helps you to save some energy because A/C unit is working more efficiently! (Watch the video below).
In the wintertime as you probably also know cold air is concentrating near the floor and over the time it fills house up to the thermostat’s level. So if you have .... However, what is most important to understand that it’s going to add more comfort to your house and also save some money because it is reducing the furnace’s (heat pump) working cycle!In the first picture above, you can see a double cold air return in the corridor on the second floor where one of the ..... In addition, to the left hand side is another double cold air return that .....
In the second picture, you can see ...... I hope you understand that it’s ..... In the summertime, I will put .In the third picture, you can see my master bedroom’s wall where I also have ..... This actually not only saves me some energy but make this room very comfortable, because once furnace or A/C start working I feel the difference right away!As you can see in my house I have three..... (one more in the basement) and along with the others energy saving tips it gives me 20% saving on my utility bill. In your house you can make more .....!
If you decide to use this energy saving tip in your house you may have difficulties with the cold air return grill installation it’s why I'll give you some explanations to this topic in the chapter below.
|
How to Save Energy on Humidifier
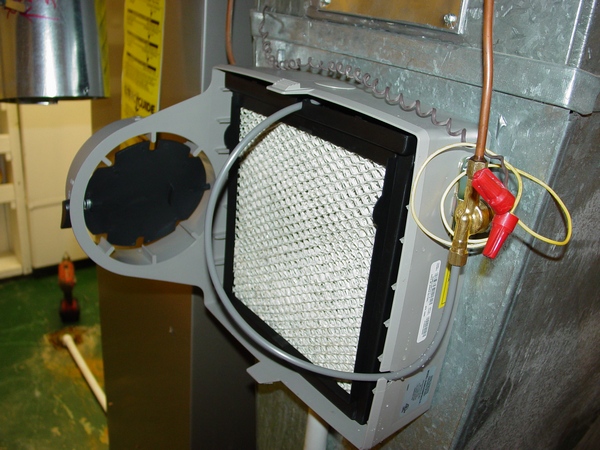
For buildings with a forced-air furnace, a humidifier may be built right into the furnace. They can also protect wooden objects, antiques and other furnishings which may be sensitive to damage from overly dry air In colder months, they may provide substantial energy savings, since as humidity increases, occupants feel warm at a lower temperature. These units are typically called bypass humidifiers (because they are connected between the heated and cold air return ducts, using the pressure difference between these ducts to cause some heated air to make a bypass through the humidifier and return to the furnace). The humidifier should usually be disabled during the summer months if air conditioning is used; air conditioners partially function by reducing indoor humidity. There are three basic styles:Drum style: A pipe brings water directly to a reservoir (a pan) attached to the furnace. The level of water in the pan is controlled by a float valve, similar to a small toilet tank float. The wick is typically a foam pad mounted on a drum and attached to a small motor; hot air enters the drum at one end and is forced to leave through the sides of the drum. When the hygrostat calls for humidity, the motor is turned on causing the drum to rotate slowly through the pan of water and preventing the foam pad from drying out.
Advantages include: Low cost Inexpensive maintenance (drum-style pads are cheap and readily available)
Disadvantages include: Requirement for frequent (approximately monthly) inspections of cleanliness and pad conditionWater evaporation even when humidification is not required (due to the pan of water which remains exposed to a high velocity air stream)
|
How to Save Money on Bath Fans
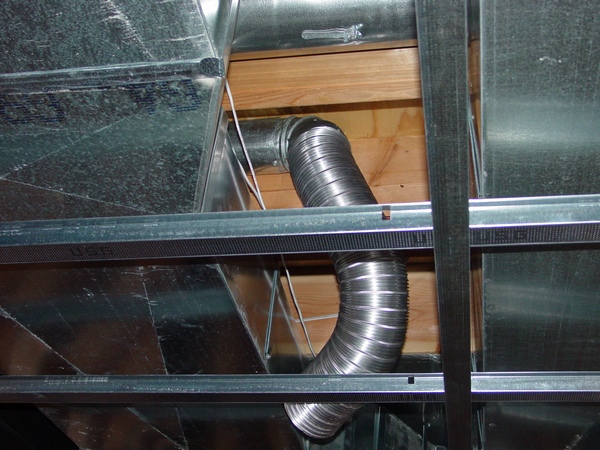
For the last 20 or so years, the bath fans have been set in the building code and if your house not much older than that most likely that you have a bath fan in every bathroom. Of course, it is very important to have them. You can find a lot of information about how important to have them in your house, such as: “Moisture can be a problem in the bathroom. It can cause paint to peel, doors to warp and the accumulation of mold spores. A simple exhaust fan can greatly reduce or eliminate the many problems created by excess moisture”. However, believe me nobody tells you that through the bath fan you loose a lot of the conditioned air! Several years ago, I looked at the soffit cap, where the bath fan exhaust was terminated, and saw a couple of icicles hanging down! I knew that that bath fan never has been running because it located in the laundry room. I walked around the house and found that there are the same icicles on the other soffit caps. Therefore, I have decided to save some energy and of course money and put pieces of paper between the unit cover and the casing of the fan. However, I have not blocked the air completely to prevent the motor from overheating if I or somebody else in my family turns the fan on.
Of course, this energy saving tip is not for everyone. If you spend hours in the bathtub, or very smell sensitive you need the bath fan running in the full strength, otherwise this energy saving tip can significantly increase your furnace idle cycle.
Below you can learn how to install bath fan in your basement or in your attic.
|
|
Microwave Kitchen Exhaust
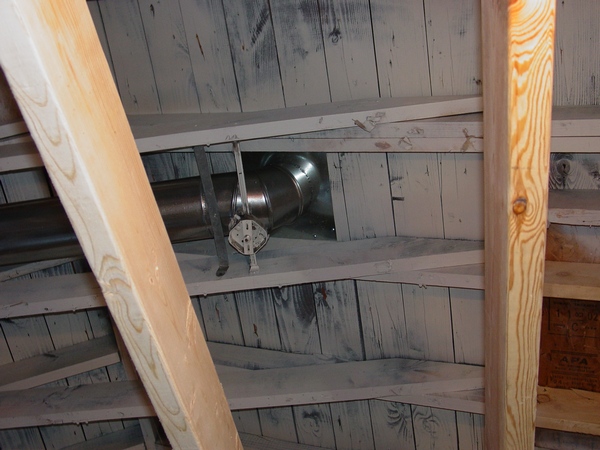
A microwave range (or "over-the-range microwave") combines the function of a microwave with a basic ventilation system, while a kitchen hood (or range hood) is primarily designed to effectively vent smoke, grease, and odors from cooking directly outside, making a kitchen hood the better choice for heavy cooking, especially if you want to significantly reduce cooking smells in your kitchen, while a microwave range can be a space-saving option for lighter cooking needs where strong ventilation isn't crucial.
This chapter describes all three cases of the kitchen vents installation: kitchen hood vent, microwave oven hood vent, and Jenn-Air fan vent; explains the roof and wall cap terminations; covers basement and attic ductwork...
|
Basement Kitchen Hood
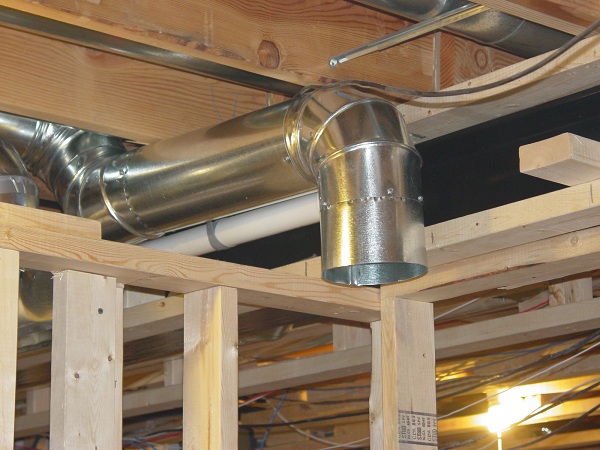
A range hood is crucial in a finished basement kitchen because it effectively removes smoke, grease, odors, and moisture produced while cooking, which can be particularly problematic in a basement due to potential ventilation challenges, preventing the buildup of unwanted fumes and improving indoor air quality in the space.
Moisture control: Basements tend to have higher humidity levels, and cooking activities add further moisture, making a range hood essential for managing moisture levels and preventing mold growth. On the rare occasion, people who finish their basements off put an additional kitchen. This kitchen as any other may have a microwave hood or kitchen hood and on this page you can learn how to install it. On this page, you can see 20 pictures of the tools
|
Toe Kick Heat Run Installation

When it comes to the ductwork, kitchen remodeling requires resolving some of the most important issues, which could arise during the remodeling process.
A Toe Kick Heat Run installation is necessary if you want to direct warm air from your HVAC system directly into the space below your kitchen cabinets, specifically the "toe kick" area, providing focused heat at floor level, which can be particularly beneficial in cold kitchens or for people who feel cold feet, while keeping the design clean and discreet by utilizing the space under cabinets that would otherwise be unused
Key points about Toe Kick Heat Runs: Targeted warmth: Unlike standard floor vents, a toe kick heat run delivers warm air directly to your feet, creating a more comfortable feel in the
|
How to Cross Break Ductwork
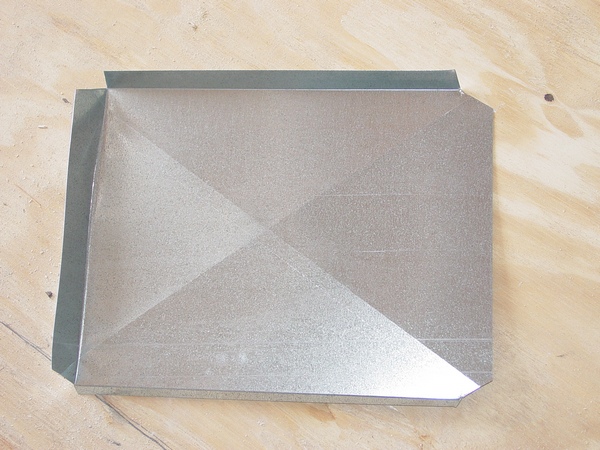
Cross break ductwork is used to add rigidity and strength to large sheet metal ducts, preventing them from sagging or vibrating due to air flow, essentially making them more stable and reducing noise by minimizing movement of the metal, especially when using thinner gauge materials; blockers are used to direct airflow within the duct system by creating specific pathways and preventing air from taking unintended routes Key points about cross break ductwork: Stiffening effect: The "cross breaks" are small bends or creases made across the width of the duct, which helps to resist flexing and maintain its shape, especially in large spans of ductwork If you are making a transition for a new furnace or any other short piece of duct you may need to learn this simple technique: Take a piece of S-cleat or a folder, as you can see it in the picture, or any straight edge
|
|
How to Repair Hole in Ductwork
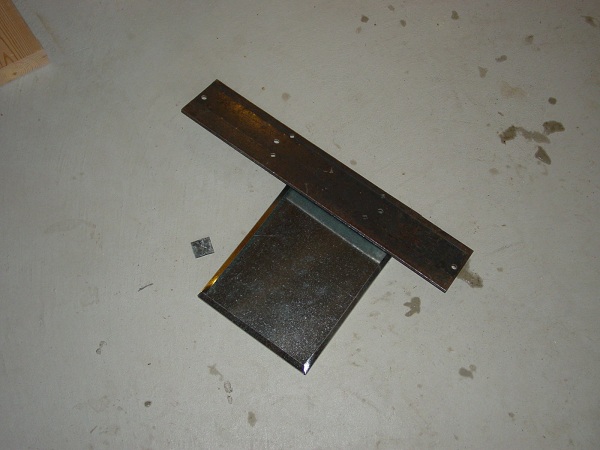
Patching holes in ductwork is crucial because it prevents air leaks, which can significantly impact your home's energy efficiency by causing your HVAC system to work harder to maintain desired temperatures, leading to higher energy bills; additionally, it helps maintain proper airflow throughout your home and can improve indoor air quality by preventing dust and pollutants from entering the system through gaps in the ducts
There are many occasions when it is necessary to repair a hole in the sheet metal ductwork or plenum. If you decided to move a register, get rid of old leaking humidifier or relocate a heat run the hole in the ductwork must be patched
|
Transition from Furnace to Plenum
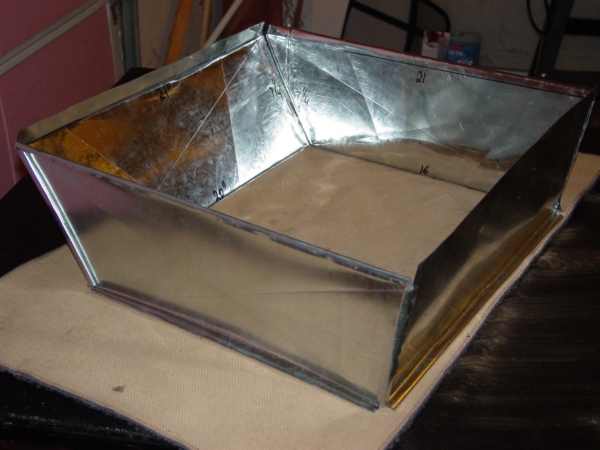
A transition from a new furnace to an old plenum is often needed because the new furnace may have different air flow requirements or duct connections compared to the existing plenum, which could lead to inefficient air distribution, uneven heating/cooling throughout the house, and potential airflow issues if the old plenum isn't properly adapted to fit the new furnace; essentially, a smooth transition is necessary to ensure the new furnace functions optimally with the existing ductwork.
When it comes to a transition between your new furnace and the old plenum you have to make one side of the future transition straight.
The best way of doing that is to
|
Round to Square Transition
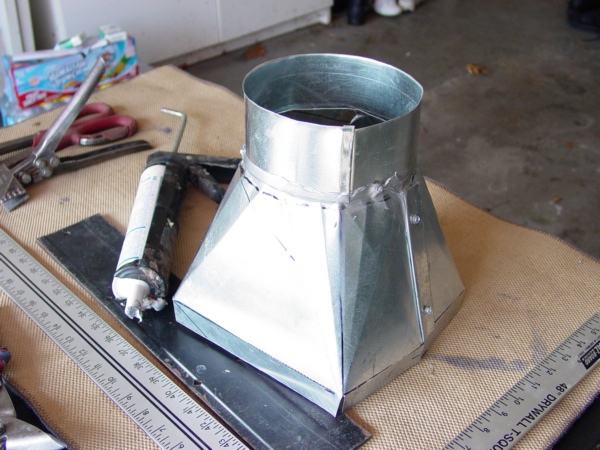
A "round to square" transition is needed when you need to connect a round duct or pipe to a square or rectangular section, typically in situations where space constraints require a change in shape, like connecting a round ventilation system to a rectangular room or fitting a round pipe into a square opening within a building structure. Key reasons to use a round to square transition:
|
How to Make Pittsburgh Lock Seam
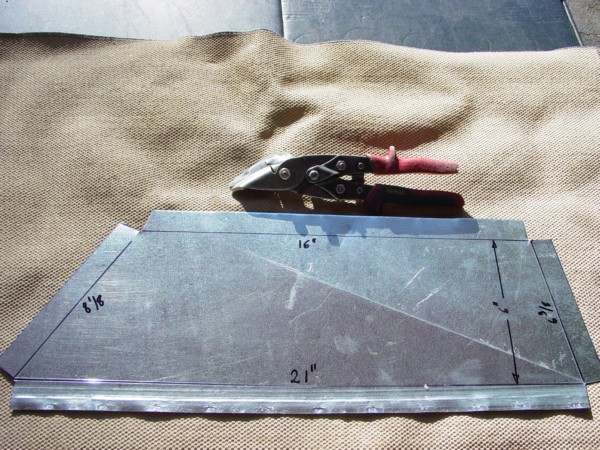
A Pittsburgh lock seam is needed when you need to create a strong, secure, longitudinal seam on sheet metal, particularly in applications like rectangular ductwork for HVAC systems, where a tight seal is crucial against air pressure, and when dealing with larger duct sizes or higher pressure situations where a simpler snap lock seam might not be sufficient; it's essentially the go-to seam for long, straight joints on sheet metal requiring high structural integrity
While marking out a 1” extension for the Pittsburgh seam make sure that your measurement is perpendicular to the part’s side (P. 1)
As you can see in P. 2 a 1” extensions must... |
|
How to Do Elbow Adjustment
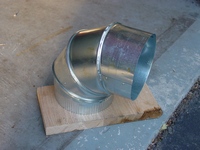
Duct elbow adjustments are necessary to precisely direct airflow in a HVAC system by allowing you to change the angle of the elbow to match the exact direction needed, especially when dealing with uneven wall placements, ceiling heights, or other variations in the ductwork layout, ensuring optimal airflow efficiency and minimizing turbulence
An elbow, which is a basic part of a jumper, consists of four parts. They are fastened to each other with a special seam. All these four parts can be moved back and forth in relation to each other that allow you to achieve definite purposes at installation...
|
How to Repair a Broken Elbow
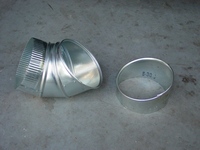
A broken ductwork elbow should be repaired because a damaged elbow can lead to significant airflow disruption, causing uneven heating and cooling throughout your home, increased energy bills due to air leaks, and potential discomfort from inconsistent temperatures in different rooms, all while putting extra strain on your HVAC system; essentially, a broken elbow hinders the efficient distribution of conditioned air throughout your house
Everyone in this trade considers a broken elbow as a waste. They can collect broken elbows and the other broken fittings and bring them back to the supply house.
|
How to Make 8x6x8 Tee Guide
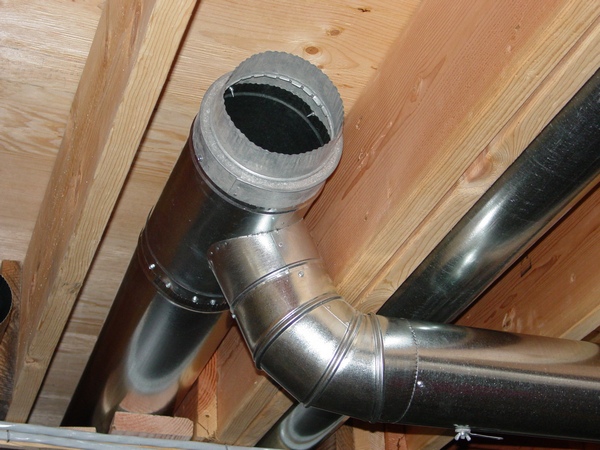
Ductwork tee fittings are used to create branch points in an HVAC system, allowing airflow to be directed to different rooms or areas by splitting the ductwork into multiple directions, essentially acting like a "T" junction where one main duct can feed into two separate smaller ducts; this is crucial for distributing conditioned air throughout a building effectively
What you are seeing in the picture is an 8”- 8”- 8” tee. This kind of tees could be pretty expensive, because there is no high demand for the fittings like this. Furthermore, if you need different kind of tee, let’s say 8”- 6”- 8”, or 8”- 7”- 8” tees...
|
How to Take Apart a Galvanized Pipe
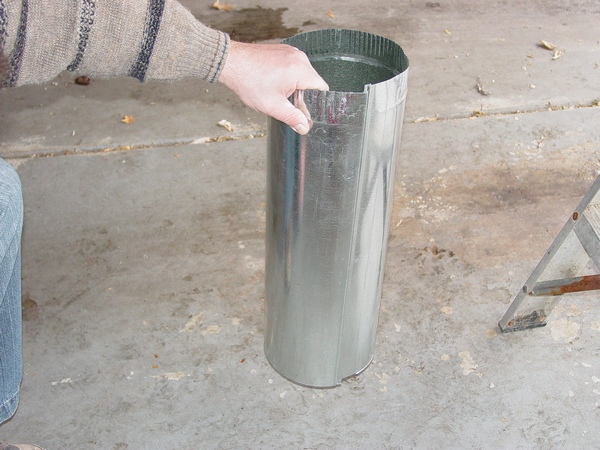
You might need to take apart a ductwork galvanized pipe to: inspect for damage like rust or corrosion, clean accumulated debris, repair leaks or cracks, modify the ductwork layout, replace a section that is beyond repair, or access areas within the duct system for maintenance or further inspection;
Recently I was working in the basement, doing heat runs, and probably I was thinking too much how to improve my website! As a result I put too many six inch pipes together – nine of them. When the job was done to my surprise I've discovered nine extra pipes all over the basement. I said to myself – it’s not a big deal!
|
|
How to Work with Rectangular Duct
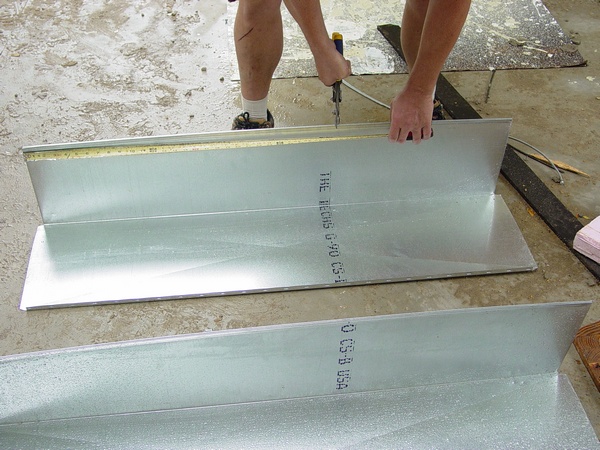
Learn how to measure, cut and put together a rectangular sheet metal duct the right way.
To measure, cut, and put together a rectangular duct, first accurately measure the required dimensions of the duct, then use a metal cutting tool to cut the sheet metal to size, ensuring straight lines and sharp edges; finally, join the pieces together using a snap-lock seam or by attaching them with screws and corner pieces, making sure to seal any gaps with metal tape or sealant to ensure proper airflow
|
How to Measure and Cut Pipe
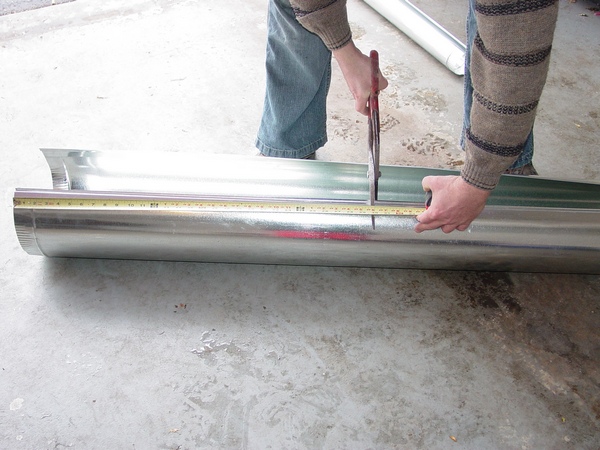
To measure and cut galvanized duct pipe, first accurately measure the required length using a tape measure and mark the cut line on the pipe with a permanent marker; then, using a suitable tool like tin snips, an angle grinder with a cut-off wheel, or a hacksaw, cut along the marked line, ensuring to always wear safety gear like gloves and goggles; finally, smooth any sharp edges with a file to prevent injuries and ensure proper fit with other components.
In order to find length of a piece of pipe you should measure a distance between...
|
How to Put Pipe Together
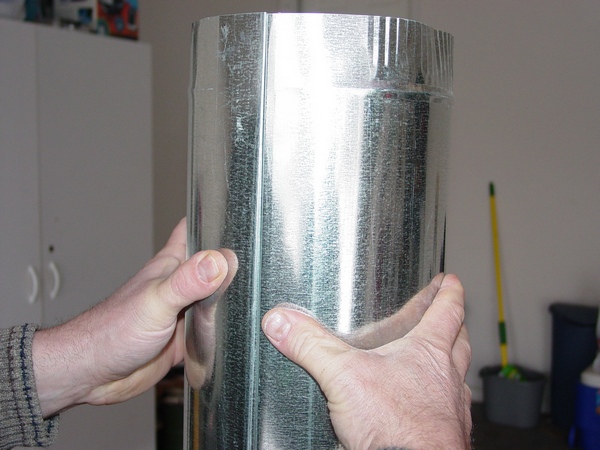
To put galvanized duct pipe together, most commonly used methods involve a "snap-lock" design where the edges of the pipe have a crimped seam that interlocks when pushed together, essentially acting like a zipper, creating a tight seal without needing additional fasteners; this is done by aligning the crimped edge of one pipe with the flat edge of the other and then applying pressure to snap them together along the seam, starting at one end and working your way around the pipe
The round pipes’ snap lock seam is designed for easy
|
How to Crimp Six Inch Pipe
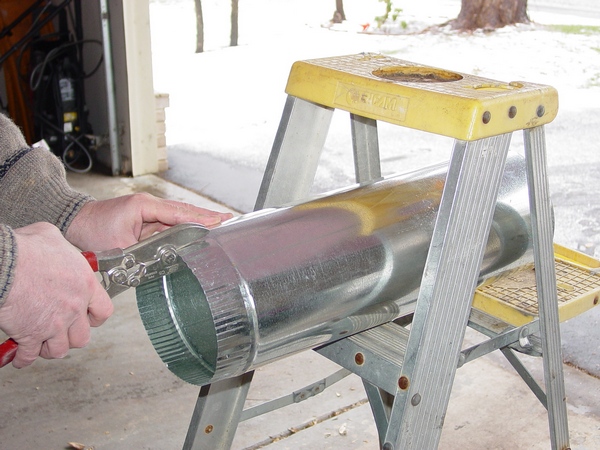
Crimping a galvanized duct pipe involves using a specialized tool called a duct crimper to slightly fold the edges of the pipe inward, creating a tighter seal when connecting it to another pipe or fitting, thus preventing air leaks and ensuring proper airflow within the HVAC system; it's primarily done to achieve a secure connection between duct sections, especially when using slip-fit joints where the pipe needs to slide into a fitting with a snug fit.
If this is a whole pipe, it is already has a crimp. However, this crimp falls short about...
|
|
Oval Stack Extension Trick
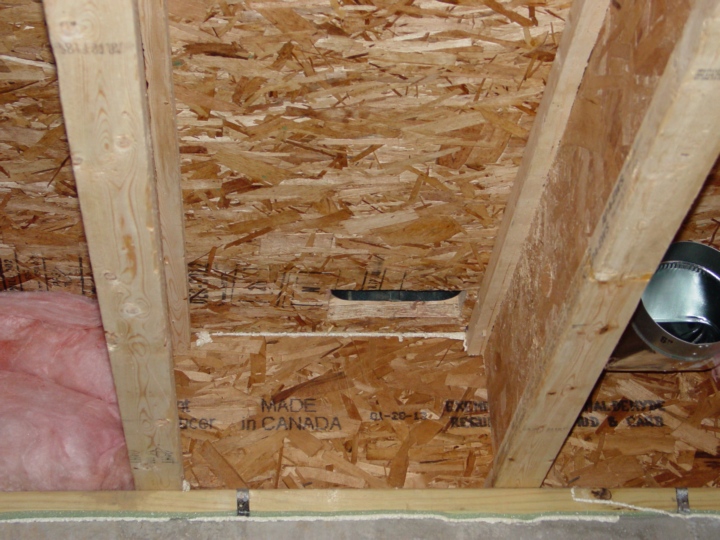
Years ago, when exterior walls were built from 2x4-s it was very important to connect an Oval 90* to Oval Stack before it has to be dropped in the basement. Not anymore! Nowadays you can just drop it for a couple of inches down just like in the interior walls and hook it up in the basement later.
The situation that you can see in the picture occurred because a rougher made some kind of math mistake. My teammate comes up with a weird idea how to fix it, but I resolve this issue in five minutes! How did I do that?
If you need the answer click on the "Buy Now" button below and get step-by-step instructions instantly for only $1.00!
|
How to Open up a Hem Tip
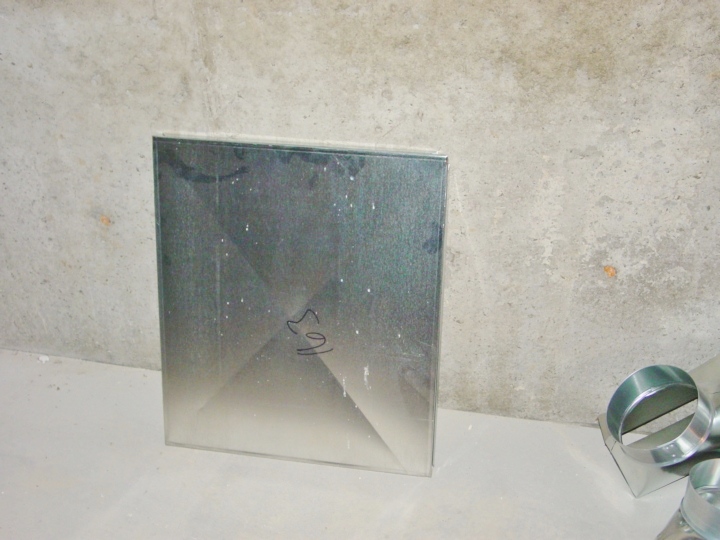
This thing in the photo is a slip-on cap. They use it as a top cap for a plenum. Normally this type of caps made on a Manual Straight Brake machine and the worker do not squeeze the hem too tight, but this one was made on the other kind of machine that rolls the hem right through. This operation makes the hem very tight and subsequently deprives an installer from making the plenum box!
However there is a simple technique that allows you to open the hem up in a matter of seconds!
For the price only $1.00 you can learn this technique on the paid page.
There are 8 pictures on the page.
|
How to Hook up a Heat Run Trick
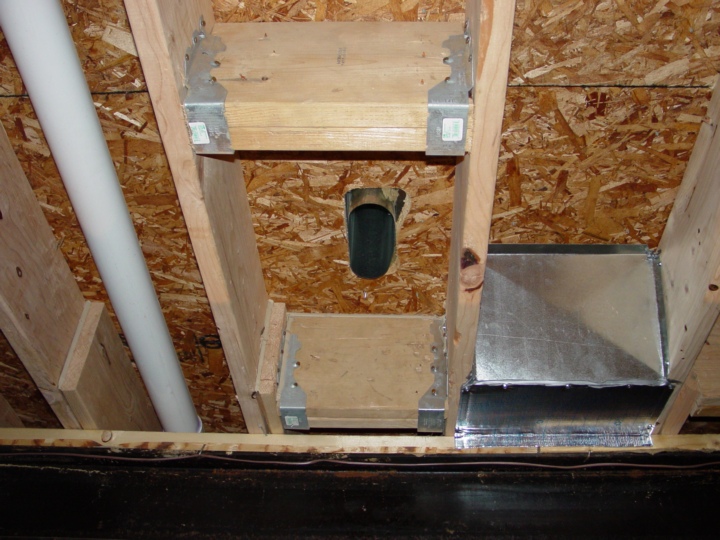
You would hook up a heat run to an oval stack extension because oval ductwork allows for better space utilization in tight areas while still maintaining efficient airflow, making it a practical choice for situations where a standard round duct wouldn't fit properly, especially when extending a vertical stack upwards through walls or ceilings
Key benefits of using an oval stack extension:
Space-saving design:
Oval ducts have a smaller profile than round ducts with the same cross-sectional area, enabling them to fit into narrower spaces between walls or ceiling joists. As you can see this heat run is surrounded by joists and 24” x 8” duct will be hung up right
|
How to Make an 8” (12”) Pipe
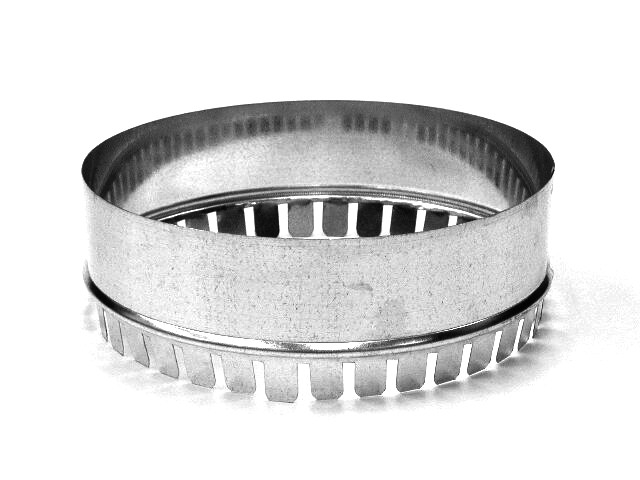
To create a larger diameter duct pipe (like 8", 12", 14", or 16") from smaller diameter duct pipes, you need to use a duct transition or "tapered" piece that gradually increases the diameter of the duct, effectively "stepping up" from the smaller size to the desired larger size; this can be achieved by either purchasing pre-made transition pieces or fabricating your own using metal ductwork and appropriate tools like a metal shear, a duct former, and a crimping tool.
Have you ever needed a 12" galvanized pipe, or maybe 14”, or 16”? If so you can easily make it from the pipes of a smaller size.
Just recently I was installing a ductwork system and noticed that the roughers didn’t extended a 12” pipe down
|
|
My Sedona Vacation Report

In 2012 I’ve been on vacation in Sedona, AZ.
As you can see in the photos below, this small town has gorgeous terrain, but their stupid traditions of the HVAC rooftop unit installations significantly diminish beauty of this place. My wife and I were renting a condo on the second floor of the condo building and in the photos below you can see how those rooftop package units look like up on the roof. But what's inside may be even worse!
First of all inside is very noisy. The noise that is coming down from the roof is very loud and the air that is blowing from four commercial stile registers could be used to inflate a rubber pontoon… Furthermore - the system is short cycling unnecessary often.
As you can see in the photo above, they set a thermostat right in the way of the airflow from the register and it helps to satisfy it ahead of time. Also they are using single pane windows that are losing cold to the outside very fast.
|
How to Make a Duct Tip
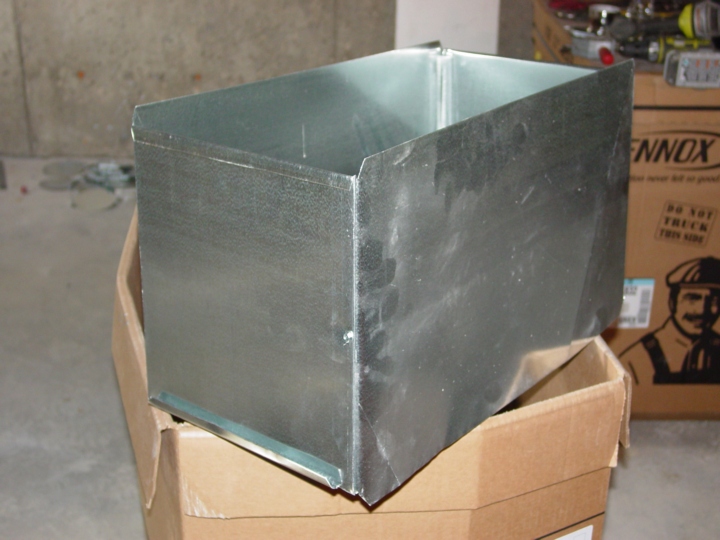
A rectangular duct is often necessary when you need to fit airflow into a tight space that wouldn't accommodate a round duct, like between ceiling joists or within wall cavities, effectively maximizing air delivery within limited space constraints while still achieving the desired airflow volume; essentially, a rectangular duct allows you to optimize the use of available space compared to a round duct in certain situations.
Key points about rectangular ducts: Space constraints:
The primary reason for using rectangular ducts is to fit them into narrow areas where a round duct wouldn't be able to fit, like between floor joists or within wall cavities
I wouldn’t say it happens daily, but sometimes you have to make a piece of duct.
Of course if you need 8’ or even 4’ of duct it would be better to order it from the shop. But if you need a shorter piece, then just make it from the duct you have!
|
How to Make Offset Transition
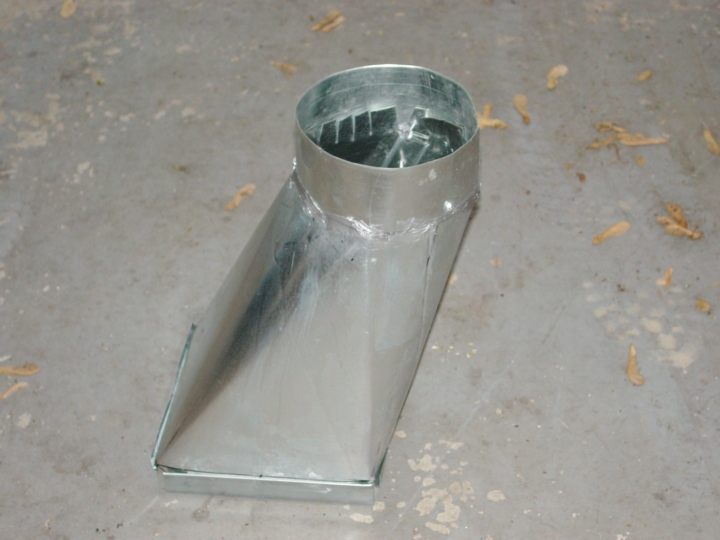
A "square to round offset transition" is needed in situations where you need to smoothly connect a square-shaped duct or pipe to a round one, which is often necessary in applications like ventilation systems, plumbing, or industrial machinery, where different components might have different shapes but need to be connected without causing airflow disruption or fluid resistance; essentially, it acts as a gradual change in shape to facilitate a smooth transition between the two geometries Key reasons why a square to round transition is needed:
Compatibility with different equipment:
Many ventilation fans, air handling units, and other equipment are designed for round connections, so a square to round transition is required to connect rectangular ductwork to them.
Do you want to know how to make it in a matter of minutes? Do you like this 8”x 8” square to |
How to Make a Cone Reducer
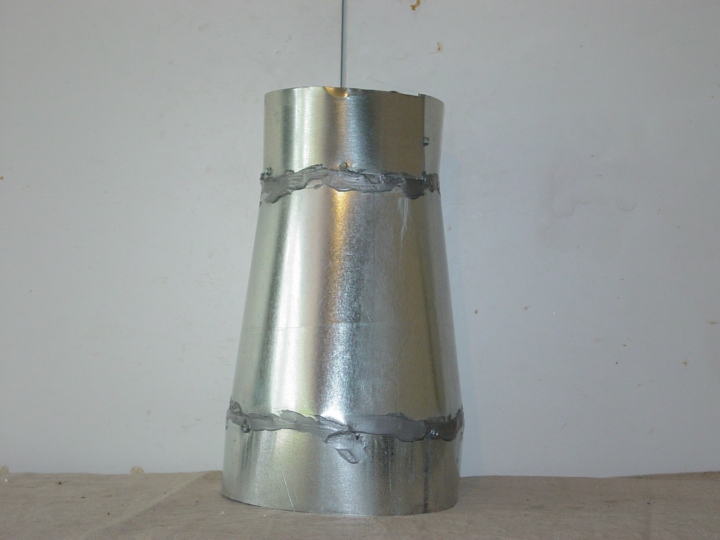
A duct cone reducer is needed to create a smooth transition between two different sized ducts in a ventilation system, ensuring optimal airflow by preventing disruptions caused by abrupt size changes when connecting ducts of varying diameters; essentially, it allows you to connect equipment or ducting of different sizes while maintaining efficient air flow
Key points about duct cone reducers: Smooth transition: The cone shape gradually reduces the duct size, minimizing turbulence and pressure loss in the airflow. Adapting to different equipment:
When connecting a smaller appliance or vent to a larger duct, a cone reducer allows for a proper fit. For example, let’s make a reducer from 8” round to 6”.
Normally you don’t need to know a precise height of the future reducer, but if you do, you may calculate reducer side's height by using the
|
|
Microwave Hood Vent Installation Manual
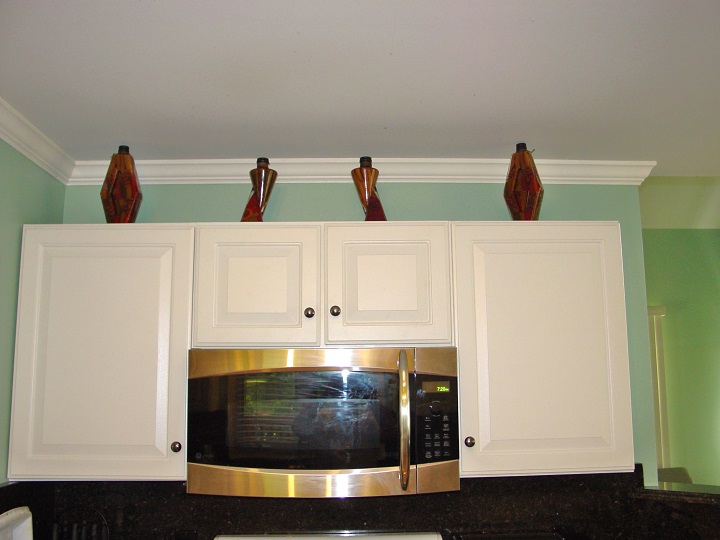
A microwave that you can see in the picture on the left top corner was working in the recirculation mode. Unfortunately it didn't serve the purpose and idea to exhaust it to the outside eventually came to fruition!
The most discouraging part of this project was microwave's location - it was sitting on the interior wall and of course you would never know what kind of obstacles you may encounter on the way through the stud and joist cavities!
However everything were resolved successfully, all obstacles were overcome and this microwave hood was vented the way you can see it in the picture on the left bottom!
|
Make Cold Air Duct Looks Straight Trick
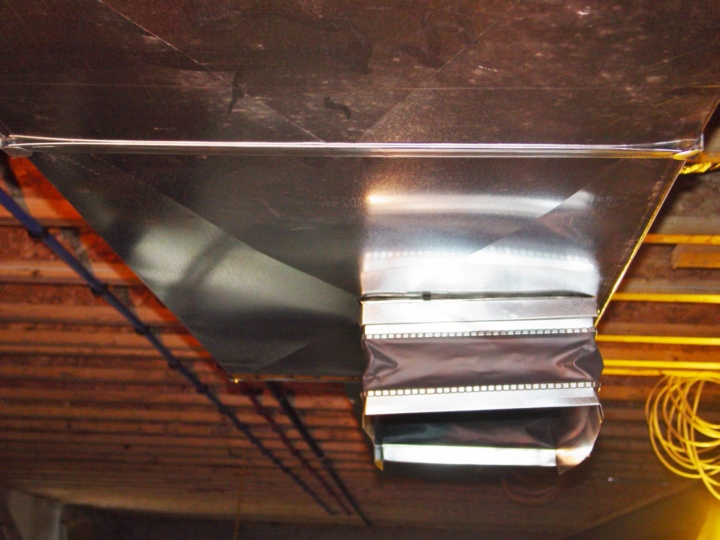
You need to make cold air ducts look straight because sharp bends and kinks in the ductwork significantly restrict airflow, leading to uneven cooling in your home by creating unnecessary friction as the air tries to navigate the turns, ultimately reducing the efficiency of your HVAC system; a straight duct allows for smoother air flow and better distribution of cool air throughout your house. As you can see in the picture to the left this duct is sagging down. Of course its not a big deal, but it looks unprofessional... So, what can you do to fix it? Some installers screw an S-cleat right next to the sagging corner, but it doesn't looks good!
|
Cut Holes with Lightning Speed Tip
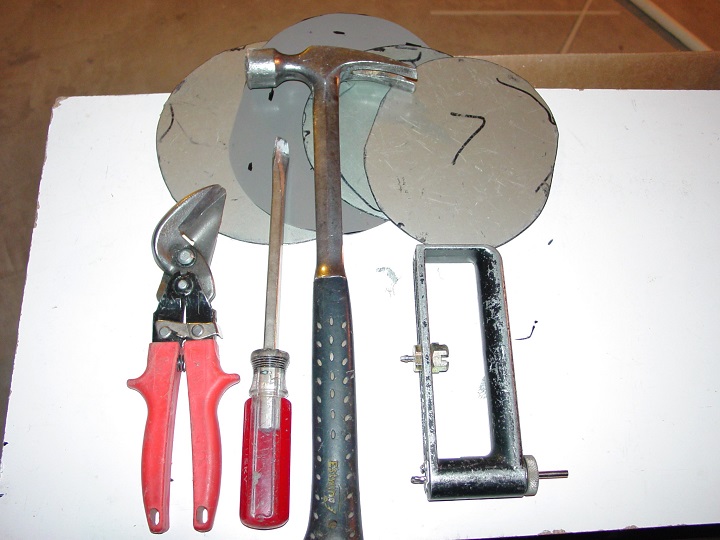
You need to cut holes in a supply sheet metal duct to create access points for connecting other ducts, vents, or registers, allowing the conditioned air to flow from the main supply duct to different rooms or areas within a building; essentially, these holes are where the air will be directed to specific vents throughout the HVAC system. Connecting to vents: The primary reason for cutting holes is to attach individual vents or register boxes to the main supply duct, allowing air to be distributed to different rooms
No, of course it isn't about red aviation offset snips or a hole cutter that you can see in the picture on the left. This tool would
|
How to Make Oval 7" and 8" Templates Tip
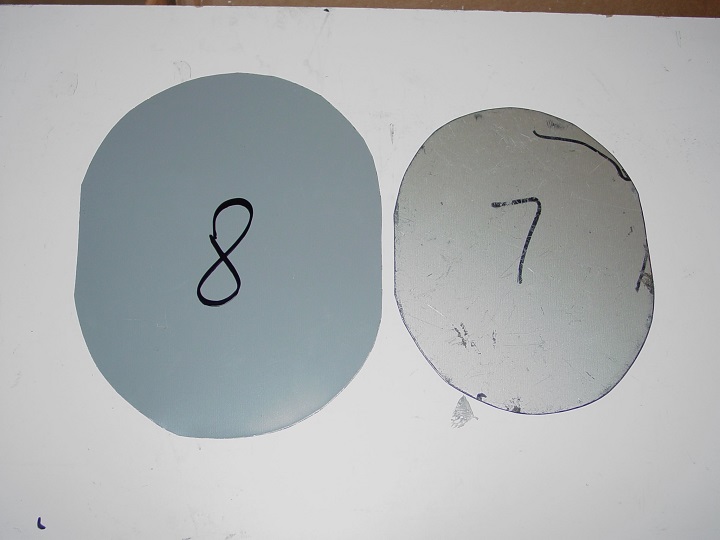
You need to cut a "takeoff" into a rectangular duct to create a branch point, allowing air to flow from the main rectangular duct into a smaller secondary duct (branch duct) that will then distribute air to a specific area like a room, essentially acting as a dedicated air supply to that space; this is particularly important when working with rectangular ductwork in situations where space constraints make it the most efficient option for the main duct run.
I know that many of you do not use templates at all! They just trace take-offs and that's it - done!! But it's wrong, it's sloppy and unprofessional. The holes made this way could be bigger or smaller and if you
|
|
How to Work with Round to Oval 90* Boot Trick
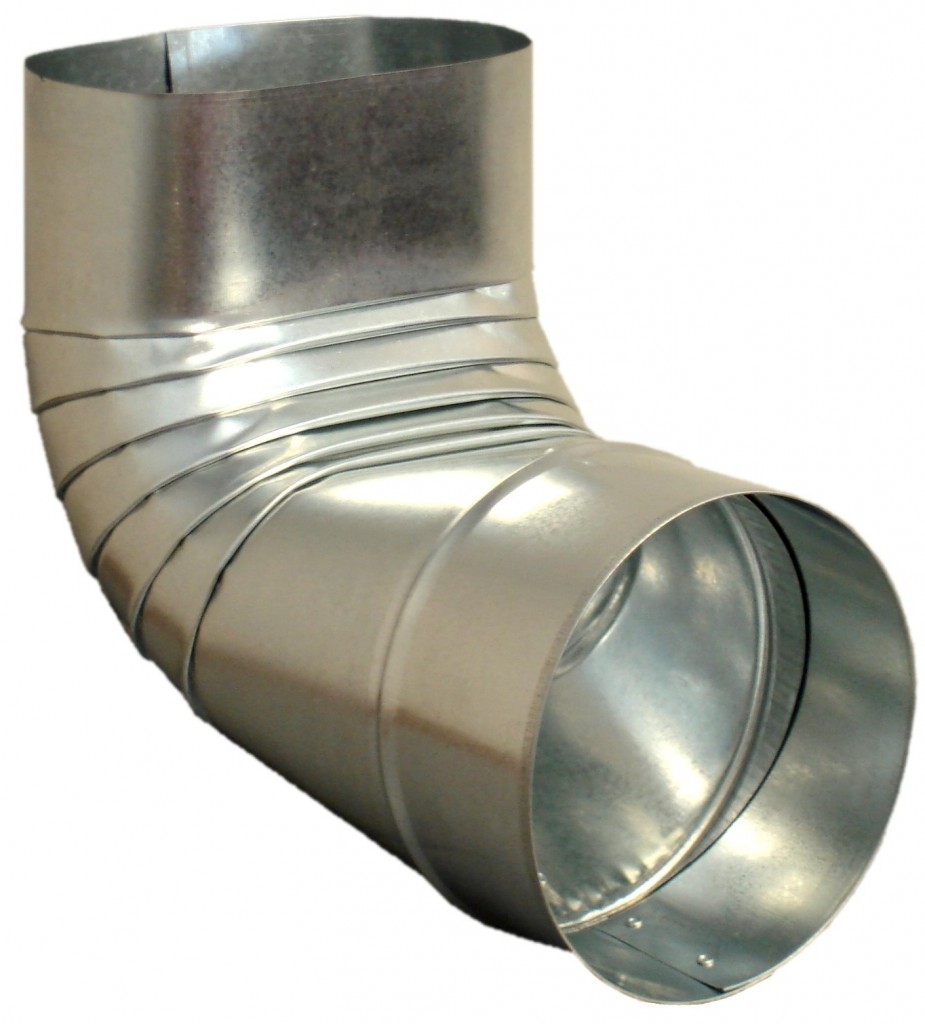
If you are working on the heat-runs and using Round to Oval 90* Boots there is no problem if joists are 9" tall. However it isn't always the case... If joists are 12" or even 16" tall and your heat run is very short then what would you do?
Of course there is a simple solution - just add a short piece of pipe and keep working...
But is it a smart solution? Well, in this case you will spend some time on measuring, cutting and installing this freaking piece! You can do better than that!
|
How to Use Sawhorses on Job Site Tips
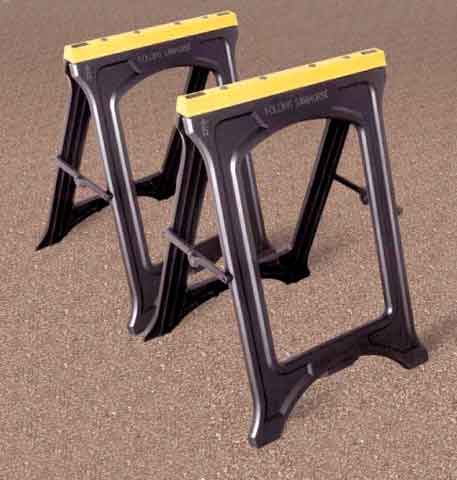
"For a job site workbench I use two folding sawhorses and a 30" x 80" oak veneer hollow core door slab"??? - Well, if you are a seasoned installer and afraid to get any back problems sawhorses are irreplaceable! But a door??? In my opinion it's overkill! I cannot picture myself running around with a door slab and making a fool out of myself... While watching me carrying a 30" x 80" door down to the basement all the other trades working with me at the house they may whisper to each-other: this guy is a dangerous idiot, stay away from him... And of course
|
Double Return for Finished Basement Installation in Pics
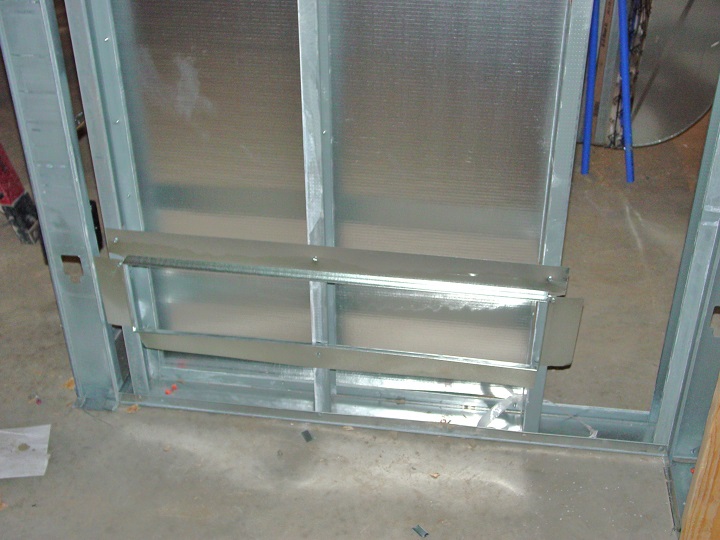
A double return for a finished basement is generally recommended to ensure proper air circulation and temperature control throughout the space, as it allows for more balanced air intake from different areas of the basement, preventing uneven cooling or heating and promoting better airflow, especially if the basement is large or has multiple rooms with closed doors
Learn how to install a double cold air return in your finished basement project in the case if you are using metal studs, thermo-pan and flex...
|
Hooking up Kitchen Hood Installation in Pictures
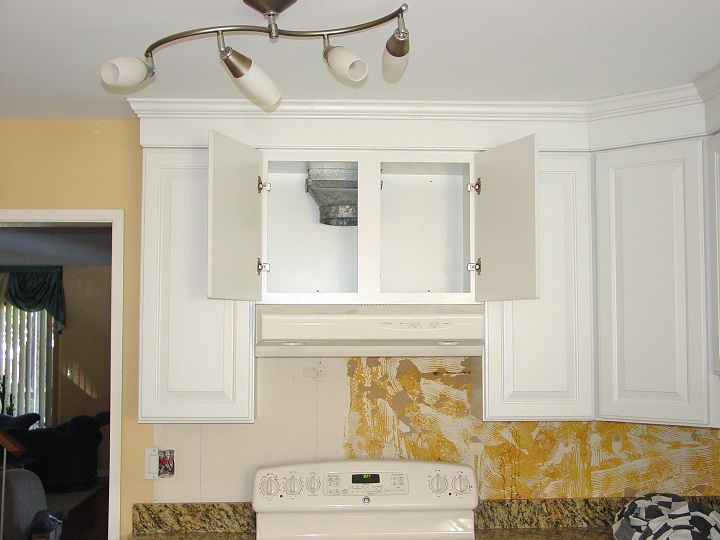
You need to hook up a kitchen hood, also called a range hood, to effectively remove smoke, steam, grease, and cooking odors from your kitchen by venting them outside, keeping your cooking area clean and free from airborne contaminants while you cook; essentially, it helps maintain good air quality in your kitchen
On this page you can find a step-by-step guidance that include 9 high quality pictures with brief explanations. The price of this page is only...
|
|
How to Save Time on Dampers Inst. Tip
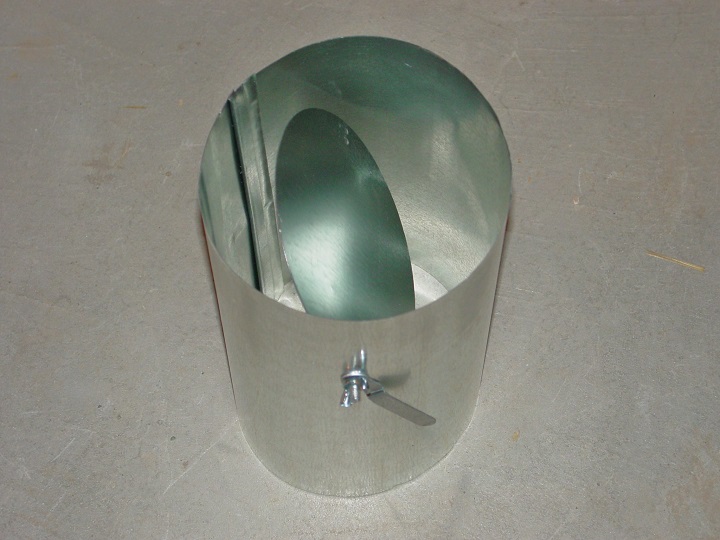
Everyone who is involved in this business knows how to install a damper. But what would you do if in the basement dozens of damper should be installed, what would you do to speed up the process?
Well there is a pretty simple method, but please don't try to re-invent a wheel! Just click the Buy Now button below and for the price of only $1.00 you'll know what should be done!
There are 3 pictures on the page.
|
New Way of Snapping Plenum Together
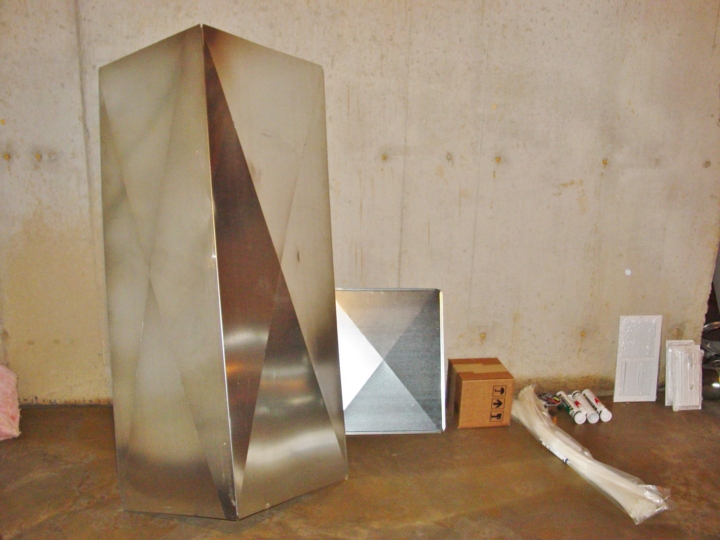
The company I'm currently working for is using large 20"(23") x 20" x 60" plenums. Actually to the job-site they deliver two pieces that you can see in the picture and my task is to measure, cut to length, snap it together, fold the hem and install the top cap, etc.
However it's a challenge to keep these huge pieces of plenum in place - they are wobbling and shaking and it doesn't allow you, while snapping, keep corners even to each other.
|
How to Line up PVC 90 degrees & 45*-s
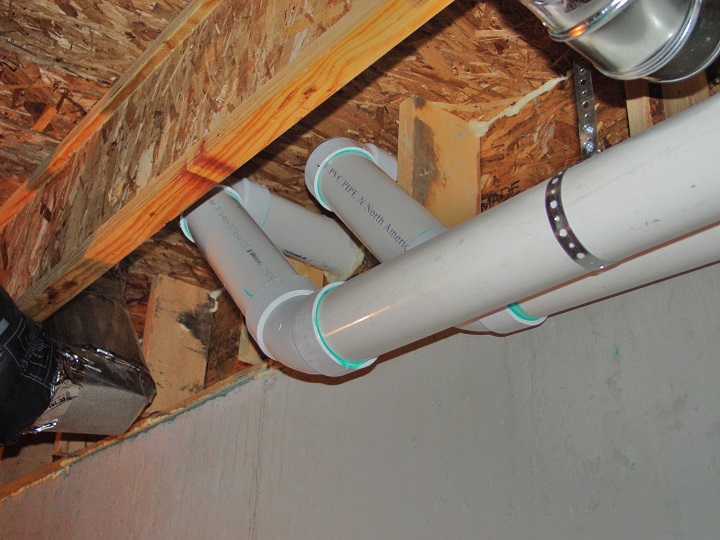
Lining up PVC 90° and 45° elbows is usually important for a few practical reasons:Flow Efficiency: Proper alignment can help maintain smooth water or air flow, especially in pipes carrying liquids or gases. Sharp turns (like in a 90° elbow) can create turbulence, slowing down flow or causing resistance, so aligning these fittings in a way that minimizes abrupt turns is beneficial.
Well it's not very difficult to do. Everyone who is running PVC
|
Pulte Homes Cold Air Returns Installations
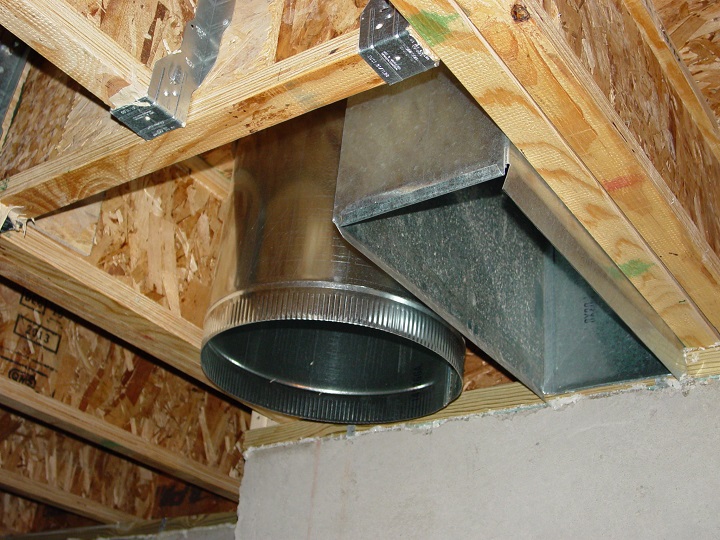
Depending on which area of the country you live in, your heating or cooling system can be critical to your level of comfort during certain seasons. These systems are essential components of you and your family’s comfort and safety, as well as vital to keeping other systems working properly.
Pulte Homes is a nationwide home building company and their way of running heat runs and cold air returns differs significantly from the others. In the Ductwork Installation .
|

|
|
A website "ductworkinstallation. com" focus on providing information and services related to the installation of ductwork systems , which are the tubes used to distribute heated or cooled air throughout a building as part of an HVAC system; essentially, it would be a platform for individuals or companies specializing in designing and installing ductwork for homes and commercial properties, offering details on the process, and potential contractors to contact for such services.
Key points about ductwork installation websites:
Services offered:
New ductwork installation, ductwork repair, duct cleaning, duct sealing, airflow balancing.
Target audience:
Homeowners looking to install a new HVAC system, individuals experiencing issues with their existing ductwork, commercial property owners needing ductwork for large buildings.
Information provided:
Explanations on different types of duct materials, design considerations for optimal airflow, potential benefits of proper ductwork installation.
|
| A ductwork installation guide helps you understand how to assemble and install ductwork for an air distribution system. It provides information on the components needed, how to lay out the ductwork, and how to assemble it.
What you can expect from a ductwork installation guide:
Components: Explains the purpose and use of each type of ductwork fitting
Preparation: Tips for planning ahead to ensure a successful installation
Main line: Instructions for assembling the primary airflow path
Drops: Instructions for assembling the branches of airflow
FAQ: Answers to common issues and concerns
Reminders: Important reminders to ensure a successful installation
Tips for ductwork installation:
Use appropriately sized ducts
Install ducts in straight lines whenever possible
Seal gaps in ductwork
Size your ductwork based on the square footage of your home
Install enough return vents
Insulate ducts to improve energy efficiency
|
| A "Ductwork Installation Guide Finished Basement Edition" is a comprehensive guide that provides detailed instructions on how to properly install ductwork specifically within a finished basement, considering the unique challenges of limited space, existing structures, and the need to integrate new ductwork seamlessly into an already finished area, ensuring efficient airflow throughout the newly finished basement space while maintaining aesthetic appeal.
Key points about this guide:
Planning and Design:
It will emphasize the importance of carefully planning the layout of your ductwork, taking into account the location of vents and returns to optimize airflow and minimize disruption to the finished basement.
Space Constraints:
The guide will address how to work around existing basement features like support beams, walls, and ceilings while installing ductwork, potentially suggesting options like smaller diameter ducts or concealed duct runs.
Insulation Considerations:
It will likely highlight the importance of properly insulating ductwork in a basement to prevent condensation and maintain energy efficiency, especially when the ducts are exposed or running through unconditioned areas.
Access Points:
The guide will discuss how to strategically locate and install vents and returns within the finished space, considering aesthetics and the need for proper air distribution.
Integration with Existing System:
For situations where you're tying into an existing HVAC system, the guide will provide instructions on how to connect new basement ductwork to the main supply and return lines.
Who would use this guide:
DIY Homeowners:
Individuals who are planning to finish their basement and want to install the ductwork themselves, but need detailed instructions to do it correctly.
Contractors:
Professionals who are regularly working on basement finishing projects and want a reference guide for best practices regarding ductwork installation.
|
| Ductwork installation for a kitchen remodel involves installing a vent outlet cover, cutting holes for the vent, and attaching the ductwork.
Steps
Turn off power and disconnect wiring
Remove the old range hood
Mark the location of the vent
Check the wall where the vent will go
Cut holes for the vent
Attach the ductwork
Seal the ductwork with silicone
Secure the vent outlet cover from inside the kitchen
Materials
Rigid duct is the most durable and efficient option for range hoods
Stainless steel and aluminum are the most common materials for kitchen ductwork
Installation
Sheet metal workers, also known as "tinners", can fabricate and install ductwork
HVAC technicians can prepare the ductwork and ventilation system
Kitchen contractors can ensure that the system complies with building codes
Cost
The cost to install ductwork along with a range hood is usually around $500
|
|
Can I relocate my return air grill for your furnace?
Yes, you can relocate your return air grill for your furnace, but it's usually best to consult an HVAC professional to assess the feasibility and potential complications involved, as it may require modifying ductwork depending on the new location you choose.
Key points to consider:
Ductwork access:
Check if the existing ductwork can easily reach the desired new location for the return air grill without significant modifications.
Airflow impact:
Moving the return air grill could affect the airflow throughout your home, potentially requiring adjustments to other vents or ductwork.
Structural considerations:
Depending on the wall or floor where you want to move the grill, you might need to cut new openings or reinforce the existing structure.
Benefits of relocating a return air grill:
Aesthetic improvements: Moving the grill to a less noticeable location in a room.
Better air circulation: Placing the return air vent in a more strategic spot to improve air flow in specific areas.
|
| A bathroom exhaust fan should be installed through a brick wall to properly vent moisture and odors outside the house, as directly venting to the exterior is the most effective way to remove humidity from a bathroom, especially when other options like attic access are not readily available; essentially, it allows for the most efficient removal of moisture which can prevent mold growth and improve indoor air quality.
Key points about venting a bathroom fan through a brick wall:
Moisture control:
The primary reason is to expel humid air directly outside, preventing condensation buildup within the walls and potential mold issues.
No recirculation:
Venting through a wall ensures that the moist air is not recirculated back into the bathroom.
Odor removal:
Proper ventilation through an exterior wall effectively removes bathroom odors.
Important considerations:
Professional installation:
Cutting through a brick wall requires specialized tools and expertise to ensure a proper seal and prevent air leaks.
Ducting:
Always use appropriate ductwork to connect the fan to the exterior wall to maintain efficient airflow.
Local building codes:
Check local regulations for specific requirements regarding bathroom fan venting.
|
| Knowing how to make handmade duct fittings is important because it allows you to precisely customize ductwork to fit unique spaces in a building, especially when pre-fabricated options might not be readily available, leading to improved airflow efficiency and potentially reducing energy waste in an HVAC system; this is particularly valuable for situations where tight corners, unusual layouts, or specific design needs require tailored ductwork solutions.
Key reasons to learn handmade duct fitting fabrication:
Adaptability to complex situations:
When dealing with odd-shaped spaces or challenging layouts, being able to manually fabricate fittings allows you to create ducts that perfectly match the required dimensions, maximizing airflow efficiency
Cost-effectiveness:
In some cases, making your own fittings can be more cost-effective than purchasing pre-fabricated ones, particularly when only a few custom pieces are needed.
Quality control:
By hand-making fittings, you have greater control over the quality of materials and construction, ensuring proper seals and minimizing air leaks.
Troubleshooting and repair:
Understanding how to fabricate fittings can be crucial for making quick repairs on existing ductwork, especially in situations where a specific replacement part is not readily available.
However, it's important to consider:
Skill and expertise:
Making high-quality handmade duct fittings requires specific skills and knowledge of sheet metal fabrication techniques, including cutting, bending, and joining.
Time commitment:
Compared to using pre-fabricated parts, creating custom fittings can be time-consuming.
Professional considerations:
For most HVAC installations, particularly in larger projects, relying on professional duct fabricators with specialized equipment is often the preferred approach.
|
| You should "tap" a takeoff into a duct to create a branch point, allowing air to flow from the main duct to a specific area or room in your building, effectively distributing conditioned air to different parts of your HVAC system; essentially, it's a way to divert a portion of the airflow from the main duct to a smaller branch duct that leads to a particular room or zone.
Key points about tapping a takeoff into a duct:
Air distribution:
The main purpose is to distribute air evenly throughout your building by creating branch lines to different rooms from the main duct.
Efficient design:
Properly designed takeoffs minimize disruption to the airflow in the main duct, ensuring that the branch receives adequate air without significantly impacting the overall system pressure.
Flexibility:
You can add or modify rooms by adding new takeoffs to the main duct as needed.
Important considerations when tapping a takeoff:
Placement:
Takeoffs should be strategically positioned to avoid disrupting airflow in the main duct, often following a "two-foot rule" where takeoffs are spaced at least 2 feet apart from each other.
Proper sizing:
The size of the takeoff should be matched to the required airflow for the branch duct to ensure efficient air delivery.
Professional installation:
For optimal performance and to avoid potential issues, it's recommended to have a qualified HVAC technician install the takeoffs.
|
| Learning how to install a microwave hood vent is beneficial because it allows you to properly vent cooking odors and steam from your kitchen, improving air quality, especially if you frequently cook on the stovetop, and can potentially save you money by doing the installation yourself instead of hiring a professional; however, always consult the specific manual for your microwave model as installation procedures can vary depending on the brand and design.
Key reasons to learn microwave hood vent installation:
Improved air quality:
Venting your microwave hood to the outside effectively removes cooking smells, grease, and moisture from the kitchen, keeping the air fresh.
Cost-effective upgrade:
Installing a microwave hood vent yourself can be significantly cheaper than Understanding your appliance:
By studying the manual, you gain a comprehensive understanding of your microwave's capabilities and limitations, especially regarding ventilation.
Potential for DIY repairs:
Learning the basic installation process can also help you troubleshoot minor issues with your vent system in the future.
Important considerations:
Check compatibility:
Not all microwave hoods are designed to be vented outside, so always consult your appliance manual to confirm compatibility.
Proper ductwork:
Ensure you use the correct size and type of ductwork to maximize ventilation efficiency.
Safety first:
Follow all safety guidelines in the manual, including electrical disconnection procedures and proper tool usage.
|
| Knowing how to make sheet metal duct fittings is important for anyone involved in the HVAC (Heating, Ventilation, and Air Conditioning) industry, particularly those working in installation, maintenance, or fabrication, as it allows them to efficiently design, build, and repair ductwork, ensuring proper airflow and system performance within buildings by creating custom fittings to suit specific project needs.
Key reasons why this skill is valuable:
Customizing ductwork:
Different building layouts require unique duct fittings, which can be fabricated on-site to precisely match the required angles and connections.
Cost-effectiveness:
Being able to fabricate fittings can sometimes be more cost-effective than relying solely on pre-made components, especially for complex projects.
Troubleshooting and repairs:
When encountering damaged or improperly fitted ducts during maintenance, the ability to fabricate replacement fittings can be crucial for quick repairs.
Understanding system design:
Knowing how to make fittings provides a deeper understanding of the entire HVAC system and how airflow is affected by ductwork design.
Who might need this skill:
HVAC technicians: For on-site repairs and installations.
Sheet metal workers: Professionals specializing in fabricating and installing sheet metal ductwork.
HVAC designers: To effectively plan duct layouts and specify required fittings.
Building contractors: To oversee ductwork installation and ensure proper execution.
|
| You should not replace your furnace yourself because it is generally considered very dangerous and could lead to potential safety hazards like gas leaks, electrical issues, and carbon monoxide poisoning, especially if you are not a licensed professional with the necessary expertise to handle gas lines and complex wiring; always consult a qualified HVAC technician for furnace installation or replacement.
Key reasons to avoid DIY furnace replacement:
Safety risks: Improper connections to gas lines can cause leaks, leading to carbon monoxide poisoning, which is odorless and can be deadly.
Electrical hazards: Incorrect wiring can result in electrical shocks or fires.
Inefficient installation: Amateur installation may lead to poor performance and higher energy bills due to improper sizing and ductwork.
Warranty issues: Most manufacturers will void the warranty if the furnace is not installed by a licensed professional.
Legal concerns: In many areas, installing a gas furnace without a license is illegal.
When to consider calling a professional:
Old furnace:
If your furnace is 15 years or older, it may be time to replace it due to potential efficiency issues and increased repair costs.
Frequent repairs:
If you are constantly fixing your furnace, replacement may be more cost-effective.
High energy bills:
A failing furnace can lead to significantly higher heating costs.
Unusual noises or smells:
If your furnace is making strange sounds or emitting unusual smells, it could indicate a serious problem
|
|