Sheet Metal
Book Description
Publication Date: January 1, 2006
Sheet Metal blends basic principles with contemporary tools and technology. Now including workbook questions, this edition is concisely written, with large, two-color illustrations and updated photography to emphasize key points. |
|
| DUCT OFFSET AND RISER FORMULA |
|
On this page you can find out how to calculate an Offset and a Riser, and formulas on how to find a distance between two flat and stack (virtical) forty-fives and more!
Offset Riser Two Flat 45*-s Offset
If you want to know these formulas and get all possible information that is related to them, on the paid page below you can learn the following:
- Length of a duct between two Flat or Stack (virtical) 45* (30*; 60*) working as an offset (riser). Calculation formulas without using a center line method
- Offset/Riser calculation formula
- How to calculate an Offset/Riser situated between two existing ducts
- How to calculate an Offset/Riser from full length (8', 5', 4') duct and why the result is different
- How to mark a duct before it’s snapped together and why it’s important to do
- How to find where hangers should be nailed
- How to find spots where Take-offs should be cut in
- What to do if the width of a duct after Offset/Riser is calculated to would be too big for connection
- How to calculate, mark out and cut duct (ductboard) in order to make a Riser and Offset (a rolling offset) at the same time
- How to miter shop-made Offset or Riser
- Round pipe Offset/Riser calculation without using a center line method
- Spiral duct Offset/Riser calculation between two 30* (45*, 60* elbows) without using a center line method
- How to find a minimum length for Offset/Riser
- How to figure out Offsets in ductwork without a wall or I-beam for a measurement
- How to Measure Degree of Offset Duct
On the paid page, you can find explanations to all 15 (fifteen) topics and see 44 high quality pictures and drawings.
Also you can purchase all fifteen topics separatly below.
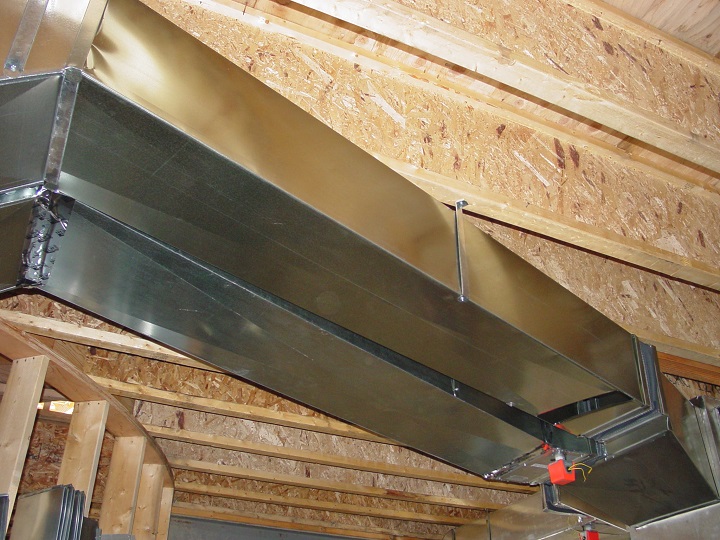
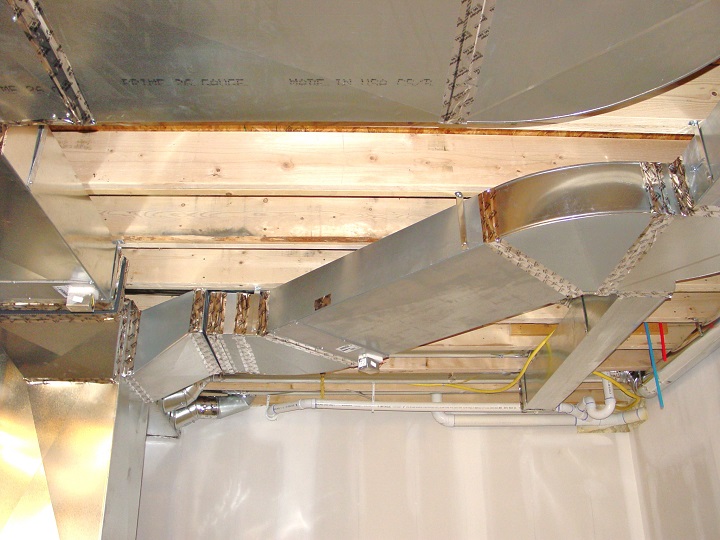
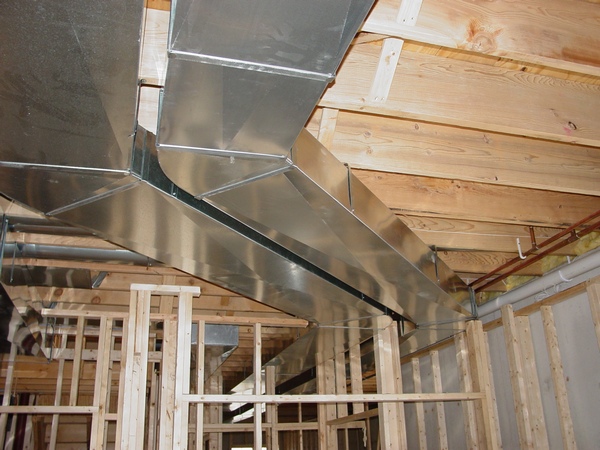
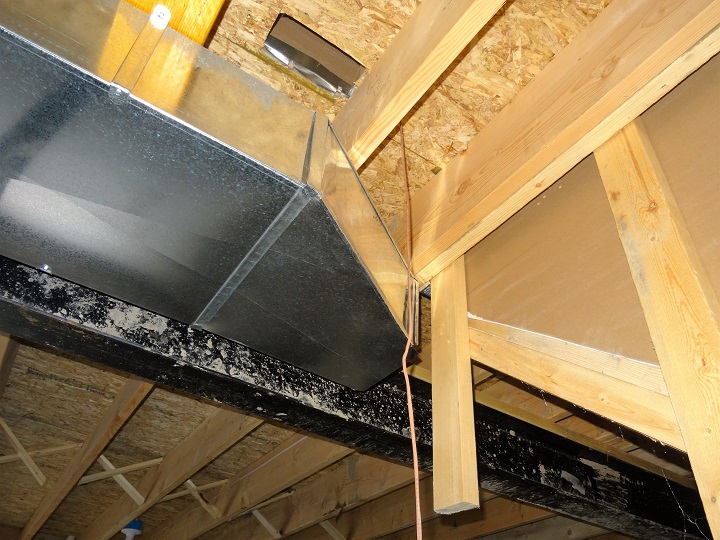
What you can see in the pictures above is the illustration of the duct length calculation. The distance between two 45*-s was larger than length of one whole duct (8'). However, it did not stop me from placing of the second 45* exactly inside of the designed spot in the drop ceiling grid! Just see for yourself how it perfectly fits 24 x 8 duct in the 24" wide drop ceiling grid!
Why was this so important? Because in the space to the left there will be several 2' x 4' lights installed, but in the space to the right electricians put an electrical box (pic. on the right) and the duct can't be installed below it.
All the calculation and installation was performed by me without any help from anybody else and took as twice less time in comparison to the other ways of doing the same type of calculations.
This is a parent page. If you would like to read more you can buy an instant access to the secondary page. You can pay right here on this page by using the "BuyNow" button below.
Instant Access:
After you purchase a paid page, PayPal is going to bring you back to my website. In order to see the paid page you have to click on the “Register” button, fill out the form, choose your own Username and Password and click on the “Register” button at the bottom of the form – congratulation, you are now on the page you have paid for!
Important: After you have purchased any Paid page or Download page and PayPal brought you back to my website, the first thing that you should do is to save that page to your Favorites. Then if something goes wrong you always can come back to re-register yourself on my website again. |
| DUCT OFFSET AND RISER FORMULA $10.00 |
|
Length of Duct Between Two Flat or Virtical 45* (30*; 60*) Working as Offset/Riser.
 In this tutorial for the price of only $1.86 you will learn how to use formulas without using a center line method. In this tutorial for the price of only $1.86 you will learn how to use formulas without using a center line method.
|
|
Offset/Riser Calculation Formula
For the price of only $1.34 learn offset/riser calculation formula.
|
|
How to Calculate Offset/Riser Situated between Two Existing Ducts
 For the price of only $1.00 learn how to calculate offset/riser csituated between two existing ducts. For the price of only $1.00 learn how to calculate offset/riser csituated between two existing ducts.
|
|
How to Calculate Offset from Full Size Duct and Why the Result is Different
 For the price of only $1.86 learn how to calculate offset from full size duct and why the result is different if it would be made in the range of that length. For the price of only $1.86 learn how to calculate offset from full size duct and why the result is different if it would be made in the range of that length.
|
|
How to Mark Duct Before It’s Snapped Together and Why It’s Important to Do
Many installers put duct together and only then miter it. This is happening because they don't know how to mark it out in the open kind. As a result the rest of the duct is wasted and if the duct made from low gauge sheet metal (24) it's become very difficult to cut through the seam, let alone, notch the corners out! For the price of only $1.86 you can learn how to do it the right way.
|
|
How to Find Where Hangers Should be Nailed and Take-offs Cut in
When you are hanging a straight piece of duct you always know where the hangers should be fastened and where the take-offs should be cut in. For ant type of offset it's not that obvious. If you would like to learn the answers to this problems for the price of only $1.34 you can gain an instant access to the paid page that has it all.
|
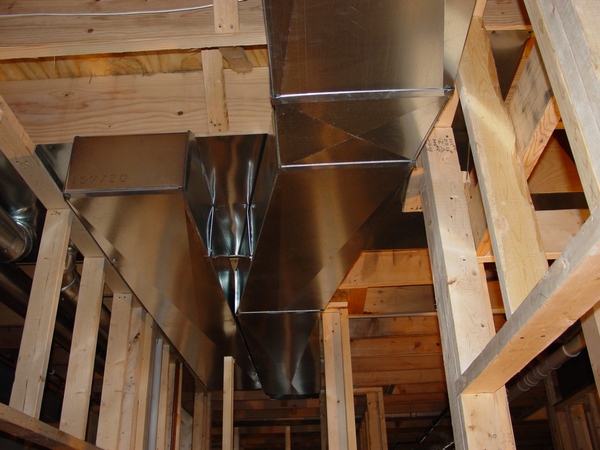
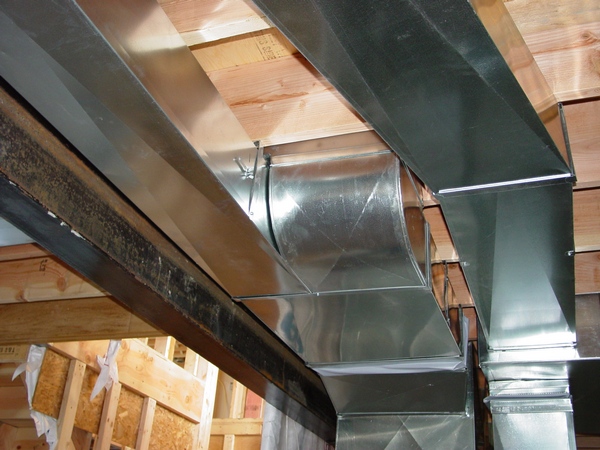
42. Calculation and Manufacturing Offset and Riser* – this chapter covers all possible cases of calculation 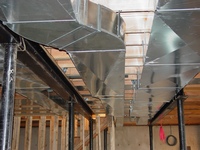 and installation of the off-sets and risers, field-made and ordered from the shop. and installation of the off-sets and risers, field-made and ordered from the shop.
The chapter has 65 pictures; 34 pages*. $3.41 (Instant Access).
*Articles:
How to Make a Ductwork Offset. Instructions.
Duct Design Myth Busters.
On 03/19/2015 text of this chapter was significantly modified and improved. On 08/13/2015 one picture was added.
|
|
How to Make Square to Round Offset Transition
 Do you want to know how to make a square to round offset transition? Do you want to know how to make a square to round offset transition?
Do you want to know how to make it in a matter of minutes?
Do you like this 8”x 8” square to 6” round 4” offset transition that you can see on the left and would like to know how to make any other one?
If your answers to all these questions are "yes", then please click on the Buy Now button below and for the price as low as only $3.49 purchase an instant access to the page where you can find 16 high quality photos with step-by-step instructions!
|
|
45* Roof Penetration
 Recently, and I'm not kidding, I got this question below: Recently, and I'm not kidding, I got this question below:
"how big of hole needed fo 10 inch pipe through 45 degree angle" - well of course it wasn't a direct question, but it was a "keyword" someone was using to find my site on the web.
In my more than 30 years in the ductwork installation business I've never tried to find an answer to this question, so I looked on the web...
And guess what it is there!
On the forum website - http://forums.jlconline.com this type of the question was asked long time ago:
"Math gurus.... not a framing question
I am about to install a woodstove. The flue goes straight up thru a cathedral ceiling that is 12:12. The pipe that penetrates the ceiling is approx. 8" diameter. Selkirk (Metalbestos) sells a woefully inadequate one-size-fits-all two-piece trim kit that does not provide a tight fit... how could it, when it supposedly "fits" anywhere from 6:12 to 12:12?
Anyway, my question is about laying out the correct cutout given the OD of the pipe and the 45 degree angle of the lid. If I can make the layout on paper I can get my friendly local tin man to make a decent looking piece of out heavy galvanized sheet.
An alternative is to send it to the friendly non-local tin men who have a CNC cutout machine, it would take them just a few seconds.
But I'd rather do it. How do-able is this?"
So, if you'd find this thread on that website you'd actually learn how this question was answered, but here is another question - would you understand the answers? I'm sorry but even with my master degree in the mechanical engineering I didn't. Furthermore, would an ordinary tin knocker with pretty much forgotten high school diploma ever understand it - sorry guys, but I do not think so!
So I decided to think about it for a moment and find a solution any ordinary tin knocker would understand - no math, no bullshit and here we go:...
If you would like to read more please click on the Buy Now button below.
|
|
How to Make 45* Radius Elbow with Hand Tools
 On this page for the price of only $2.50 you can learn how to make a 10" x 8" radius elbow by using only hand-tools. This tutorial has 30 high quality pictures with brief explanations. On this page for the price of only $2.50 you can learn how to make a 10" x 8" radius elbow by using only hand-tools. This tutorial has 30 high quality pictures with brief explanations.
|
|
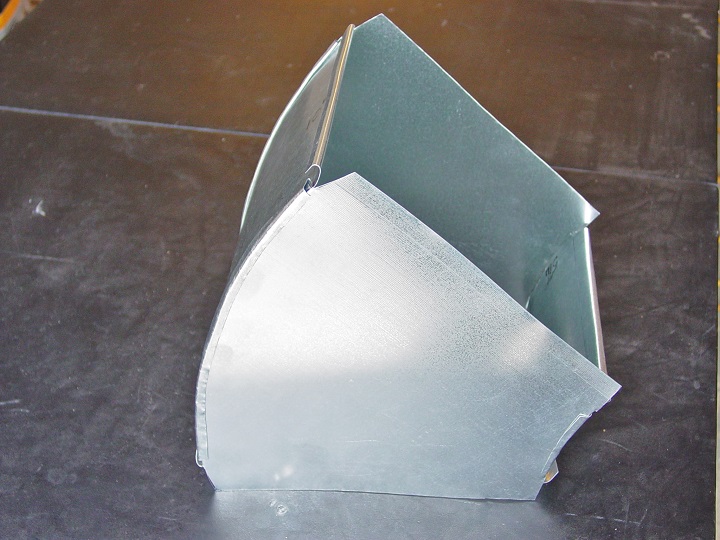
How to Make Radius Offset with Hand Tools
 If you compare this radius offset (on the left) to square throat offset below there is not much difference. However it looks better and it has lower resistance to the airflow. Of course it's a bit more complicated to make - it might take extra 10 minutes or so to draw an outline, make and put all parts together, but it worth the effort. If you compare this radius offset (on the left) to square throat offset below there is not much difference. However it looks better and it has lower resistance to the airflow. Of course it's a bit more complicated to make - it might take extra 10 minutes or so to draw an outline, make and put all parts together, but it worth the effort.
So, if you would like to learn how to make this kind of an offset with hand-tools only, please hit the Buy Now button below. Then, for the price of only $2.50 you will gain an instant access to the unique page with 39 high quality photos on it set in the step-by-step sequence with brief explanations.
|
|
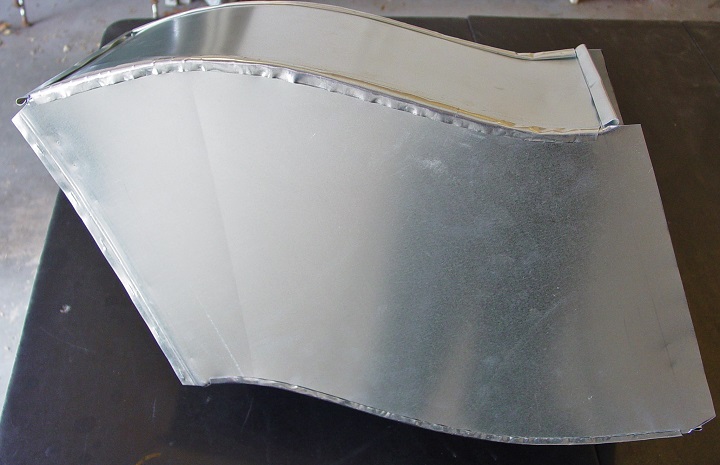
Now to Make Radius Riser with Hand Tools
 For the residential applications risers usually used in the cases when you need to bring duct up in the joist space, get it down from the joist cavity or rise it after it passed an I-beam. In the first two cases the rise itself for the 10" (12", 14") x 8" duct could be 8" - 9", in the third one usually it starts from 9 ½" - height of an I-beam plus a bottom board. If an I-beam is taller then the riser should be taller as well. For the residential applications risers usually used in the cases when you need to bring duct up in the joist space, get it down from the joist cavity or rise it after it passed an I-beam. In the first two cases the rise itself for the 10" (12", 14") x 8" duct could be 8" - 9", in the third one usually it starts from 9 ½" - height of an I-beam plus a bottom board. If an I-beam is taller then the riser should be taller as well.
So, if you would like to learn how to make a 12" x 8" riser with a 9 ½" rise by using only hand-tools, please hit the Buy Now button below. Then, for the price of only $2.50 you will gain an instant access to the unique page with 38 high quality photos on it set in the step-by-step sequence with brief explanations.
|
|
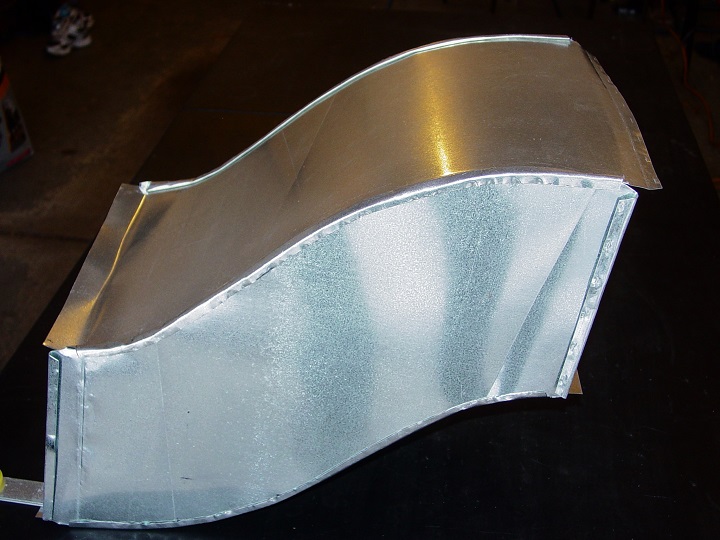
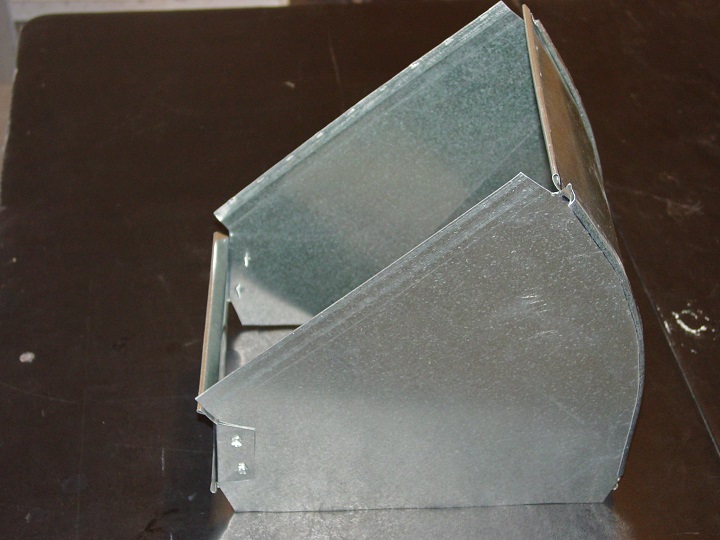
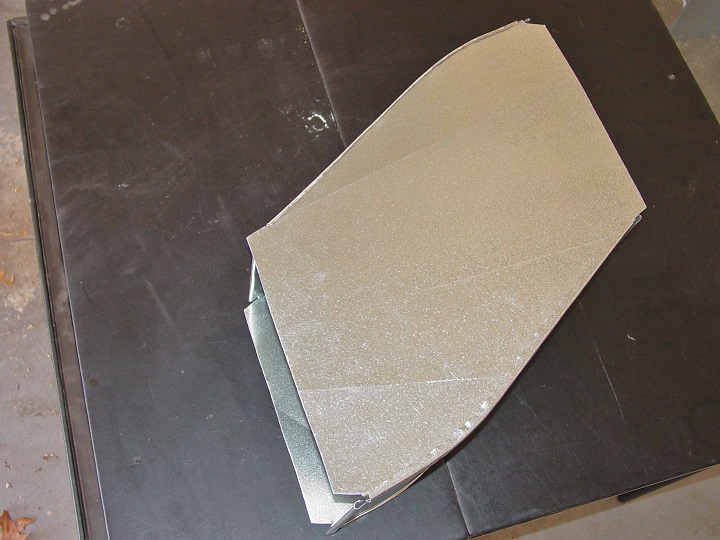
How to Make Offset and Riser in One Piece
 I already have this kind of tutorial for a piece of duct. You can find it on the paid page above. But if you need a real thing something like shop-made offset or riser you might be interested in this tutorial. I already have this kind of tutorial for a piece of duct. You can find it on the paid page above. But if you need a real thing something like shop-made offset or riser you might be interested in this tutorial.
The fitting that you see on the left is 12" x 8" "rolling" offset, and it changes direction horizontally for 6" (offset) and vertically for 5" (riser), and it's 18" in length. You can't find online a tutorial for these kind of fittings - because I already tried and there is nothing for the ducts (just for the pipes), and they won't teach you at the sheet metal shop - because you can't use a Pittsburg lock machine for this fitting's Pittsburg seam! That's why these kind of fittings you can make only with the hand tools.
The price for this tutorial is only $3.50. On the page you'll see 36 high quality pictures set in the step-by-step sequence with explanations.
|
|
How to Make 45* Square Throat Elbow with Hand Tools
 Nobody in the big operations companies making any radius fittings anymore! All the fittings such as elbows, offsets, risers, cold air boots and so on made with square throats. This way it's a bit easier and faster to produce and assemble and in this tutorial for the price of only $2.50 you will learn how to do it. So from now on you are able not only learn how to figure out the length of the duct between to 45 degree elbows but make those elbows yourself on the job-site or at home! Nobody in the big operations companies making any radius fittings anymore! All the fittings such as elbows, offsets, risers, cold air boots and so on made with square throats. This way it's a bit easier and faster to produce and assemble and in this tutorial for the price of only $2.50 you will learn how to do it. So from now on you are able not only learn how to figure out the length of the duct between to 45 degree elbows but make those elbows yourself on the job-site or at home!
On the page you'll see 37 high quality pictures set in the step-by-step sequence with explanations.
|
|
How to Make Square Throat Offset with Hand Tools
 OK, it's not too difficult to figure out how to make this kind of offset! But how would you make the Pittsburgh seam, both parts of it - the female and male parts without machine??? Well, if you are looking for the answer to this question, for the price of only $2.50 you can find it out by purchasing an instant access to the page that has it all! OK, it's not too difficult to figure out how to make this kind of offset! But how would you make the Pittsburgh seam, both parts of it - the female and male parts without machine??? Well, if you are looking for the answer to this question, for the price of only $2.50 you can find it out by purchasing an instant access to the page that has it all! |
|
How to Make Flat Offset Transition from Duct with Hand Tools
Usually I keep a cold air return duct 4” away from the I-beam. In the case that you can see in the pictures above I didn’t have a 20” x 8” to 10” x 8” transition at all and even if I would, it wouldn’t be made as a 1” offset I was needed for this job. So I made it from a piece of duct!
If you need more info with step-by-step instructions on how to make a 20” x 8” to 10” x 8” transition with 1” offset for the price of only $2.50 you can gain an instant access to the tutorial that includes 35 high quality pictures with brief explanations to them.
|
|
Totally Hand Made Duct Fittings
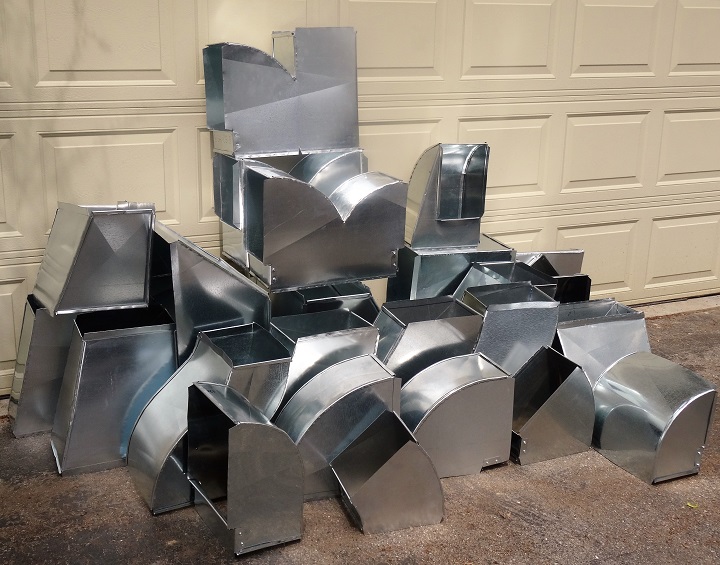 Not too long ago I, like many of you, sincerely thought that the way of making any kinds of sheet metal fittings is only possible by using sheet metal brake and metal forming machines! Not anymore: Not too long ago I, like many of you, sincerely thought that the way of making any kinds of sheet metal fittings is only possible by using sheet metal brake and metal forming machines! Not anymore:
From late Fall and Winter of 2015 through May 2016 I made more than twenty most frequently-used sheet metal fittings without using any of these very expensive machines.
All the fitting that you see in the picture on the left I made with hand-tools only!
The price of all 35 tutorials below, if you would buy them separately is $90.00, however if you would like to purchase an instant access to all of them at the same time you can do it for a low price of only $29.99!
List of Tutorials:
- How to Make Cone Reducer
- How to Make Square to Round Offset Transition
- How to Make Round to Square Transition
- How to Make 45* Roof Penetration
- How to Make Radius Elbow
- How to Make 45* Radius Elbow
- How to Make Radius Offset
- Now to Make Radius Riser
- How to Make Offset and Riser in One Piece
- How to Make 90* Square Throat Elbow
- How to Make 45* Square Throat Elbow
- How to Make Vertical Elbow
- How to Make Square to Rectangular Vertical Elbow
- How to Make Square Throat Offset
- How to Make Square Throat Riser
- How to Make Square Throat Tee
- How to Make Transition Tee
- How to Make Y- Branch Fitting
- How to Make Riser Starting Transition
- How to Make Flat on Top & Side Starting Transition
- How to Make Centralized Hess Fitting
- How to Make Flat on One Side Hess Fitting
- How to Make 45* Hess Fitting
- How to Make Flat Duct Reducer
- How to Make Vertical Duct Reducer
- How to Make Flat & Vertical Duct Reducer
- How to Make Transition from Your New Furnace to Old Plenum
- How to Make 20 x 20 to 30 x 25, One Inch Offset Transition
- How to Make 24 x 10 to 10 x 24 Duct Transition
- How to Make Transition from Duct with Hand Tools
- How to Make Flat Offset Transition from Duct
- How to Make Transition from Whole Duct
- How to Make Turning Veins
- How to Make Wye with Hand Tools
- How to Make Round End Cap with Hand Tools
|
|
Questions and searches that have been answered on the paid page above:
30 / 60 / 90 degree sheet metal offsets
45 degree rectangle duct offset formulas
Calculations for ductwork offsets
Cutting rectangular duct for offset
Double offset formula sheet metal
Duct mitering
Duct offset calculator
Duct offset to length ratio
Ductwork offset formula
Ductwork riser formula
Easy offset duct formula
Field cut offsets sheet metal formulas
Field cut round offsets sheet metal
Figuring 45 degree offset in round duct
Formula for calculating duct offset distance during fabrication
Formula for kicking straight for square to rounds
Formulas to create offsets in sheet metal ducting
How do I install duct work offset to match outside hole
How to build an offset out of sheet metal
How to calculate duct offsets in between pieces
How to calculate round duct offset formulas
How to calculate transition offset rectangular to round
How to create double off set duct
How to cut an offset in a return duct
How to field miter rectangular ductwork
How to figure out an off set with spiral pipe duct work
How to figure spiral pipe offset
How to find an area of duct offset
How to find the distance between two 30 degree elbows
How to get the straight duct between 45 degree elbows
How to lay out a round offset fitting
How to lay out a simple duct offset
How to line up two 45 degree round elbows into offset
How to make a 10 inch offset in sheet metal square duct
How to make an offset from a piece of pipe
How to make an offset in ductwork
How to measure an offset for ductwork
How to measure offset on sheet metal duct
How to miter duct
How to order duct fittings and off sets
Installing 8" x 12"duct offsets
Layout if square to round duct
Layout round offset
Making a duct offset riser
Offset equation for ductwork
Offset square duct
Photos on how to make an offset in ductwork
Round duct offset formulas
Sheet metal duct offset in the field
Sheet metal figure 30 degree elbow offset
Sheet metal offset formulas
Sheet metal offset layout
Square to round duct fittings layout
Step by step offsets ductwork
Straight between 45 degree elbows rectangle duct offset formulas
Types of rectangular offset ducts
What is the formula for a 45 degree offset in ductboard?
What is the formula to miter a piece of duct?
What kind of calculator can I use to figure out the offset between two 45 elbow on round spiral pipe?
|
|
|
A website "ductworkinstallation. com" focus on providing information and services related to the installation of ductwork systems , which are the tubes used to distribute heated or cooled air throughout a building as part of an HVAC system; essentially, it would be a platform for individuals or companies specializing in designing and installing ductwork for homes and commercial properties, offering details on the process, and potential contractors to contact for such services.
Key points about ductwork installation websites:
Services offered:
New ductwork installation, ductwork repair, duct cleaning, duct sealing, airflow balancing.
Target audience:
Homeowners looking to install a new HVAC system, individuals experiencing issues with their existing ductwork, commercial property owners needing ductwork for large buildings.
Information provided:
Explanations on different types of duct materials, design considerations for optimal airflow, potential benefits of proper ductwork installation.
|
|
Today's 40 Most Frequently Used Fittings: Including Supplemental Sections of Other Fittings and Items
Customer Review
I have been buying how to books for the last 40 years. Richard S. Budzik book, "Today's 40 Most Frequently-Used Fittings" is the best book on fabricating sheet metal fittings that I have found. May I suggest that this is the best how to book on any subject ever. This is great book in the Industrial Arts tradition. I am now using this book for sheet metal class instruction at the TechShop in Menlo Park, Ca.
|
|
Layout for Duct Fittings
Book Description
Publication Date: January 1, 2005
Layout for Duct Fittings teaches practical, easy-to-follow shop methods for laying out duct fittings. Illustrated step by step methods show you how to lay out:
Rectangular transitions, S offsets, Rectangular duct elbows, Square-to-round, Round tapers, Round tees, Round elbows
Use this book as a handy reference or as a textbook to learn all the methods you may need.
|
|