| Related Pages: |
|
Underground Ductwork Installation
In the modern houses the underground ductwork usually is not mounted. However, there are exceptions when in a big house a homeowner wants to install supply registers on the basement’s floor instead of on the ceiling...
|
|
Jumper Installation
In my experience, Jumper installation appears as the most difficult issue to study in this trade. Probably, this result from the fact, that apprentices and even experienced installers cannot understand how to turn elbow's parts over the right way and cannot remember the sequence of execution of work.
|
|
Cold Air Return Duct Installation
Installation of the cold air return duct usually starts from that first piece which should be attached through a Canvas, Cold Air Drop and Cold Air Boot to a furnace...
|
|
Blockers Installation
The purpose of the Blockers installation at performance of the Rough-in to a certain extent is senseless, because they are installed in a joist space, which subsequently will be closed by drywall. However, the building code demands their installation so you do not have the other option here...
|
|
Application 8” Pipes & Fittings
Because you already know how to use the 8” pipes in the basement, now I can start to consider the use of 8” fittings...
|
|
Heat Runs Installation
With reference to the basement part of the installation, heat run means a pipe with fitting, which starts from a Take-off and terminates with a boot nailed to the opening in the floor or connects to a Bathbox or Oval Stack.
|
|
Calculation and Manufacturing Offset and Riser
Sometimes it happens that it's impossible to run a duct straight from the beginning to the end – in its way it may appear, for example, a staircase, which is necessary to bypass. In this case sometimes you can use two Flat 45*-s, which allow you to change duct's direction bypass an obstacle, and after that return to the earlier chosen direction...
|
|
|
Ductwork Installation Tips and Tricks 2
|
|
Instant Access:
After you have purchased a paid page; PayPal is going to bring you back to my website. In order to see the paid page you have to click on the “Register” button, fill out the form, choose your own Username and Password and click on the “Register” button at the bottom of the form – congratulation, you are now on the page you have paid for!
Important: After you have purchased any Paid page or Download page and PayPal brought you back to my website, the first thing that you should do is to save that page to your Favorites. Then if something goes wrong you always can come back to re-register yourself on my website again.
Describe in details how this or that tip or trick was implemented and get any paid page for free!
Submit an additional tip or trick of your own and get any five paid pages free of charge!
You can purchase any tip or trick below and if you purchase the e-book as whole I’ll refund your money back to your PayPal account.
|
|
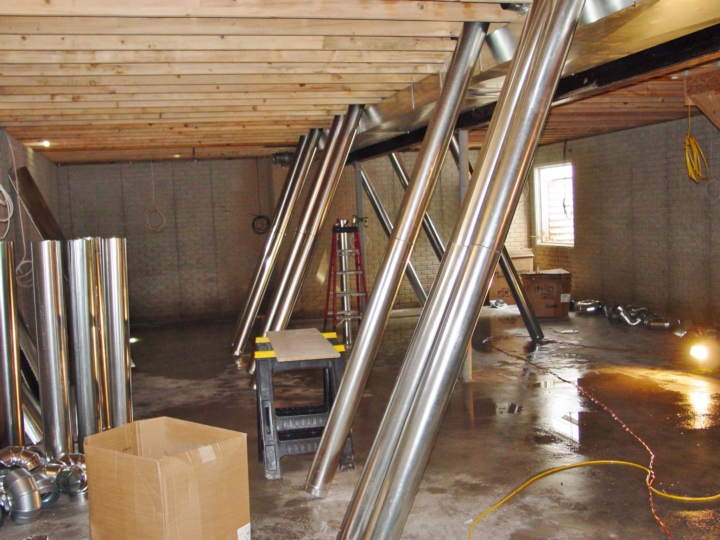
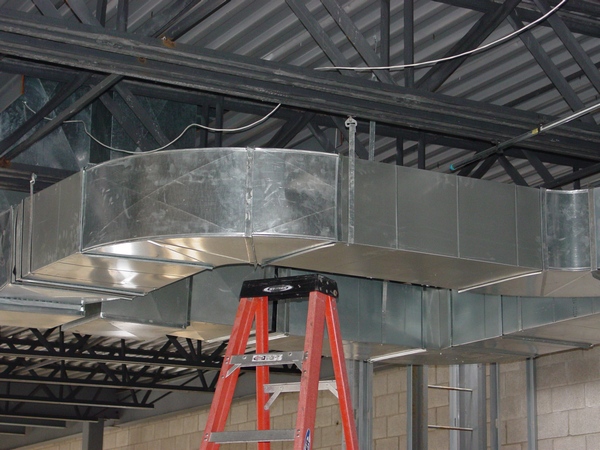
9. Spiral Duct Tips
 I am working for a company which is doing commercial jobs as well. I am working for a company which is doing commercial jobs as well.
What you can see in the picture is a 16” spiral duct that is 18’ long with four register boxes cut in it.
So here are two questions:
1. What did I do to line up all four register boxes?
2. How did I calculate the distance between them, so they were set so perfectly centered?
All two questions above are not difficult at all, but only if you just graduated from a High School! Otherwise, nobody even in my trade will meet this kind of issues too often. Therefore, if you have this kind of issue in front of you I can help. Price for my help is only $1.00.
|
|
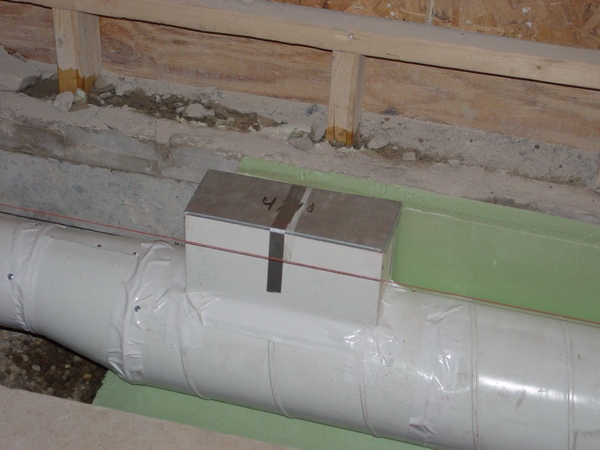
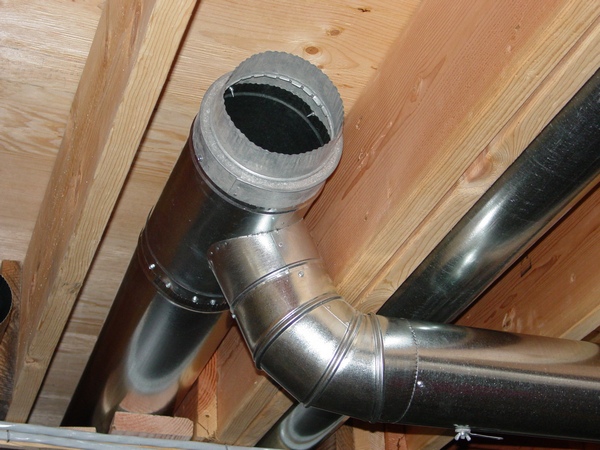
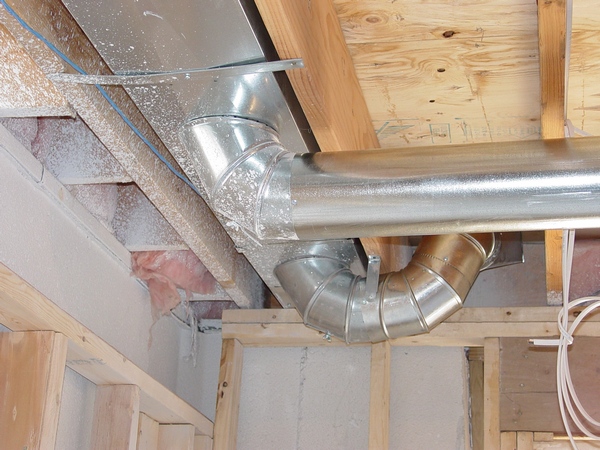
10. Pipe Length Calculation Tip
 As you probably know in order to connect two pipes or fittings together all pipes and fittings must be crimped. The length of the crimp is 1½”. As you can see it in the picture the pipe is situated between two elbows. But let's say the distance between those elbows is longer than you see in the picture, and it would be 92 ½”. So, how long should be an additional piece of pipe if the first one has a standard length of 60”. I've resolved this issue in just 5 minutes! As you probably know in order to connect two pipes or fittings together all pipes and fittings must be crimped. The length of the crimp is 1½”. As you can see it in the picture the pipe is situated between two elbows. But let's say the distance between those elbows is longer than you see in the picture, and it would be 92 ½”. So, how long should be an additional piece of pipe if the first one has a standard length of 60”. I've resolved this issue in just 5 minutes!
How Did I Do It?
Answer to this question has its value mostly for the professional installers. If you make a measurement and the distance is bigger than the length of the whole pipe (60”, 30”), some of you don’t know what to do next! So, for the price of only $1.00 I can explain how to calculate an additional piece.
|
|
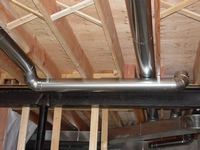
11. Dent Elimination Trick
 What you see in the picture is a dent on the Flat 90*. I wouldn’t say it’s a big deal, but in some applications this dent can make a popping noise. Also if you leave a duct with this kind of damage on it, it looks sloppy and unprofessional. So I fixed it in less than 1 minute. What you see in the picture is a dent on the Flat 90*. I wouldn’t say it’s a big deal, but in some applications this dent can make a popping noise. Also if you leave a duct with this kind of damage on it, it looks sloppy and unprofessional. So I fixed it in less than 1 minute.
How Did I Do It?
I’ve received this email some time ago: “I had my mom (the only one small enough) get behind my furnace to help me run a wire. In the process she had to squeeze against the return. I believe she may have popped it in. Now, when it starts and finishes its cycle the return pops.” If you are having this kind of help from your relatives or maybe you neighbor 6’6” hit your duct with his head you may need the answer to this question.
So, if you have this kind of issue in front of you I can help. Price for my help is only $1.00.
There are 2 pictures on the page.
|
|
12. Blocker Installation Tip

It’s always a fun to talk with a new guy when he got hired in your company! Usually he starts to tell you a story on how incredibly good he is and how fast he can do any kinds of duct installations work, while, let’s say, doing a piece-work. What he is expecting from you is a loud WOW!!! But I always keep “wows” as a last resort until the actual job is done.
This time around when a newbie started to do blockers installation he spent 6 minutes for each. I looked at him and said that during this time I could get 3 blockers done and I’ve showed him the technique. So, now I was getting a huge WOW!!!
How Did I Do It?
So, for the price of only $1.00 I can explain how to do it.
|
|
13. Reducer Tip
T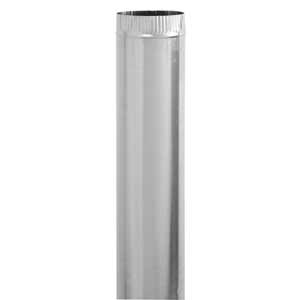 he other day I was working at an old commercial building replacing old heat runs. Almost all of them were 9” round pipes and fittings, and my task was to replace them with 8” fittings, pipes and diffusers. At the same time my boss told me that I have to save as much old stuff as possible in order to help him to save some money. I‘ve been told that he will buy some 9” to 8” Reducers which will terminate every 9” heat run I am able to save, for the 8” flex. When it comes to the time to give me those reducers my boss found out that there were no such things available at all! There wasn’t any supply house in the entire Detroit area carrying things like that! he other day I was working at an old commercial building replacing old heat runs. Almost all of them were 9” round pipes and fittings, and my task was to replace them with 8” fittings, pipes and diffusers. At the same time my boss told me that I have to save as much old stuff as possible in order to help him to save some money. I‘ve been told that he will buy some 9” to 8” Reducers which will terminate every 9” heat run I am able to save, for the 8” flex. When it comes to the time to give me those reducers my boss found out that there were no such things available at all! There wasn’t any supply house in the entire Detroit area carrying things like that!
He was lucky enough to find a few 9” round caps and 8” collars at the shop to make the reducers, but for the rest of the 9” heat runs he come up with another bright idea: replace them with 8” collars, pipes and fittings! As a good employee I’ve said – all right, but for myself I’ve said – no way!
I’m not crazy to take all 9” Take-offs off, patch the holes, cut 8" collars in and run the pipes with fittings when all of it is already done and I need just a few lousy reducers! Luckily I found some 9” pipes and made the reducers in no time!
How Did I Do It?
If you are a self-employed contructor or thinking about ductwork installation seriously you may need to know how to make a field-made reducer (I’m actually know two ways of making them). So, for the price of only $1.00 I'll explain how you can do it. On 06/23/2013 7” to 6” and 7” to 5” reducers along with 8 pictures were added. |
|
14. Fix a Heat Run Trick
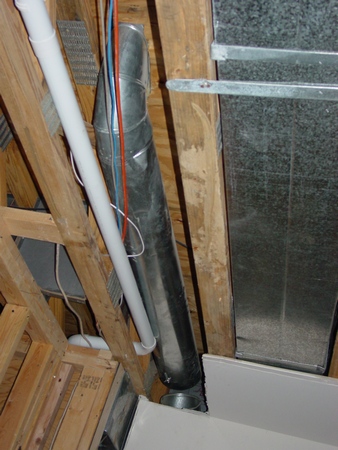 When you are doing remodeling there is always a possibility that people of the one trade destroy or break something of the other! When you are doing remodeling there is always a possibility that people of the one trade destroy or break something of the other!
As you can see in the picture the guys who were running the vacuum cleaner line broke a 7" Take-off.
When superintendent asked me if I can fix that I've said no: I don’t have a 7” Take-off to replace the broken one, I can’t unscrew and pull out the Flat-Oval 90*, because it's inside the upstairs wall, I don’t have enough 7” pipes to replace the smashed one and of course I don’t have enough time to fix all this BS.
Are you seriously thinking it was me? Of course not! In 20 minutes I’ve fixed everything, cleaned up the job and went home!
How Did I Do It?
I don’t know if you paid attention, but in order to fix this heat run I've used the techniques taken from two previous tips plus an additional one. If you think that you need to know how to fix this heat run pay me $1.00 by the “BuyNow” button below and I’ll let you know what should be done! |
|
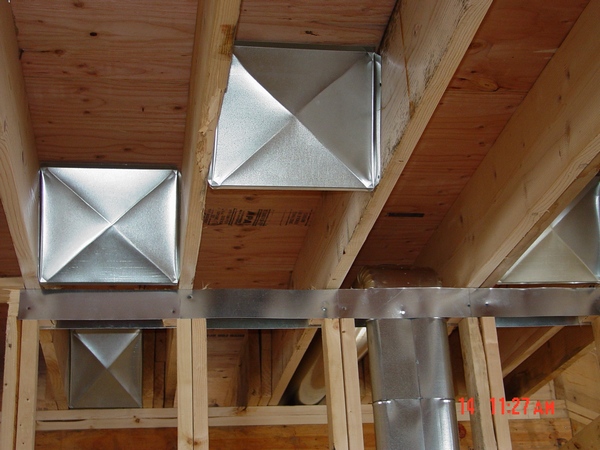
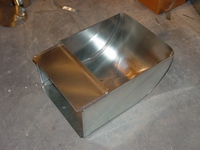
15. Tee Tip
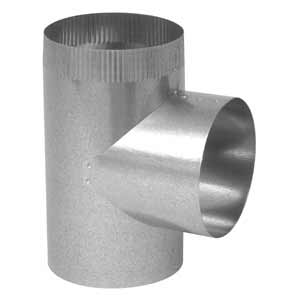 What you can see in the picture is an 8”- 8”- 8” Tee. This kind of Tees could be pretty expensive, because there is no high demand for the fittings like this. Furthermore, if you need a different kind of Tee, let’s say 8”- 6”- 8”, or 8”- 7”- 8” tees they could be out of stock or you might just forget to buy one. There is a very simple technique on how to make any type of tees. I usually make it in less than 10 minutes! What you can see in the picture is an 8”- 8”- 8” Tee. This kind of Tees could be pretty expensive, because there is no high demand for the fittings like this. Furthermore, if you need a different kind of Tee, let’s say 8”- 6”- 8”, or 8”- 7”- 8” tees they could be out of stock or you might just forget to buy one. There is a very simple technique on how to make any type of tees. I usually make it in less than 10 minutes!
How Did I Do It?
If you are a self-employed contractor or if you are thinking about ductwork installation seriously you may need to know how to make a field-made Tee. For the price of only $1.00 I can explain how to do it.
|
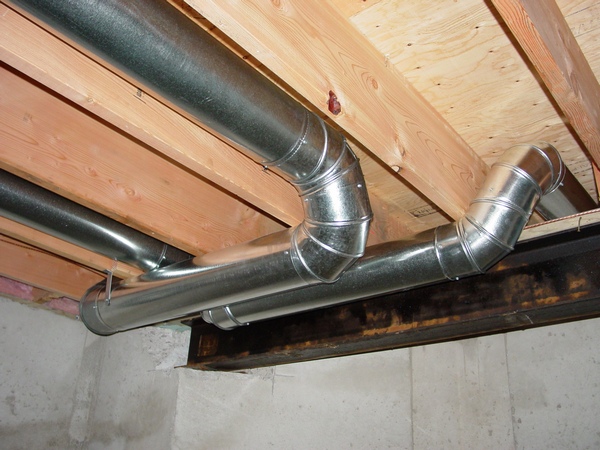
16. Drive Connection Trick
 When you are making a drive connection, it is necessary to bend a drive at the top and at the bottom. It serves two purposes: When you are making a drive connection, it is necessary to bend a drive at the top and at the bottom. It serves two purposes:
- Reduces the duct leakage
- Hold a drive in place
However, sometimes it is virtually impossible to do, just look in the picture.
Therefore, there are only a few ways how to keep this drive in place and only one of them is the right one.
So, for the very low price of only $1.00 I can explain to you what to do!
Just click the “BuyNow” button below and the “Drive Connection Trick” is going to be yours!!!
|
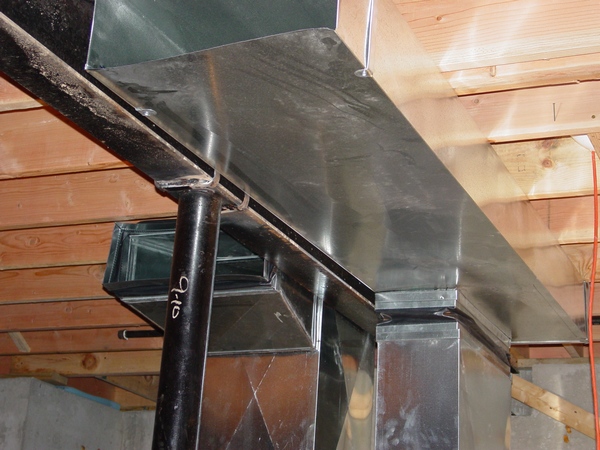
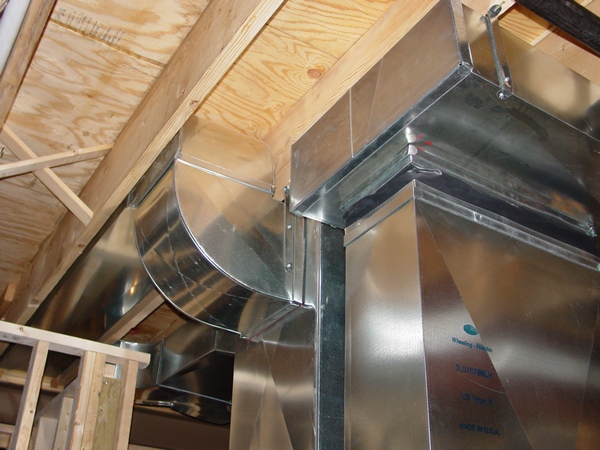
17. Making Drive Trick
 What you can see in the picture is a 14” x 8” stack 90* with a transition to 14” x14”. The manufacturer made drives and S-sides on the wrong sides: where you see drives-sides there is suppose to be S-sides and vice-versa. In order to make this fitting work I should have made new drives, but the problem was with the 1” throat. When you are dealing with the 1” throat, a folder becomes useless, because you cannot bend this side well enough. However, I managed to make this drive very fast and easy! What you can see in the picture is a 14” x 8” stack 90* with a transition to 14” x14”. The manufacturer made drives and S-sides on the wrong sides: where you see drives-sides there is suppose to be S-sides and vice-versa. In order to make this fitting work I should have made new drives, but the problem was with the 1” throat. When you are dealing with the 1” throat, a folder becomes useless, because you cannot bend this side well enough. However, I managed to make this drive very fast and easy!
How did I do it?
For the very low price of only $1.00 I can explain how to resolve this issue! |
| 47 Ductwork Installation Tips and Tricks for $9.99 |
New!
If you don't need all 47 Tips & Tricks that's fine! Pick the chapters you need, add more paid pages at discount price from the other parts of this website, create your own e-book on this page and save! |
|
|
A website "ductworkinstallation. com" focus on providing information and services related to the installation of ductwork systems , which are the tubes used to distribute heated or cooled air throughout a building as part of an HVAC system; essentially, it would be a platform for individuals or companies specializing in designing and installing ductwork for homes and commercial properties, offering details on the process, and potential contractors to contact for such services.
Key points about ductwork installation websites:
Services offered:
New ductwork installation, ductwork repair, duct cleaning, duct sealing, airflow balancing.
Target audience:
Homeowners looking to install a new HVAC system, individuals experiencing issues with their existing ductwork, commercial property owners needing ductwork for large buildings.
Information provided:
Explanations on different types of duct materials, design considerations for optimal airflow, potential benefits of proper ductwork installation.
|
|