|
|
|
Sealing Ductwork
A duct system that is well-designed and properly sealed can make your home more comfortable, energy efficient, and safer. Here are some reasons why duct improvements can be a wise investment:
Comfort
Sealing and insulating ducts can help with common comfort problems, such as rooms that are too hot in the summer or too cold in the winter.
Indoor Air Quality
Fumes from household and garden chemicals, insulation particles, and dust can enter your duct system, aggravating asthma and allergy problems. Sealing ducts can help improve indoor air quality by reducing the risk of pollutants entering ducts and circulating through your home.
Safety
During normal operation, gas appliances such as water heaters, clothes dryers, and furnaces release combustion gases (like carbon monoxide) through their ventilation systems. Leaky ductwork in your heating and cooling system may cause “back drafting,” where these gases are drawn back into the living space, rather than expelled to the outdoors. Sealing leaks can minimize this risk.
Save Money
Leaky ducts can reduce heating and cooling system efficiency by as much as 20 percent. Sealing and insulating ducts increases efficiency, lowers your energy bills, and can often pay for itself in energy savings. Plus, if you’re planning to install new heating and cooling equipment, a well-designed and sealed duct system may allow you to downsize to a smaller, less costly heating and cooling system that will provide better dehumidification.
Protect the Environment
Energy used in our homes often comes from the burning of fossil fuels at power plants, which contributes to smog, acid rain, and global warming. Simply put, the less energy we use in our homes, the less air pollution we generate. By sealing your ducts and reducing the amount of energy necessary to comfortably heat or cool your home, you can reduce the amount of air pollution generated.
If you decide to seal your ductwork here are some key steps you should follow:..........
If you would like to read more, please use the “BuyNow” button below and you will gain an in instant access to the tenth Chapter of my new book dedicated to the energy conservation issues!
In Chapter, you will learn how to properly seal the ductwork, what kind of tool to use and where the sealant should be applied.
The chapter has 21 pages and 33 pictures in it. Price is only $1.34
Instant Access:
After you have purchased a paid page, PayPal is going to bring you back to my website. In order to see the paid page you have to click on the “Register” button, fill out the form, choose your own Username and Password, and click on the “Register” button at the bottom of the form – congratulation, you are now on the page you have paid for!
Important: After you have purchased any Paid page or Download page and PayPal brought you back to my website, the first thing that you should do is to save that page to your Favorites. Then if something goes wrong you always can come back to re-register yourself on my website again.
|
|
Question
Is it worth it to seal my attic HVAC boots?
It looks like I do not have insulated boots and when I went up to the attic today, I noticed the boot was cold to the touch and had a small draft coming from where the boot meets the Sheetrock of the ceiling.
I was thinking of using great stuff and sealing around the boot. I will use a combination of doors and windows great stuff and the normal expanding great stuff.
I also noticed a small hole in the diffuser box (I think that is what it is) and I will use great stuff to seal that. There is also a small amount of mold on some of the tape.
Bottom line, is it worth the cost for 20+ boots to seal with great stuff. I have blown fiberglass insulation and I live in Southern Alabama and will probably only live in this house for another 2-4 years.
Thanks
Nate
Answer
Twenty leaking boots can be a lot of air leakage. Sealing them can greatly increase your comfort, and reduce your cooling bill, along with your heating bill.
Any air leaks are worth sealing and any duct work in a unconditioned space its best to insulate as you are paying to condition the air as for using great stuff be careful it can go every where might try caulking first.
Question
Metal floor vent out of shape
The picture illustrates a metal floor vent with many leaks around the edges related to a forced air oil heating system. Lots of cold air leaks through the perimeter of the vent because the metal is not flush against the wood border.
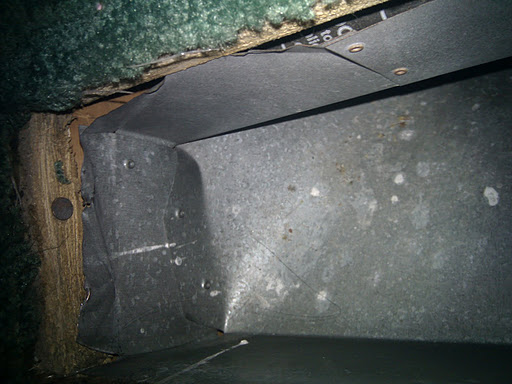 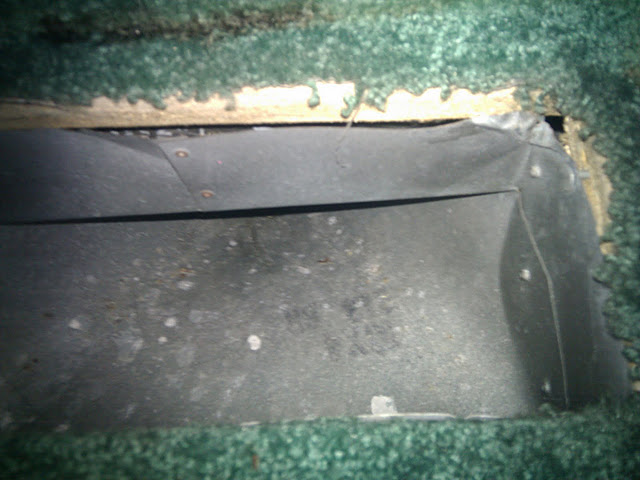
What would you recommend to seal in the gaps? Is there a way to get the metal back to being flush against the wood border? I tried tapping it with a piece of wood and hammer but the metal was not holding to place.
Or should I foam it or use some sort of heat tape? I'm guessing the heat tape won't stay stuck to the wood. I want to be sure whatever I use will not catch fire from the heat and the register has to also fit back into the hole so the metal should not stick out further or the register won't be able to slide in.
Answer
Can of spray insulation foam and with extender tube on the can. Start as deep as you can go 360 degrees around the entire duct let it set up then around again, till it is flush right to the top/edge of the duct. Feed the foam in easy cause it expands and might ace the register going back in.
|
|
Ductwork Insulation
Materials:
R4 Duct Wrap Insulation Sleeve Insulation
R13 Wall Insulation “Silver” Tape
Staples
Tools:
Utility Knife Tape Measure
PC4000 - Heavy-Duty PowerCrown™ Tacker Templates
Before insulating, seal all the gaps around drive, pipe connections and take-offs....
Installation on the paid page might not exactly describe your upcoming project. However, it will give you an important example of how this type of installation should be done. In addition, it will open the gates for as many questions as necessary to make sure that the job is done right.
Please use "Buy Now" button below, pay $2.50 and get instant access to the page!
|
|
|
A website "ductworkinstallation. com" focus on providing information and services related to the installation of ductwork systems , which are the tubes used to distribute heated or cooled air throughout a building as part of an HVAC system; essentially, it would be a platform for individuals or companies specializing in designing and installing ductwork for homes and commercial properties, offering details on the process, and potential contractors to contact for such services.
Key points about ductwork installation websites:
Services offered:
New ductwork installation, ductwork repair, duct cleaning, duct sealing, airflow balancing.
Target audience:
Homeowners looking to install a new HVAC system, individuals experiencing issues with their existing ductwork, commercial property owners needing ductwork for large buildings.
Information provided:
Explanations on different types of duct materials, design considerations for optimal airflow, potential benefits of proper ductwork installation.
|
|